|
NOTE: To use this functionality, you will require an Event licence and/or a GatorMail licence, please contact your account manager for more information.
Workbooks offers a licenced module to allow for the management of Events. Whilst a customisable portal is available as part of the module, if you prefer, you can continue to use your own web forms on your website, and still benefit from the full suite of features such as integrations with GoToWebinar or ON24 and a wealth of marketing automation capabilities via GatorMail.
By using our stand-alone script, you have the ability to capture custom questions on a form during signup and/or map the data to any of the following record types in Workbooks:
- People
- Organisations
- Mailing List Members (Event Attendees)
- Events
- Event Products
- Event Tickets
- Orders & Order Line Items
- Invoices
You can use any method you like to push the data to Workbooks, however, the submission must create an Online Activity and store the data submitted in the Form Submissions Data field. The data must be stored in JSON format. There are 3 methods that we would recommend to achieve this:
- Use a GatorMail Smart Form embedded into a Public Landing Page or webpage or within your site
- Use Workbooks Web2Lead HTML embedded into a page on your website
- Use a custom form on your website, with an HTTP POST request to the Workbooks API endpoint "crm/web_leads"
The above methods all automatically create the Online Activity in the correct format for this process. This example covers how to configure a GatorMail Smart Form.
Step 1: Create a Gator SmartForm Template
Within GatorMail, configure a new Smart Form as per the instructions here. We'd recommend that you configure a template Smart Form that can be copied for each Event that you wish to run. This means that you will only need to add the Workbooks Event Id to GatorMail, rather than starting from scratch each time.
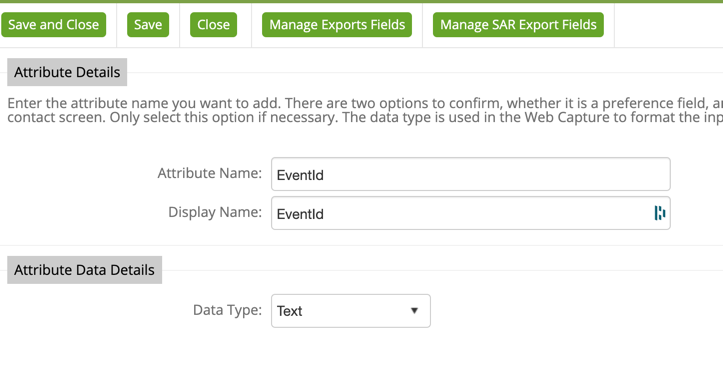
As part of the initial configuration, setup a new Contact Attribute for EventId as the Text data type from Audience > Contact Fields.
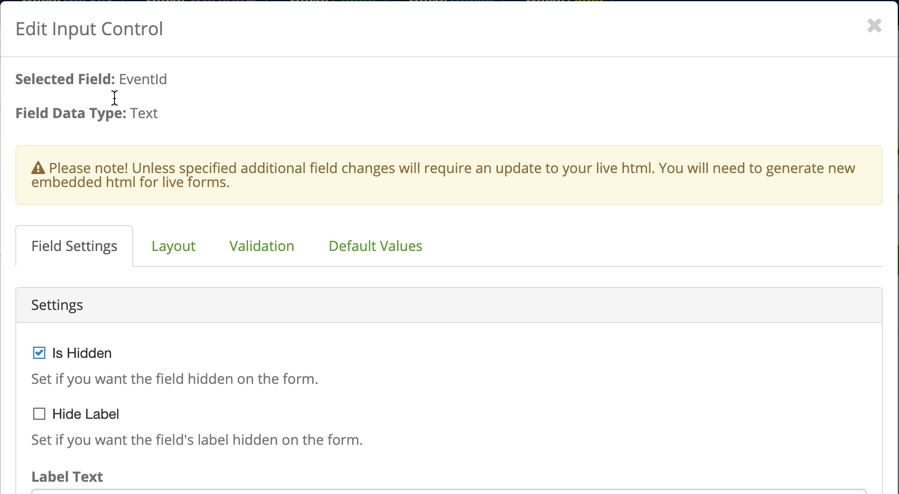
Within the Smart Form configuration, add the EventId to the form, then configure the options of that field so that "Is Hidden" = TRUE.
Configure the Smart Form's other options to suit your needs. Save it with a sensible name so you can find it later - we'd recommend prepending the text "TEMPLATE" to your name. Any templates created, can then be stored within a specific folder in GatorMail.
Step 2: Create Workbooks Configuration
Workbooks can be configured with relative ease using our Script Library plugins, alongside some manual configuration. Complete the steps below.
- Raise a Case with Workbooks Support to enable synchronisation of the Form Data Submission field
- The functionality to synchronise the form submission data to Online Activities is switched off by default. When raising a case with the team, provide the name of your Gator Instance you wish to enable the functionality for and also the setting name to have switched on. The setting is called "Integration Smart Form Submission Data Required" and "Smart form JSON integration".
- From Reports > Create Report from a Template Report. Use the Template called "TEMPLATE - Online Activities created via Form Submissions".
- Save the Report with a sensible name - it will be needed later.
- From Configuration > Automation > Plugins, install two Plugins:
- Event Management
- NOTE: You are only required to complete the installation to Step 4 if using your own forms. This schedules the creation of necessary Custom Fields within Events. Once you have completed this step, you can close the Plugin without completing the remaining steps.
- Form Submission to Event Attendees
- All steps must be completed fully.
- Now that we've installed the Plugins, and created Custom Fields (NOTE: you may have to wait a few minutes for the field to become available before you can complete this step):
- Add additional criteria to the Report
- Processed = FALSE: This ensures that only new Form Submissions are processed since the last time the script ran.
- Tweak the Report Criteria called "Action" to include the name of your Smart Form from GatorMail. NOTE: Use contains, instead of equals here, as GatorMail prepends a hardcoded value to all Smart Form submissions.
Step 3: Setup Form Field Mappings
Within Workbooks, mappings can be created to specify where the data submitted from your Gator Smart Form will be stored in Workbooks. By default, there are 3 required Field mappings that should be created. From the Event Registration Field Mappings record type (created by installing the Plugin in Step 2 and available in the start menu), create new records as follows for each field mapping:
| # |
Name |
Field Name |
Record Type |
| 1 |
EmailLogin |
main_location[email] |
Person |
| 2 |
EventId |
id |
Event |
| 3 |
Name |
name |
Person |
Additional field mappings can be created as required following the same process as above. The fields that can be set on each mapping are explained in the below table:
| # |
Field Name |
Data Type |
Field Purpose |
| 1 |
Name |
Text |
The name of the Gator Smart Form field as configured in GatorMail during form setup. It must match exactly - the mappings are case sensitive. |
|
2
|
Append To |
Checkbox |
When updating a record, if this field is set to TRUE for a given mapping, the value is added to the end of the current field value. It uses the value set in "Append Delimiter" to separate the current value with the newly submitted value. |
| 3 |
Append Delimiter |
Picklist |
See "Append To". The default is a singular whitespace character if this field is blank and Append To is set to true.
Picklist values are as follows (others can be added manually as required):
|
| 4 |
Record Type |
Picklist |
The record type to set the specified mapping on. You cannot map to any other record types at this time.
Picklist values are as follows:
- Person
- Organisation
- Event
- Event Ticket
- Mailing List Member
- Customer Order
- Customer Order Line Item
- Customer Invoice
|
| 5 |
Field Name |
Text |
The underlying field name of a Workbooks field obtained from the API reference of the chosen record type. Must be the name, not the label otherwise the process will fail e.g. "cf_person_date_of_birth" not "Date of Birth".
NOTE: API Reference for your Workbooks instance can be found under Configuration > Automation > API Reference.
|
| 6 |
Ignore Field if Updating |
Checkbox |
Set to TRUE to configure a field mapping that is used only if the script creates a record. If a match is found and the record is updated, the submitted data is not stored in against the record, it is left in the Online Activity. |
Step 4: Setup Event-specific Smart Form
Now that we have configured a template Smart Form, and setup Workbooks - the functionality can be used to configure an Event specific form in just a few clicks.
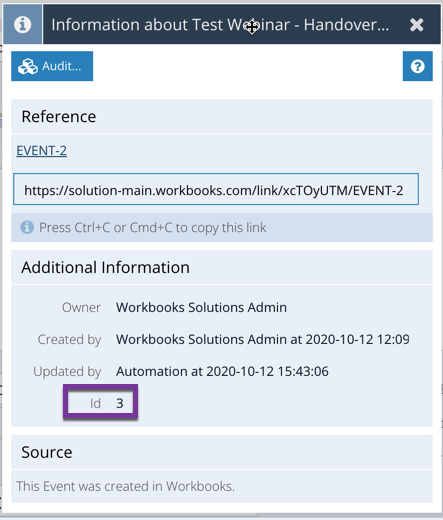
Firstly, create an Event record in Workbooks. From the Information button on the record you created, copy the Id.
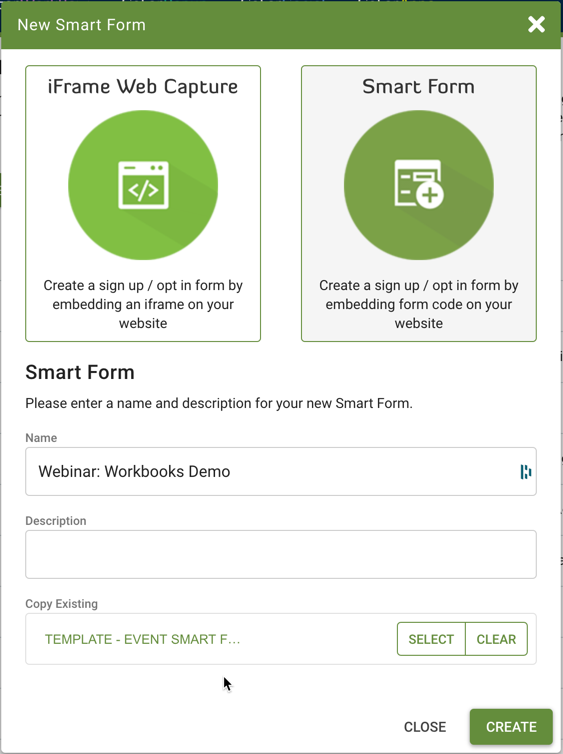
In GatorMail, setup a new Smart Form. Choose the Form that was created in Step 1, in the Copy Existing option:
Under the Default Values tab of the EventId field, set the value to the Workbooks Event Id:
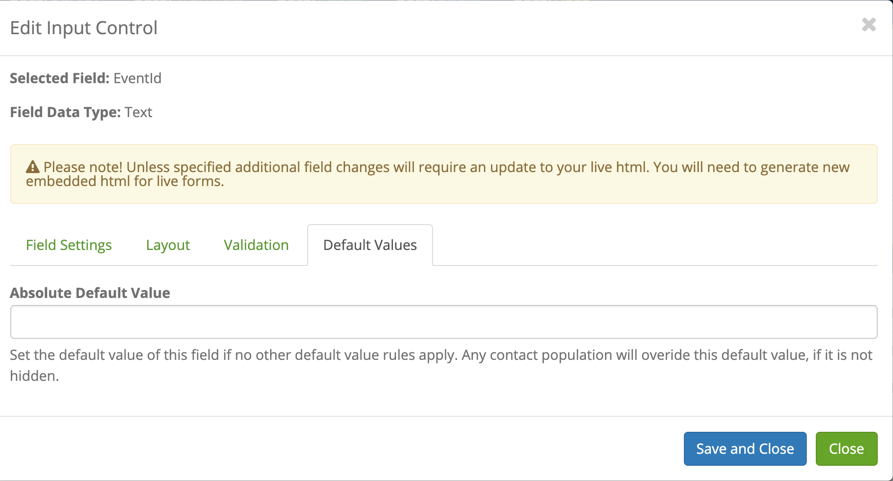
Click Save & Close on the field, and then on the form. The Smart Form can then be added to a Public Landing Page, or embedded into your website.
Step 5: Submitting a Form
When a form is submitted, an Online Activity is created. The record will be related to a Person if they exist in your database already, or a new Lead will be created if no match was found.
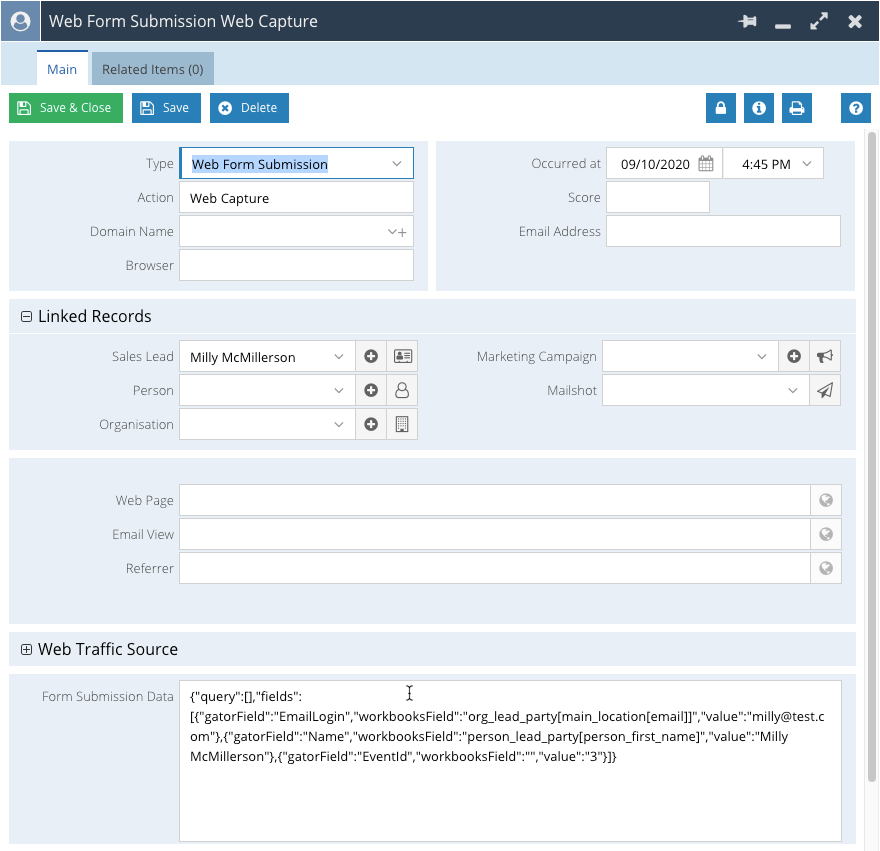
NOTE: It can take up to 30 minutes for an Online Activity to sync to Workbooks from GatorMail.
The Online Activity will be processed automatically, resulting in several records either being created or updated as per the table below:
| # |
Record Type |
Notes |
| 1 |
Person |
A person record is searched for using the Email address mapping - if a record is found matching the submitted email address, then this Person is added as an Attendee to the specified Event Id. Otherwise, a new Person is created and this record is added instead. Depending on field mapping settings, the existing record may also get updated with the data from the Form Submission. |
| 2 |
Organisation |
An Organisation is looked up based on Name if provided in the Form Submission and mappings are created. If found, then this record is used, otherwise a new record is created. If an Organisation is specified, it is assumed to be the Employer of the Person submitting the form, and therefore set on the Person record. An Organisation may get updated based on mapping settings. |
| 3 |
Mailing List Members (Attendee) |
A new Attendee is always created as part of the processing, provided that Person does not already exist on the Event Attendee tab already. Any field mappings that are configured will be stored against that Attendee record when it is created. If an attendee already exists with a matching email address, then this record is updated. |
| 4 |
Events |
The Event record is not updated. It is only used for matching to add new Attendees, Tickets, Orders etc. The script looks up the Event Id specified from the submitted form to check that it exists. If the Id is not found, the Form Submission is not processed and is marked as follows:
Process Failed = TRUE
Process Failure Msg = Details of the issue
|
| 5 |
Event Products |
An Event Product is looked up based on the Form Submission data if a Product Id is provided in the submitted data. Otherwise the default Product Code is used from the Process Parameter as set during the Plugin Installation in Step 2. A new Product is created if a match is not found, which is then used as the Product on an Order/Line Item.
A Product record is never updated and cannot have custom mappings.
|
| 6 |
Tickets |
An Event Ticket is always created as part of the Form Submission. Additional fields can be set on the Ticket if configured in the field mappings and submitted in the data. |
| 7 |
Order & Order Line Items |
An Order & Order Line Item is always created as part of the Form Submission. Additional fields can be set on these records if configured in the field mappings and submitted in the data.
NOTE: Any custom mappings for Order Line Items are mapped to the Line Item created during processed record. It is not possible to map to more than one Line Item, or a specific Line Item other than the one created during processing.
|
| 8 |
Invoices |
If the Event Product used has a default price attributed to it, and the value is greater than 0 then an Invoice is automatically created. This record is a copy of the Order record and no changes are made, unless mappings are specified in the field mapping settings for Invoices. |
|
