
Customer Forum
'Mailchimp has exceeded maximum number of groups' message
| Posted: 2014-08-13 13:57 |
|
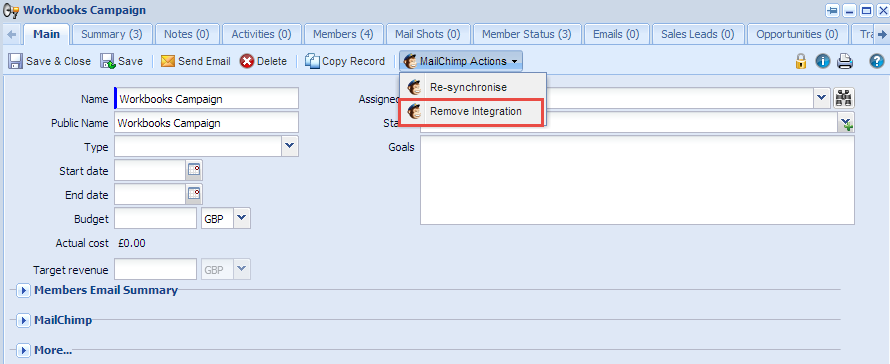
When you integrate a Workbooks Campaign with Mailchimp, a Group is created in Mailchimp (that sits within the list you're integrating with) which corresponds to the Workbooks Campaign. Mailchimp has a restriction of 60 groups per list, which when reached will prevent you from synchronising further Campaigns with Mailchimp. Often this limit is only realised when trying to integrate a Workbooks Campaign with Mailchimp. To resolve this issue you need to delete group(s) from Mailchimp (most likely groups which relate to old Campaigns) and make sure the corresponding Workbooks Campaign(s) have a Closed Status. Ensure Integration for Campaign has been removed When you come across the error message the Campaign is often left in a half integrated state. It's important before proceeding that you make sure you remove the integration for the campaign so it can be successfully re-synchronised once the grouping issue has been resolved. To do this click on 'Mailchimp Actions' > Then 'Remove Integration'.
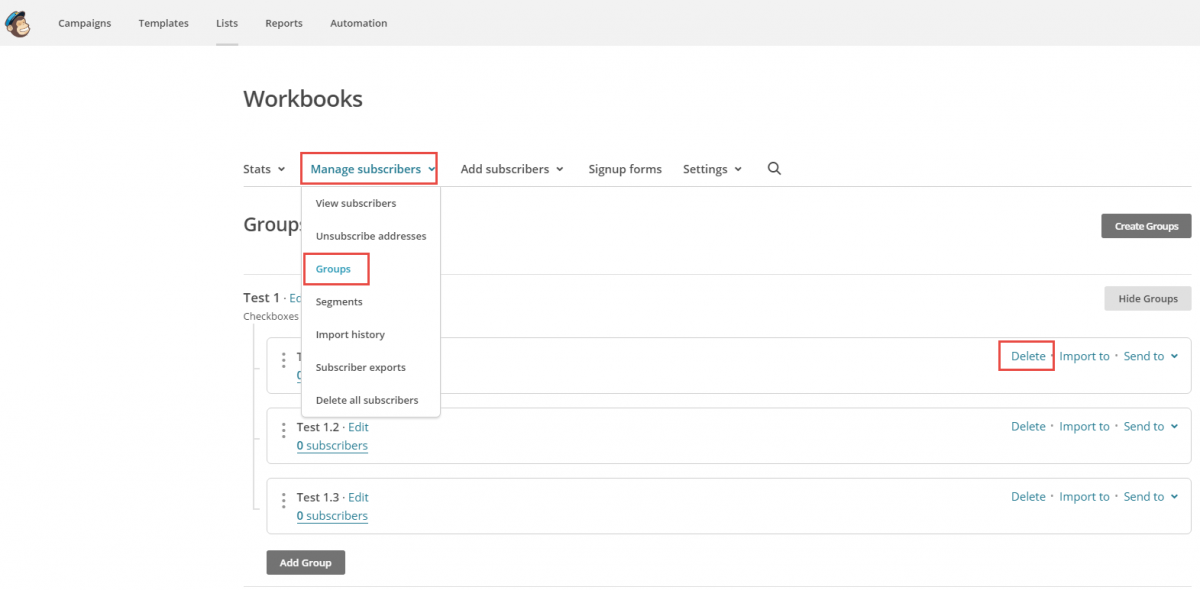
Within Mailchimp Identify the Group(s) you wish you delete by going to Lists > Select the list Workbooks is integrated with > Manage Subscribers > Groups > View Groups > Find the Group(s) you wish to delete > Select the 'Delete' option.
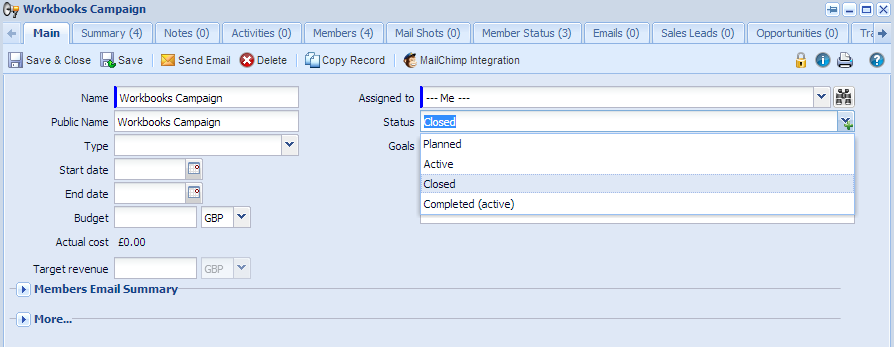
If you've reached the 60 group limit then it's advised to delete multiple groups to prevent yourself from having to complete the same process in the near future. Within Workbooks Find the corresponding Campaign(s) for the Groups you deleted within Mailchimp and make sure the Campaign(s) have a closed Status. Once you've made this change ensure that you Save the record.
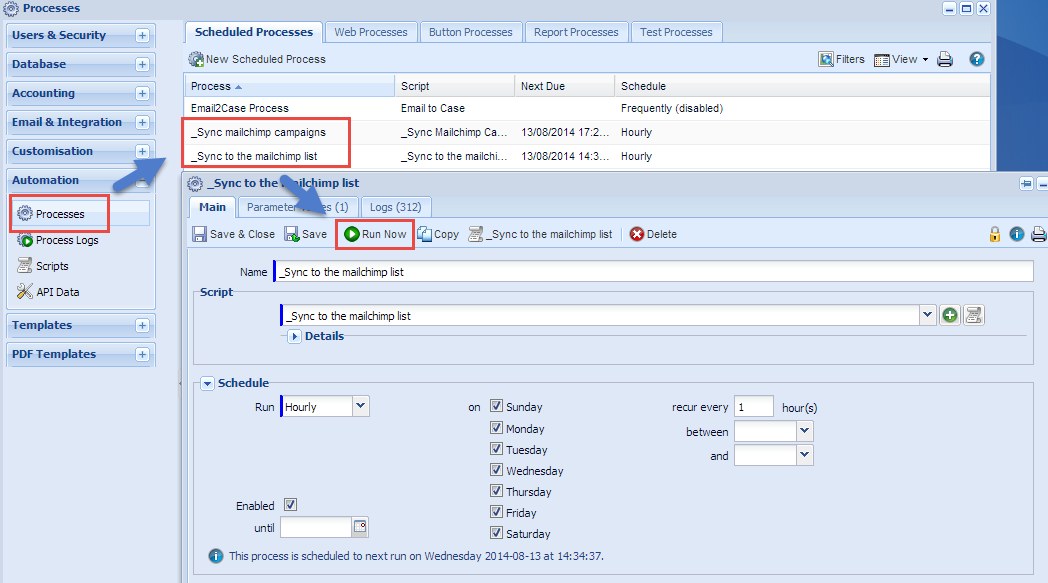
Advised Step At this point it's recommended that the 2 Mailchimp Processes are run to make sure Workbooks and Mailchimp are in sync (further information on the Mailchimp Processes can be found here). To do this go to Start > Configuration > Automation > Processes > Select '_Sync to the Mailchimp list' > Press 'Run Now'.
Once this has run, undertake the same steps to run the second Mailchimp Process (Start > Configuration > Automation > Processes > Select '_Sync mailchimp campaigns' > Press 'Run Now'. Re-Integrate your Workbooks Campaign Once you've followed these steps you can navigate back to your Workbooks Campaign and successfully integrate it with Mailchimp.
|
- Log in to post comments


