Setting up an SFTP/FTP Process is easy, however you should read our Pre-Requisites Guide and Examples Guide before you begin setting up this functionality.
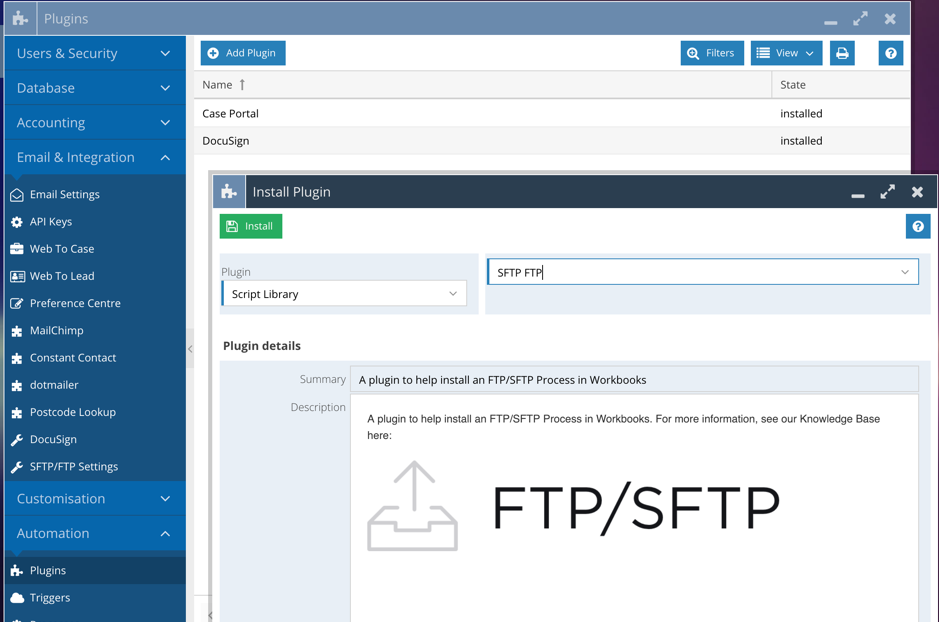
Before you can configure an SFTP/FTP process, you need to install a Plugin to your Workbooks database. Click Configuration > Automation > Plugins. Then click Add Plugin. Select Script Library > SFTP FTP as shown, then click Install.
On the first page, simply click “Continue”. When completed, a success message is shown. At which point, you can close the Plugin window. This installation only needs to be completed once. After installation, System Admins can access a “SFTP/FTP Settings” option from Configuration > Email & Integration where you can configure or change settings for your processes.
NOTE: You will need to close and re-open the Configuration page once you have installed the Plugin to show the “SFTP/FTP Settings” option.
Setup of an Automated Import/Export Process
Please Note: This section assumes that you already have configured a server as per the “Prerequisites” section available here and also pre-installed the Plugin called SFTP FTP.
Navigate to Configuration > Email & Integration > SFTP/FTP Settings.
If this is the first process that you are configuring, the page that appears will allow you to enter the settings (amongst others) that should have been completed as part of our SFTP/FTP Pre-Requisites guide.
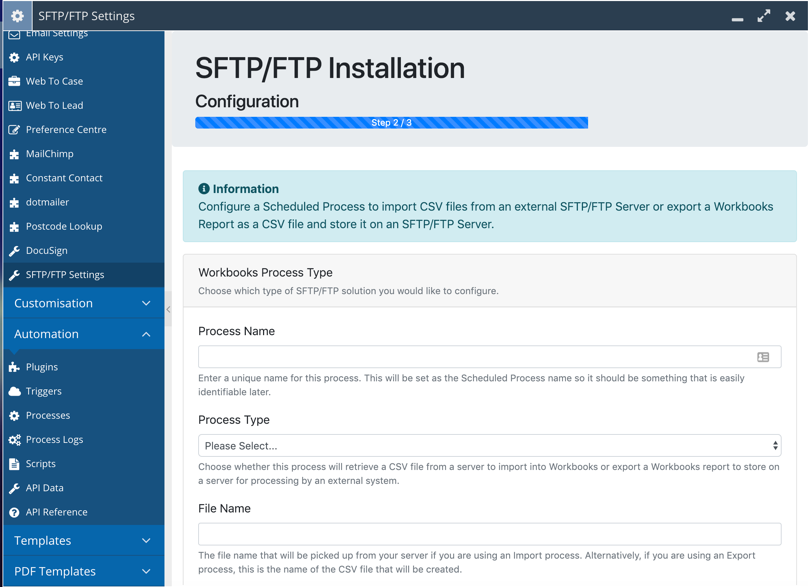
Workbooks Process Type Section
The following settings are required, below is a description of what each setting does:
- Process Name: This is the name of the process and should be set to something that you can easily identify later. For example, don’t use “Import Process”. Consider naming the process to “Import Updated People from XXX System”.
- Process Type: Can be one of the following
- Import: Retrieve a file from the SFTP/FTP Server and Import it into Workbooks
- Export: Export a Workbooks Report and generate a CSV file which is written to the SFTP/FTP Server.
- File Name: The name of the file that is created if you are using an export process. Or for Import processes, this is the name of the file that is created by the 3rd party and will be retrieved by this process.
- Import Template (for import processes only): If you have chosen “Import” in the “Process Type” picklist, you will need to configure an Import Template which is selectable in this list. See our separate forum post here on how to do this.
- Report Name (for export processes only): If you have chosen “Export” in the “Process Type” picklist, you will need to configure a report that shows the data you wish to export and store on the SFTP/FTP Server.
- Consider the Report criteria carefully. For instance, this process may run every hour, therefore you wouldn’t want the export process to generate a Report of every single Person record in your database each time it runs – you could add a criterion that limits the result set to only records where they have been updated in the last hour.
- You must set the Report Category value to “Automation” to see the report in this list.
- If you don’t see your report in the list, check it is setup as recommended above, and then click the Refresh icon to update the picklist values.
Server Configuration Settings Section
The following settings are server configuration settings and should have been provided by your IT team when the server was provisioned. Please see our Pre-Requisites guide for further detail.
- Server Protocol: This can be one of “FTP” or “SFTP” and depends on how your server is configured
- Server IP/Web Address: The public IP or web address where Workbooks can access your server
- Server Port: The port that Workbooks should use to connect to your server. This setting defaults to port 22 and is the most common port used for SFTP/FTP, however your server may be configured differently
- Server Username: The name of the user that has been configured on the server and one that Workbooks can log into on your behalf to retrieve files (for import processes) or write files (for export processes)
- Authentication Type: This can be one of “Password” or “Public/Private Key” and will depend on how your server has been configured. Whilst a username and password combination is easier to configure, a Public/Private Key pair is more secure.
- Server Password: If you have selected “Password” for your “Authentication Type” then this option is available. Enter the password for the Server Username entered above.
- Server Public Key: If you have selected “Public/Private Key” for your “Authentication Type” then this option is available. Enter the Public Key as generated by your IT team and is stored in your “authorized_keys” file on the server.
- Your IT team will be able to help you with generating a key pair and installing it in the appropriate location on the server if this is the chosen method of authentication. Please see our Pre-Requisities guide for more information.
- Server Private Key: If you have selected “Public/Private Key” for your “Authentication Type” then this option is available. Enter the Private Key as generated by your IT team that is verified by the Public Key stored in your “authorized_keys” file on the server.
- NOTE: If you were authenticating via the command line to your server, the Private Key would usually be stored in a secure location on your local machine and is not usually shared. However, as Workbooks is authenticating on your behalf, both the Private and Public Key need to be stored in Workbooks.
File/Folder Directory Configuration Settings Section
The following settings are further server configuration settings and should have been provided by your IT team when the server was provisioned. Please see our Pre-Requisites guide for further detail.
- Server Home Directory: When you log in as the supplied user to your server, you will be automatically navigated to the user’s default Home Directory. Enter this folder directory into this setting.
- Import Folder name (for import processes only): Enter the folder path and name of the folder that Workbooks will monitor for new files to process e.g. Workbooks/Import Files
- Export File to Directory/Folder (for export processes only): Enter the folder path and name of the folder that Workbooks will export new files to which will be picked up from a 3rd party e.g. Workbooks/Export Files
- Move or Delete Processed Files (for import processes only):
- Process Folder Name (for import processes only): This option only appears if you have selected to move files after they have been processed in the above option. This setting should be set to the folder path and folder name where Workbooks will move any files that it automatically imports once they have been processed e.g. Workbooks/Processed Files.
Advanced Settings Section
- Reportable Import Results (for import processes only): Select “Yes” to enable this process or alternatively “No” if you do not require this functionality for the given process.
- When a user carries out an import manually in Workbooks, it can be reviewed and approved/rejected as required. It is possible to review the Errors & Warnings before making that decision.
- With an automated import, the Import job is automatically approved to reduce manual intervention, however any warnings and errors are ignored. It is possible to create a separate process so that the results of any automated imports are stored and are made reportable. See our separate forum post here on how to configure this process and what its capabilities are.
- Store a Marker File: Some 3rd Party systems are unable to pick up new files without being notified that there is some work to do. Typically, this functionality is used if the system is primarily updating the same file with new records, rather than creating a new file each time. This kind of setup is supported by the SFTP/FTP script but is not commonly used in most implementations. Enable this option with care, and only if you really need it.
- Marker File Name: If you have enabled the “Store a Marker File” setting above, then you will need to specify the name of the file that will be created, otherwise this mode will not function correctly. This is the File Name that will be expected by the 3rd Party System and also Workbooks.
- File Name DateTime Format: When a file is processed, the date and time of when the processing happened is appended to the file name
- Note: This is not applicable if your process is set to delete files, rather than move them to a Processed folder
- Export Batch Size Files (for export processes only): When a file is exported, choose the maximum number of rows in one file. If there are more than this number of records, the script will create multiple files.
- CSV Delimiter Character: CSV file columns are separated by commas by default (Comma Separated Value file). However, in some instances the file may have been created differently. You can change this setting to the appropriate character as required or leave it as the default (recommended)
- CSV Enclosure Character: The data in a CSV file column can contain double quotes in the data to represent certain text which may cause your file to be processed in correctly. Specify the character that is used to enclose data and represents a complete string or column or data. You can change this setting to the appropriate character as required or leave it as the default (recommended)
- CSV Escape Character: The data in a CSV file column can contain double quotes in the data and needs to be escaped to be treated as a string, rather than a separate column. By default, CSV files are escaped by a backslash. However, in some instances the file may have been created differently. You can change this setting to the appropriate character as required or leave it as the default (recommended)
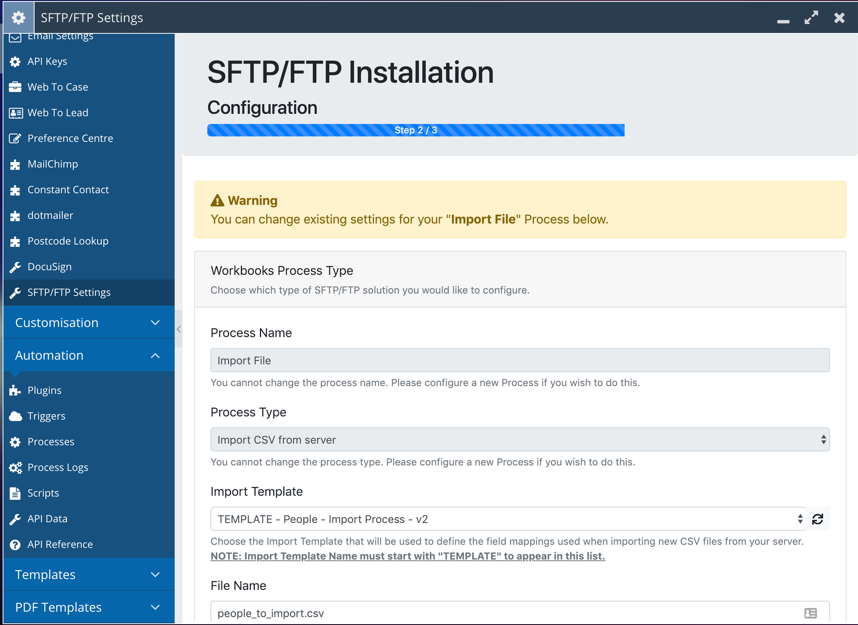
Changing Existing Process Settings
If you have existing processes then you will see a list of the existing processes, with the option to create a “New SFTP/FTP Process” or select an existing process from the list, which will allow you to change its settings:

Once you have amended any relevant settings, click “Update Settings” to change the SFTP/FTP processes configuration. NOTE: You are unable to change the Process Name and Process Type once a process is created. These options are disabled in the settings screen.
|
