
Customer Forum
Implementing Multiple Line Items to New and Existing Orders
| Posted: 2015-03-23 16:46 |
|
When we import new invoices, how do we ensure that invoices with multiple line items are grouped together in one invoice on Workbooks, rather than a new invoice being created for each line item? The way we can do this is detailed in the import method described below. Please note that first we must save our data as a CSV file, this can be done in Excel or similar spreadsheet software. It is important to try and make the data as clean as possible before importing into Workbooks. This involves naming headings column headings and formatting to ensure the data is as close to the way we want it in Workbooks as possible. Below is a screenshot of the data that I have used, as you can see there are only two invoices but five rows for the five line items, each with individual reference numbers.
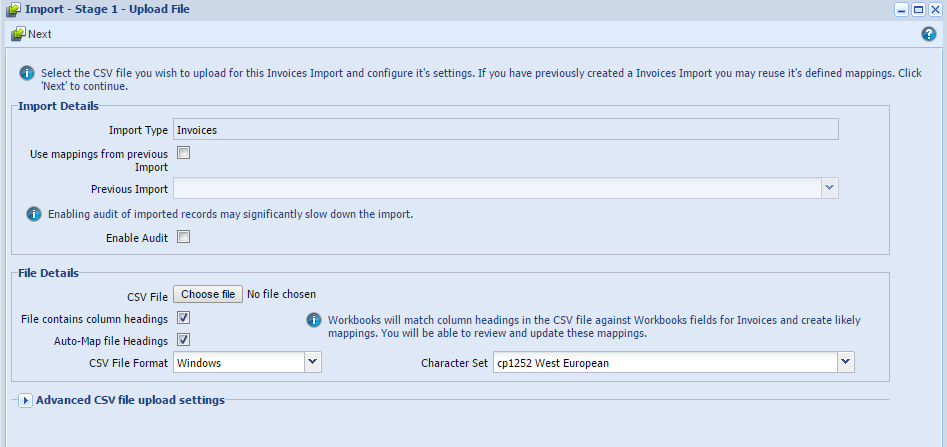
Firstly we will create a new invoice import (Start > Import > Invoices). Next we choose the CSV data file that we saved earlier.
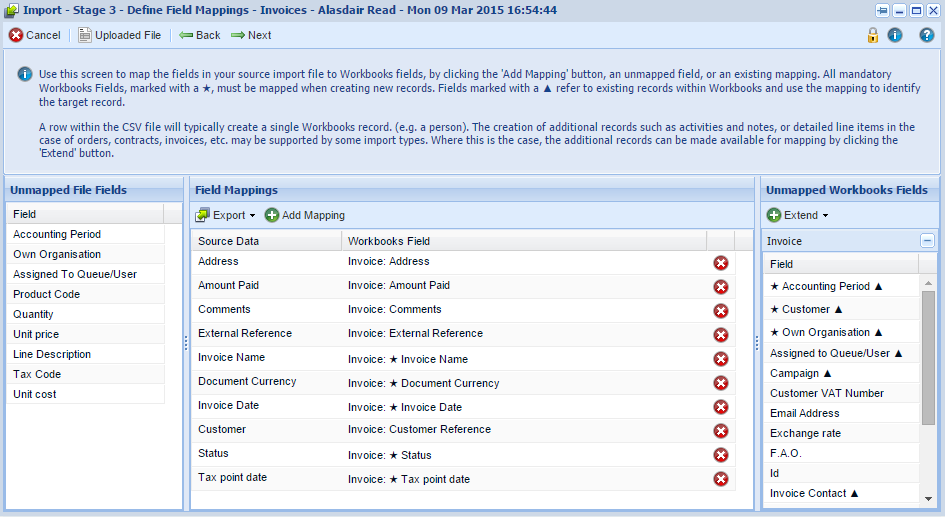
Clicking Next will upload our data and allow us to name the import. Click Next again and you will be presented with a mapping screen similar to the one shown below:
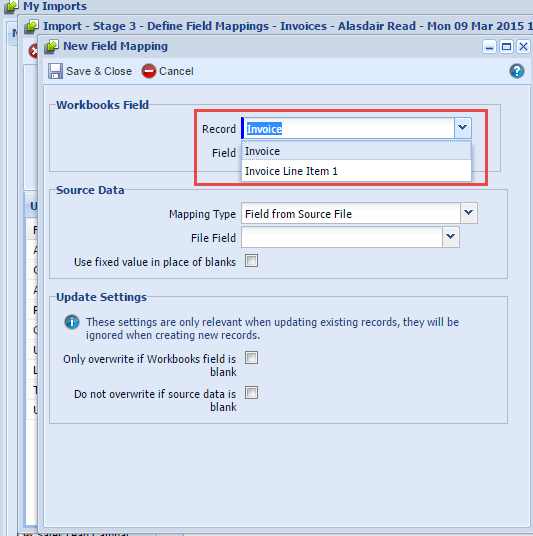
Workbooks will try to automatically match the columns of data from your CSV file to the corresponding field in workbooks. These are listed in the middle and it is important we check these are correct. If not, then simply delete or alter the mapping. We now need to map the unmapped file fields on the left that we want represented, and make sure that the starred (mandatory) Workbooks fields on the right are mapped. Some of the Workbooks fields are not found in the 'Invoice' attributes, so we need to extend into the 'Invoice Line Item'. Click Extend > Invoice Line Item. Now when adding a mapping there will be two Workbooks records to select from: 'Invoice' and 'Invoice Line Item'.
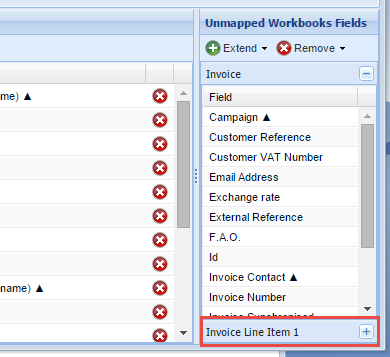
Now to show the Workbooks fields we can map to in 'Invoice Line Item' we click the plus symbol in the bottom right of the screen, shown below.
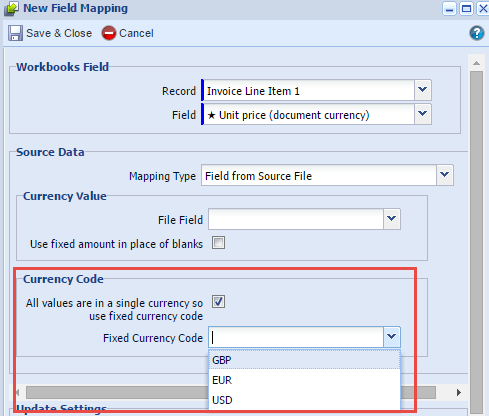
Now we simply match up the Workbooks fields with the data file fields. Please note that when selecting a currency field it is important to select a currency code. Either select this from the 'File Field' or if all values will be in a single currency then we check the box and select our fixed currency, shown below.
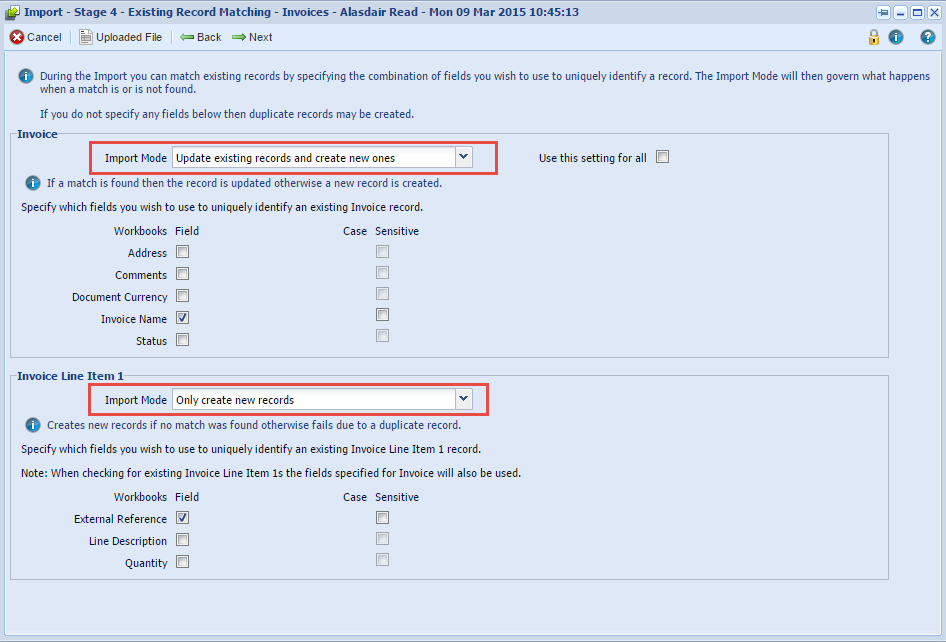
It is also worth noting that the 'External Reference' field from the data file must be matched to the 'External Reference' field in the Workbooks Invoice Line Item attributes. Therefore, if it was automatically mapped we should delete this and map it ourselves. Once you have mapped each column click Next. We are now presented with the screen shown below, this is where we tell Workbooks to collect multiple line items from the same invoice together.
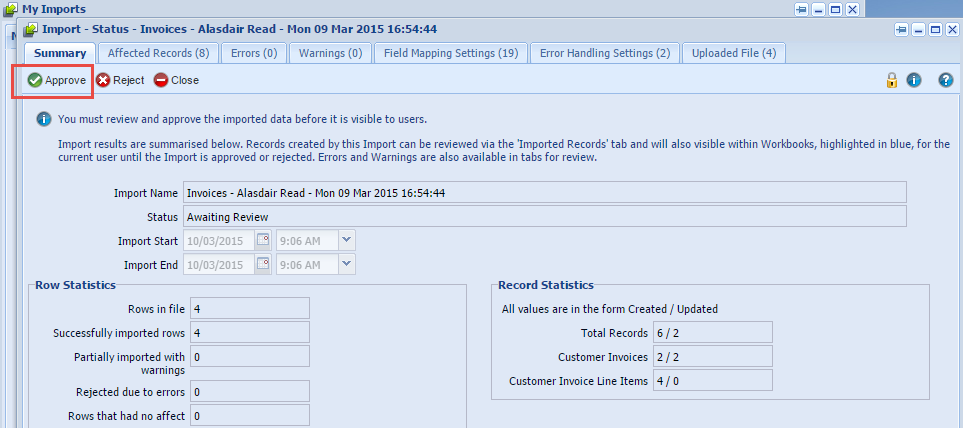
As we can see, the import mode selected is 'Update existing records and create new ones' and the field used to identify these is selected to be the 'Invoice Name'. This ensures that duplicate invoices are not created. It is important to un-tick the 'Use this setting for all' checkbox in order to select a different import mode for Invoice Line Item. 'Only create new records' should be selected for this, with the 'External Reference' selected as the field used to identify. This ensures that line items are added to the correct invoice and not duplicated either. The final thing we must do is check there are no error messages and then click Approve to complete our import.
Please note, to save time in future imports of the same nature it is possible to select the 'Use mappings from previous import' checkbox and then pick this import from the list. |

- Log in to post comments