|
The Workbooks Plugin for GatorMail Transactional Emails allows you to build Reports in Workbooks that can be used as ‘triggers’ to send an email series automatically using GatorMail. This custom integration is in addition to standard functionality available here. This particular part of the integration is especially useful in scenarios such as:
- Subscription Renewal Reminders e.g. 1 month before renewal, 1 week before, on the day and then once a subscription has expired (if a customer has not renewed before the expiration date)
- Invoice Payment Reminders e.g. Payment Due, Payment Overdue, Payment X days overdue etc.
- Training Course Reminders & Follow Up Emails e.g. Thanks for booking, 1 week before reminder, the day after (thanks for attending)
After sending an email, you can configure the automation to update a record in Workbooks allowing you to track which emails have been sent. The triggers and updated fields can be used in combination, allowing you to create a workflow of email communication.
This guide details how to install the Plugin and walks through each step explaining the options that are available on each page. Please also see our Worked Example page here.
Pre-Requisites
To make setting up the Gator Plugin and your automated processes easier, make sure you have the following to hand before starting:
- Your Gator login name (email address)
- Your Gator login password
- Your Gator Secret & your Gator Client Name
- Enable the "DeDupe Audience" Setting on your GatorMail instance
NOTE: GatorMail Passwords expire every 90 days. You will need to login to the GatorMail UI and change the password, then update your Workbooks Process manually.
NOTE: GatorMail Client Name, Client Secret and the "DeDupe Audience" setting are not available within the GatorMail UI so you must contact the Workbooks Support for this information (support@workbooks.com) before proceeding with this installation.
- The name of your GatorMail instance, which you can find in GatorMail when you click on Your Account, under Instance Name
- One of your GatorMail supported email domains, which you can find within GatorMail under Tools > System Defaults and looking at the choices in the dropdown next to the Sender E-Mail Address (MAIL-FROM) field. It’s likely that these domains will be similar to, but different from your usual work domain
- Configure an Email (GatorMail Creative, not Email Template) in GatorMail before setting up the process in Workbooks
NOTE: You can use Merge Fields within your Email Creative that are populated from a Workbooks Report. GatorMail allows you to set up a maximum of 10 merge fields which can be taken directly from the record driving your report or you can use data from calculated columns
- A Workbooks Report that identifies records that should receive an email. This Report should have the following columns at a minimum
- Primary Contact information - Person Id, Person Name, Person Email Address
- You may need to configure a DLI Custom Field to achieve this. See here for further details.
- Any fields that you wish to include as Merge fields within your Email communication. For example, you may wish to include a Renewal Date or Renewal Price
- The Id & Lock Version of the record that you wish to update after an email has been sent - both of these columns are available to select within a Workbooks Report when you click Add Column
- A calculated column which outputs the value to be written to a Workbooks record after this automation sends an email.
- For example, you could update a record with a text value of "1st Reminder Sent" after sending an email. Write a report formula to output the required value based on your business processes.
- Further columns will be configured and added to the Report throughout this guide.
Installation of Workbooks Plugin
To begin, you need to install the Plugin to your Workbooks database. You will need to be a System Administrator to do this. Click Start > Configuration > Automation > Plugins. Then click "Add Plugin" and select "Gator Transactional Emails" from the Script Library as shown shown. Click "Install" to add the Plugin to your Workbooks instance.
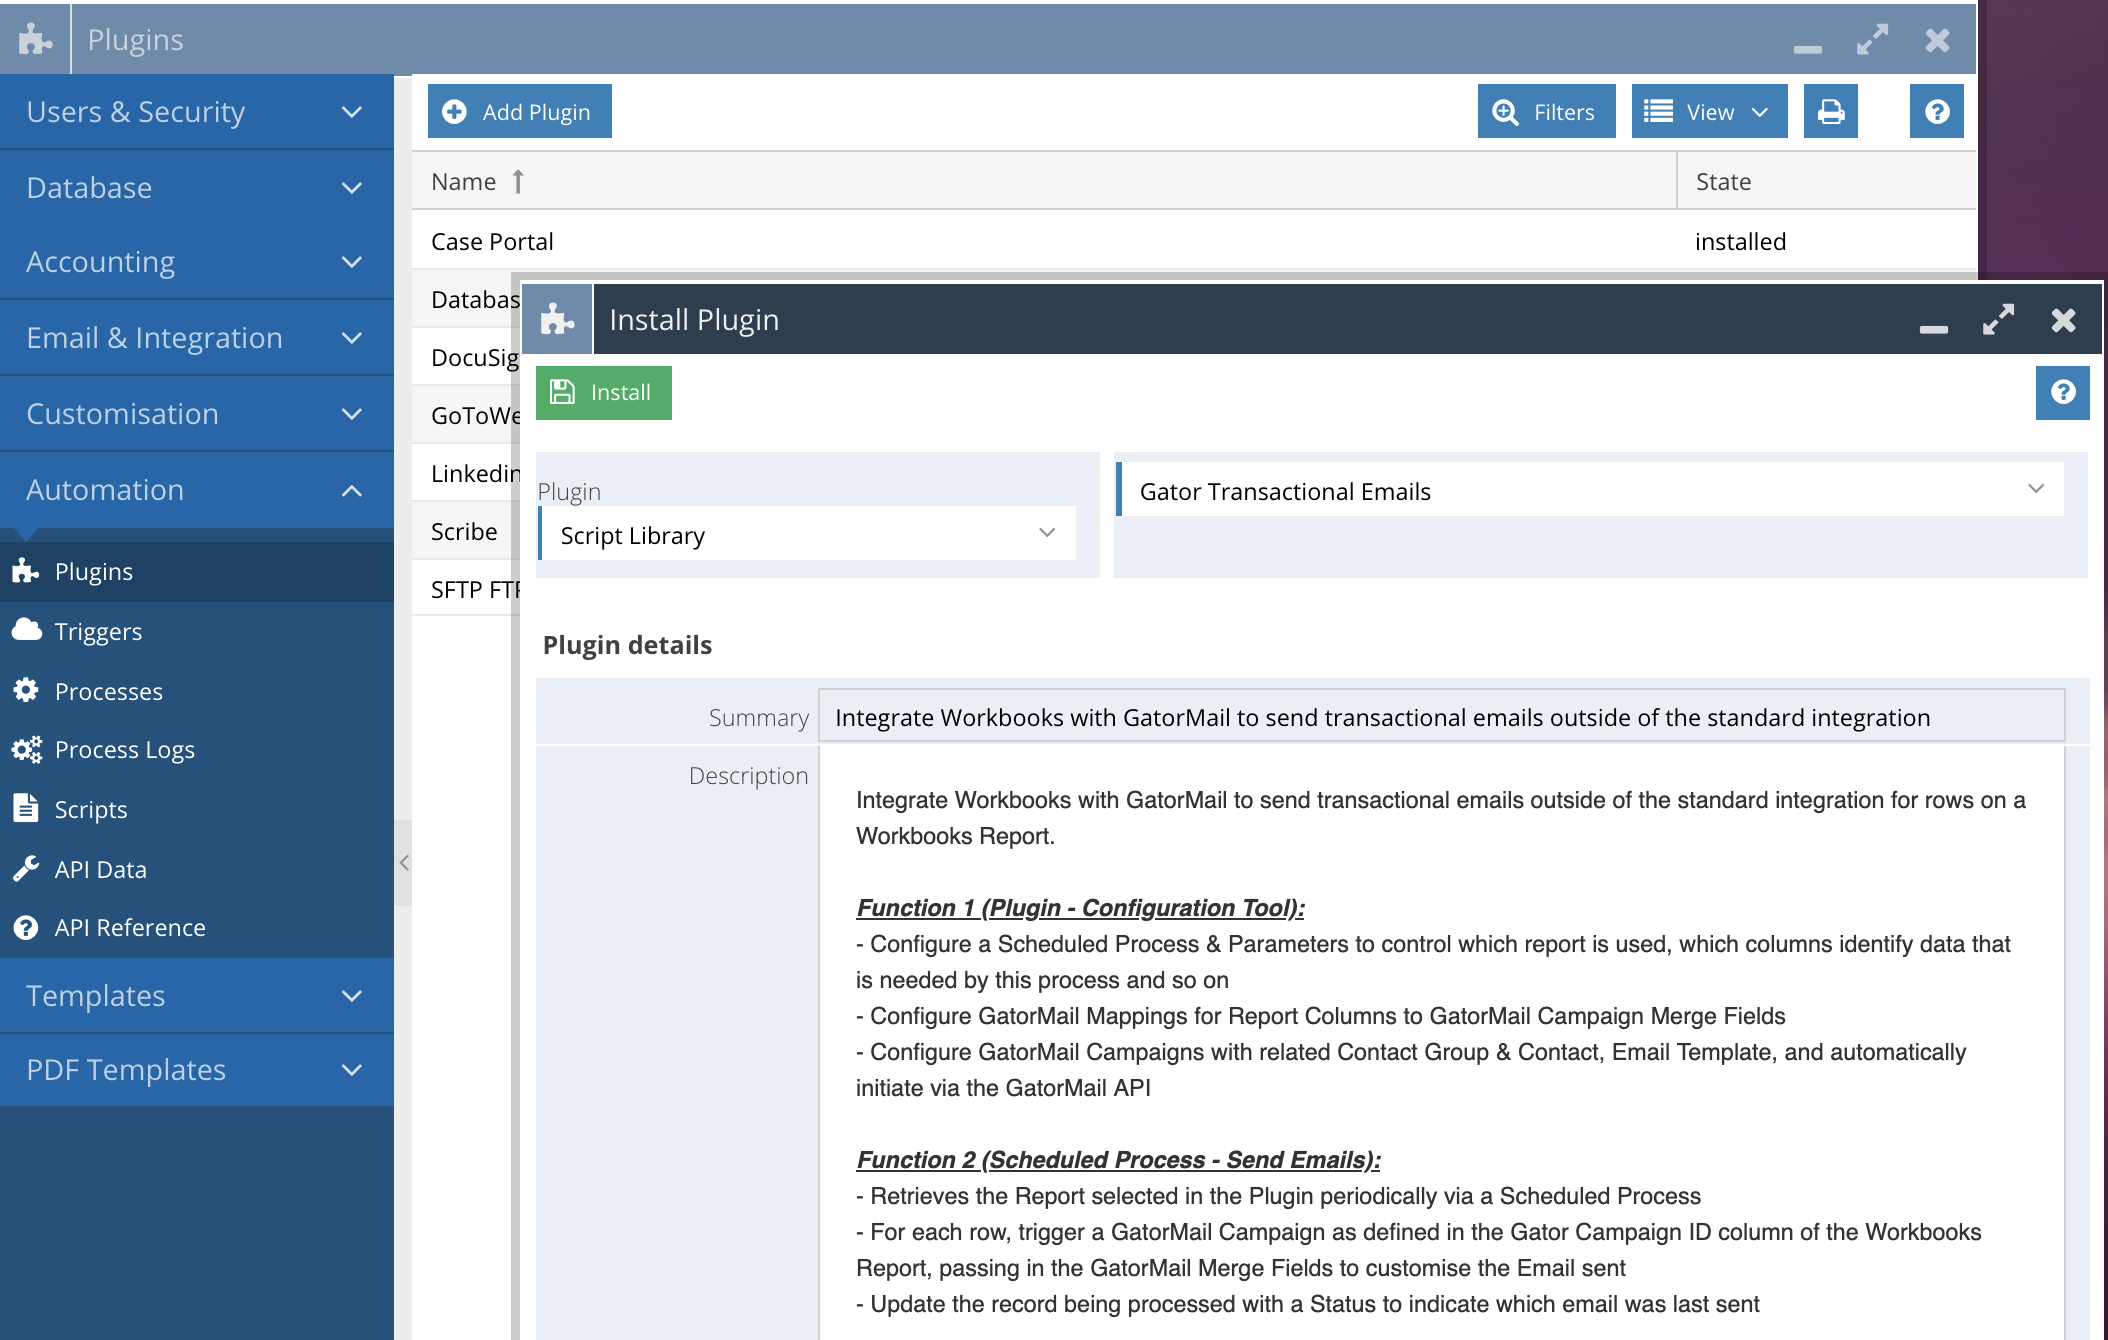
This is a short 2 step wizard. On the first page, click Continue. Once successfully installed, you will see a success page. You can close the Plugin, and Configuration window now.
Walkthrough of Transactional Emails Plugin & Functionality
Now that you have installed the Plugin, you need to configure the integration for your needs. If you haven't already, close then re-open the Configuration Landing Page. Navigate to Email & Integration where you will now see a new option called "Gator Transactional Emails".
Step 1:
NOTE: If this is the first process you are configuring, Step 1 is skipped. You will be taken directly to the process configuration page which is Step 2
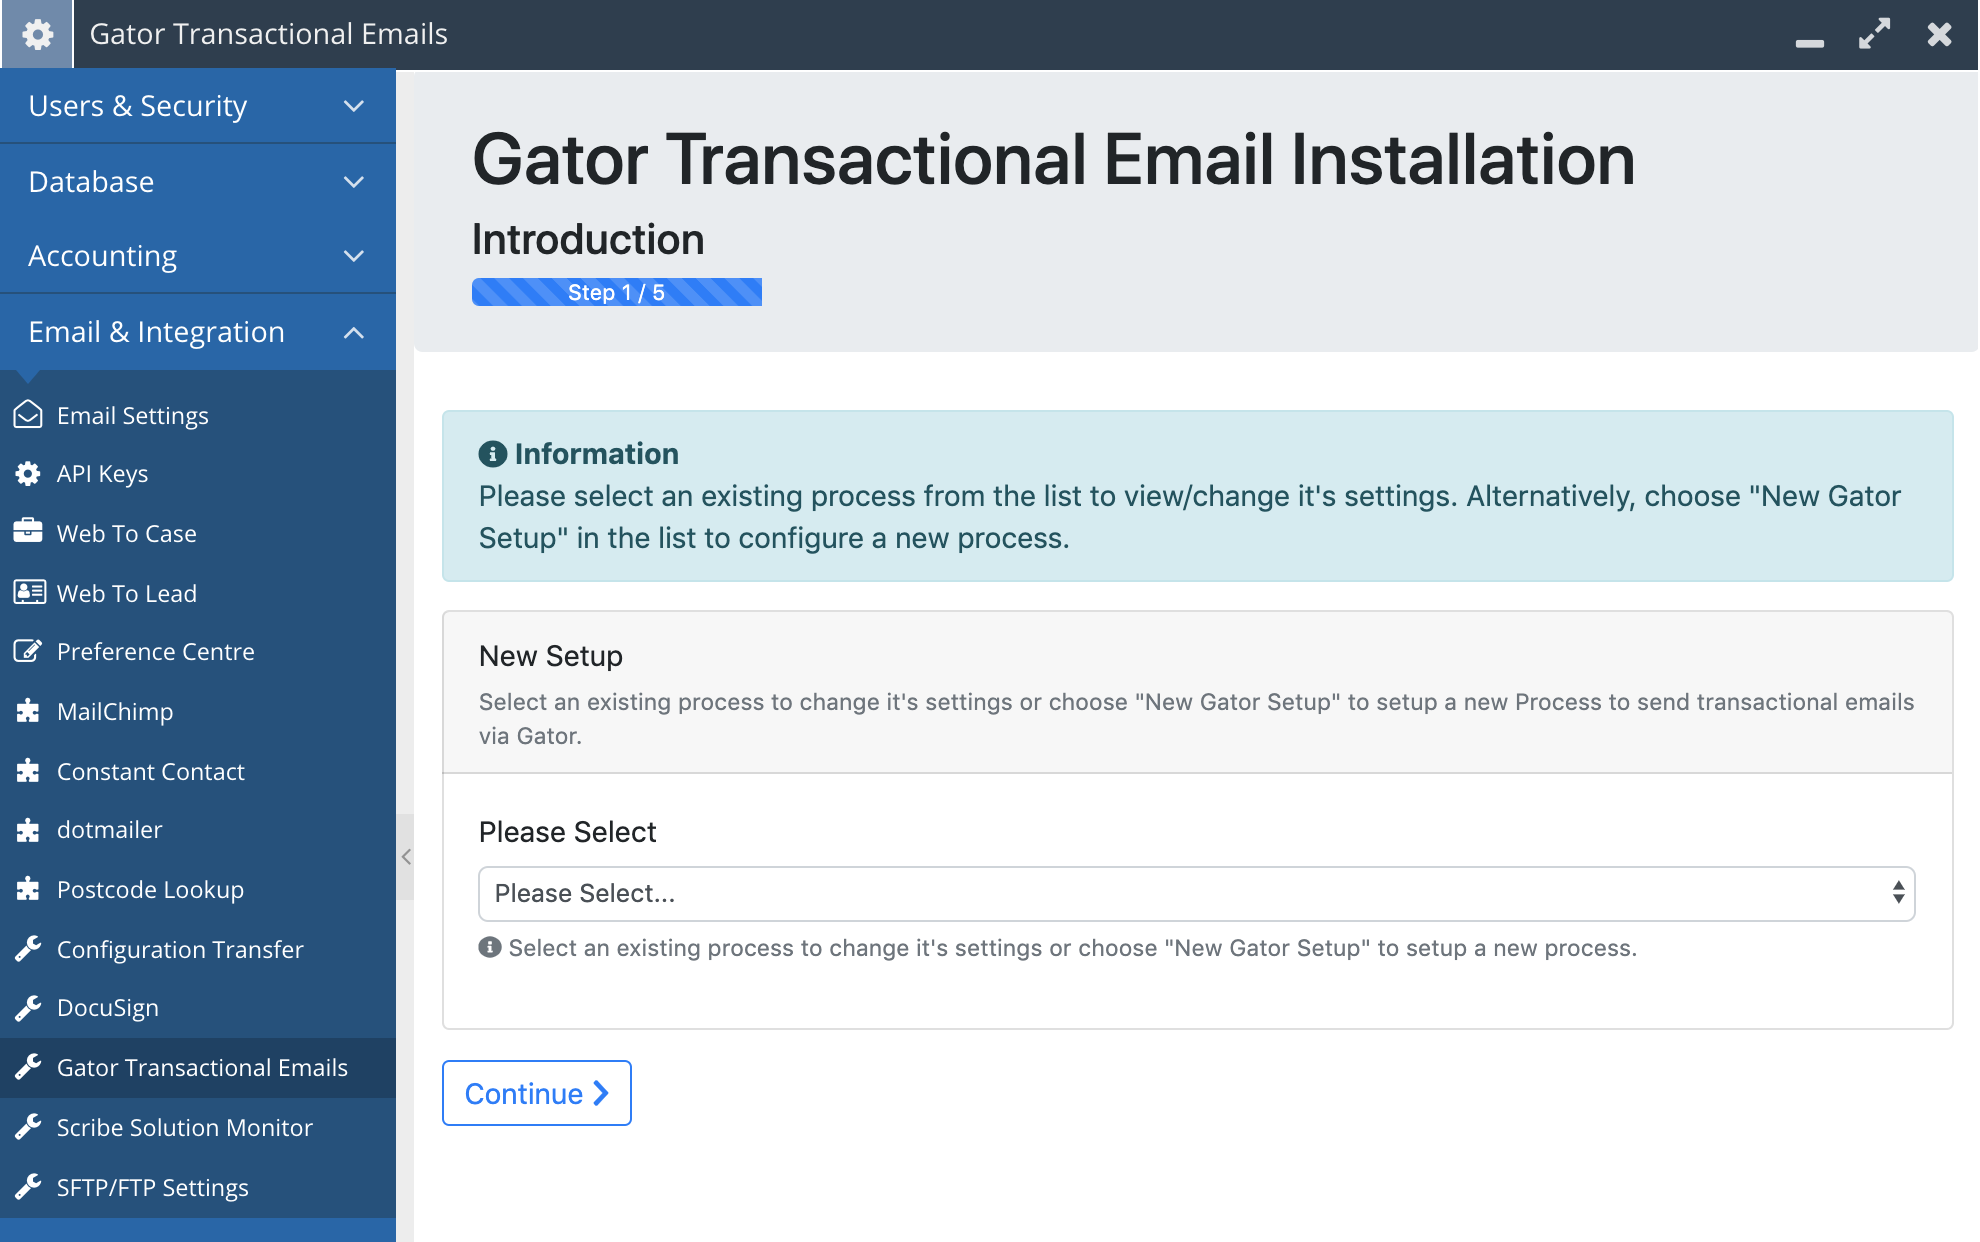
Either select an existing process (the list shows all Scheduled Processes that use the GatorMail integration script, no other processes are shown here) or choose to create a new process by choosing "New Gator Setup" then click Continue.
Step 2:
NOTE: If you chose an existing process in Step 1, this page will be populated with the selected Process' current settings which can be amended and updated via this Plugin.
This page allows you to configure the GatorMail automation process. The settings on this page are all required, and must be set for this functionality to work. Options 13-17 are only visible if you select "Yes" in setting 12 (recommended).
|
#
|
Setting Name
|
Setting Type
|
Setting Description
|
|
1
|
Process Name
|
Text
|
The name of the Process to help identify it in Workbooks Configuration under Automation > Scheduled Processes
NOTE: This field is read-only in update mode
|
|
2
|
Processing Batch Size
|
Picklist
|
Options of 10, 25, 50 or 100. This is the number of records that will be processed from the selected report on each run of this process. Depending on volumes of emails that you wish to send, you can tweak the number for performance.
|
|
3
|
Workbooks Report
|
Picklist
|
A list of Workbooks Reports from the current database where the category of the Report is set to “Automation”.
NOTE: If you do not see your Report in the list, ensure that you have access to it i.e. you can find it on the Reports Landing Page and you can open it. Also ensure that the Category is set correctly.
|
|
4
|
Report Column (Person Id)
|
Picklist
|
This will be a list of columns available in the selected report from above. As described in the Pre-Requisites, you need to include a Primary Contact in your Report before starting the configuration of this process. This should be set to a column that contains the Id of a Person record.
NOTE: The value in this column will be used by GatorMail to search for an existing contact. If this column is not set correctly, then you could end up with duplicate contacts in GatorMail
|
|
5
|
Report Column (Person Email Address)
|
Picklist
|
This will be a list of columns available in the selected report from above. As described in the Pre-Requisites, you need to include a Primary Contact in your Report before starting the configuration of this process. This should be set to a column that contains the Email Address of a Person record.
NOTE: The value in this column will be used by GatorMail to send an email to your contact so it must be valid.
|
|
6
|
Report Column (Person Name)
|
Picklist
|
This will be a list of columns available in the selected report from above. As described in the Pre-Requisites, you need to include a Primary Contact in your Report before starting the configuration of this process. This should be set to a column that contains the Email Address of a Person record.
NOTE: The value in this column will be used by GatorMail to send an email to your contact so it must be valid.
|
|
7
|
Gator Instance Name
|
Text
|
The name of the GatorMail Instance that this process will use. This can be obtained from the GatorMail UI, under Your Account > Instance Name
|
|
8
|
Gator Login Email
|
Text
|
The login email used to login to Gator via the Gator UI. Workbooks recommends that a separate user specifically for this integration is used.
|
|
9
|
Gator Password
|
Password
|
The password used to login to the account specified above.
|
|
10
|
Gator Client Name
|
Text
|
The GatorMail Client Name is used to authenticate to the Instance Name supplied above. It is not exposed via the GatorMail UI. Please contact Workbooks Support to request this information.
|
|
11
|
Gator Client Secret
|
Password
|
The GatorMail Client Secret is used in conjunction with the Client Name to authenticate to the Instance Name supplied above. It is also not exposed via the GatorMail UI. Please contact Workbooks Support to request this information at the same time as requesting the Client Name.
|
|
12
|
Enable Update Record After Email Send?
|
Picklist
|
After sending an email, choose whether you wish to update the processed record. We'd recommend that this option is used so that you can easily identify when an email has been sent by this process and thus exclude it from your Report automatically by applying Report Criteria.
Select Yes (Recommended) to enable the functionality. Select No (Not Recommended) to disable this feature.
|
|
13
|
Record Type
|
Picklist
|
Select which record type will be updated once an email has been sent.
This process currently supports all Transaction Document types and Activities.
|
|
14
|
Status Field
|
Picklist
|
A list of available fields on the selected Record Type. This field is updated when the row is processed on the report with the value held in the Report Column selected below in Option 15.
For example, if you write a Calculated Column to output "1st Reminder Sent". This value will be set in the selected field when the record is processed by this automation.
|
|
15
|
Report Column (Status Update)
|
Picklist
|
This picklist shows the Report Columns that are in the Report selected above. Your report should contain a Calculated Column which outputs a status that will be written to the record that was processed.
For example, if you write a Calculated Column to output "1st Reminder Sent". This value will be set in the selected field from above when the record is processed by this automation.
|
|
16
|
Report Column (Record Update Id Column)
|
Picklist
|
To update a Workbooks record via an automated process you need to know it's Id and Lock Version which are hidden fields on the record itself. These fields can be exposed via the Workbooks Report as a column. Ensure this setting is set to the column that identifies the record’s Id.
|
|
17
|
Report Column (Record Update Lock Version Column)
|
Picklist
|
To update a Workbooks record via an automated process you need to know it's Id and Lock Version which are hidden fields on the record itself. These fields can be exposed via the Workbooks Report as a column. Ensure this setting is set to the column that identifies the record’s Lock Version.
|
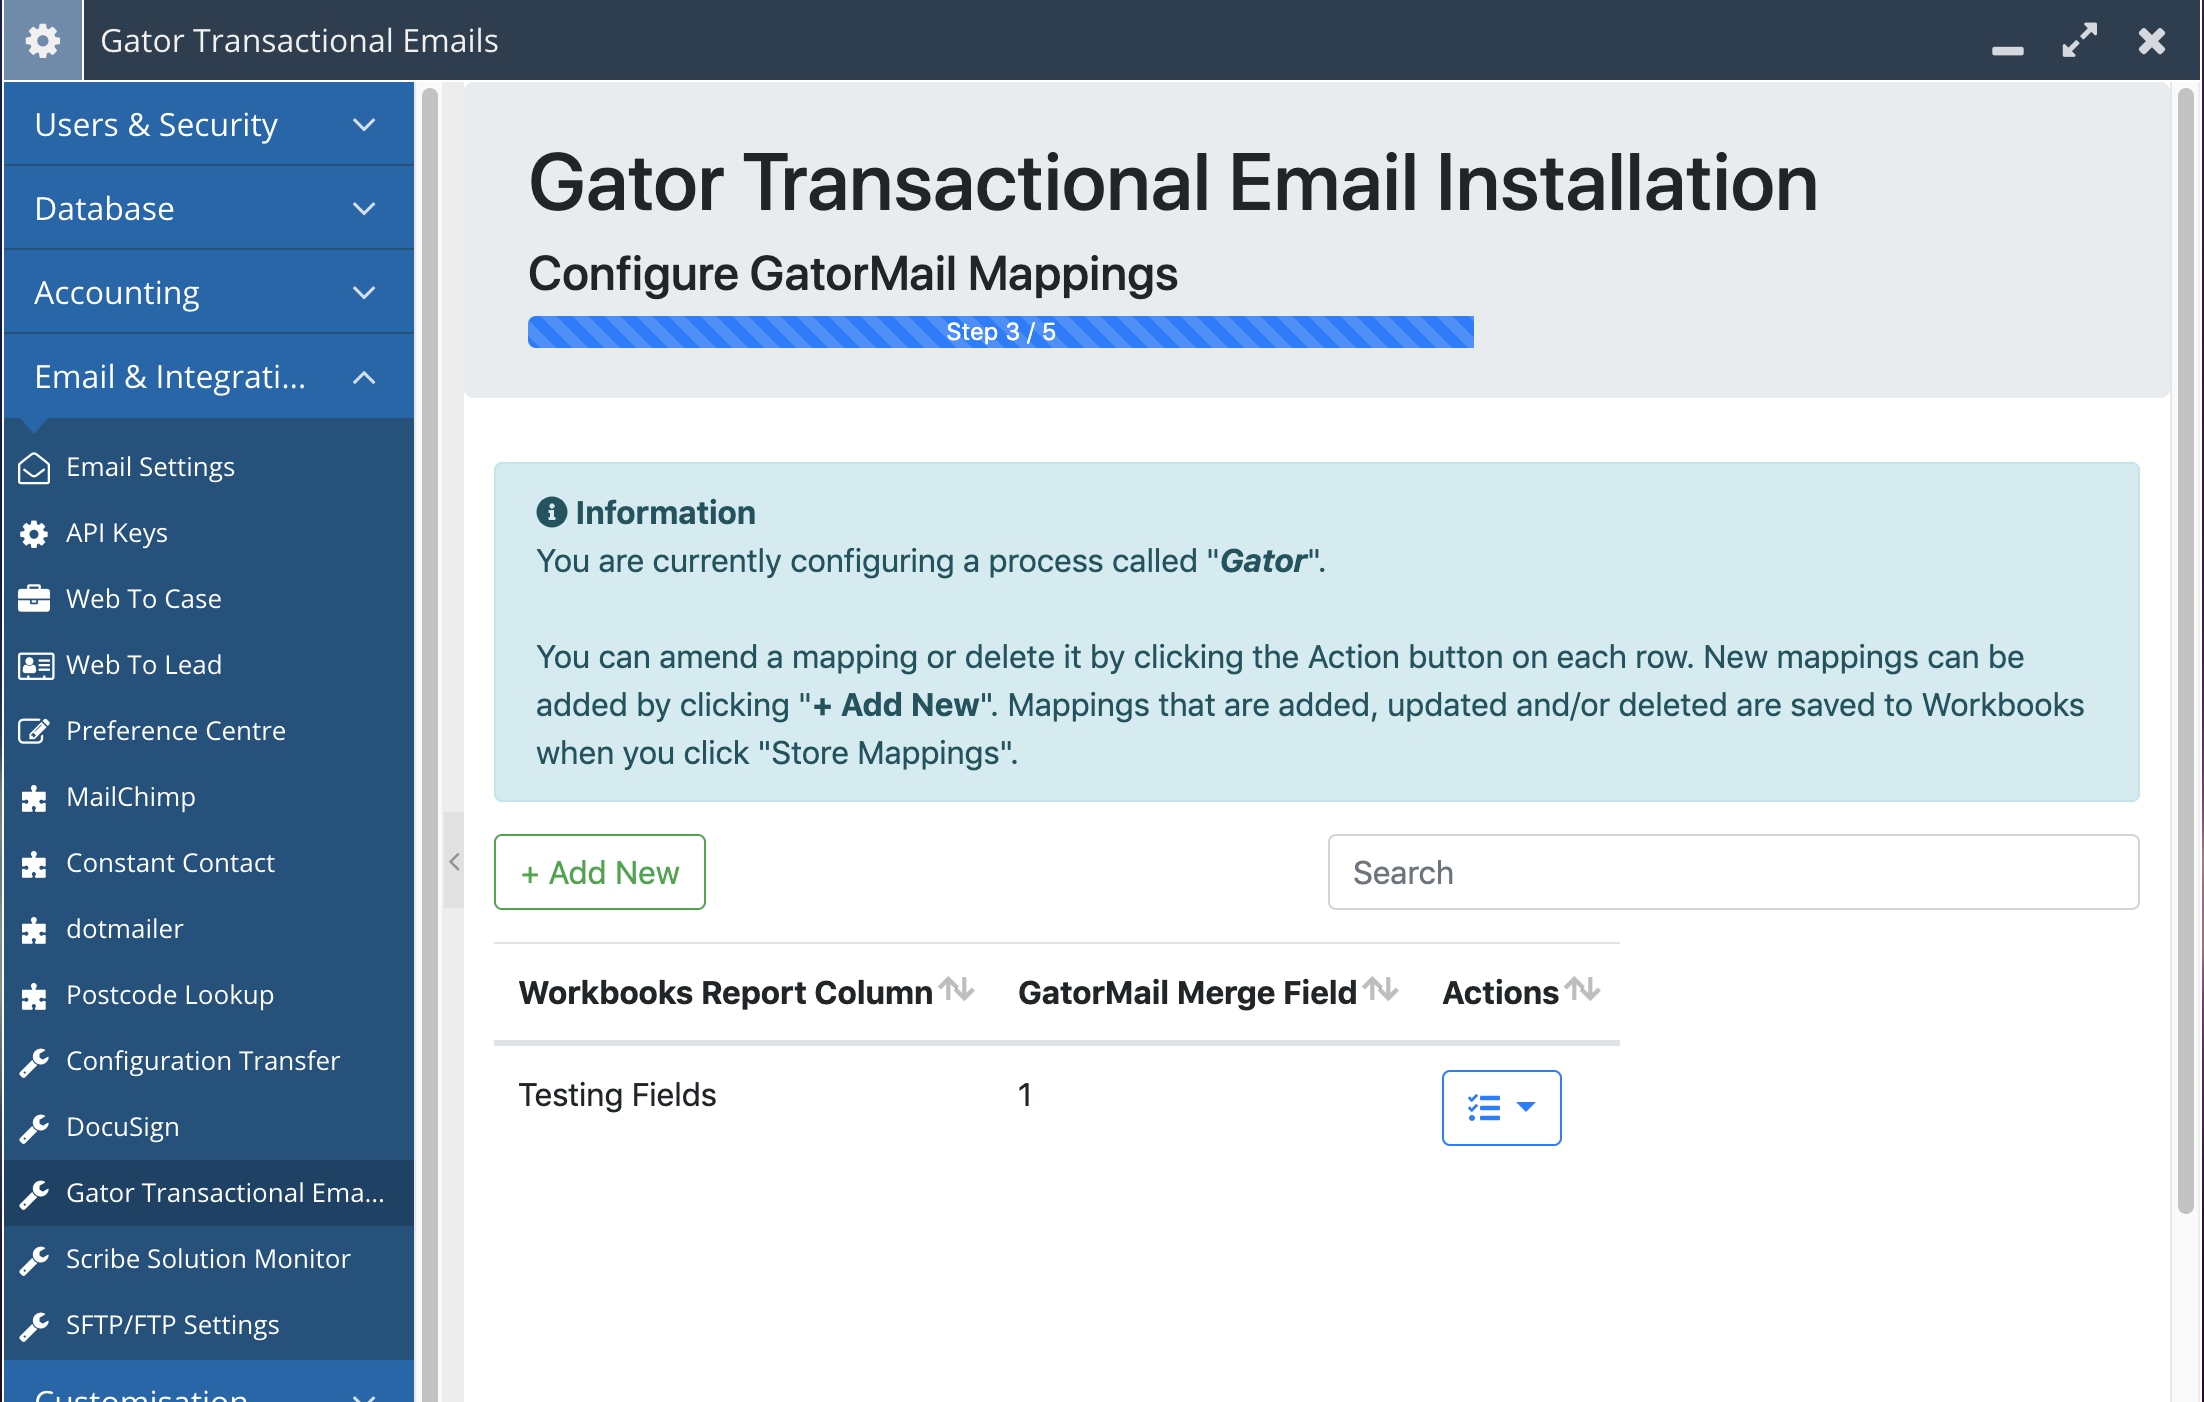
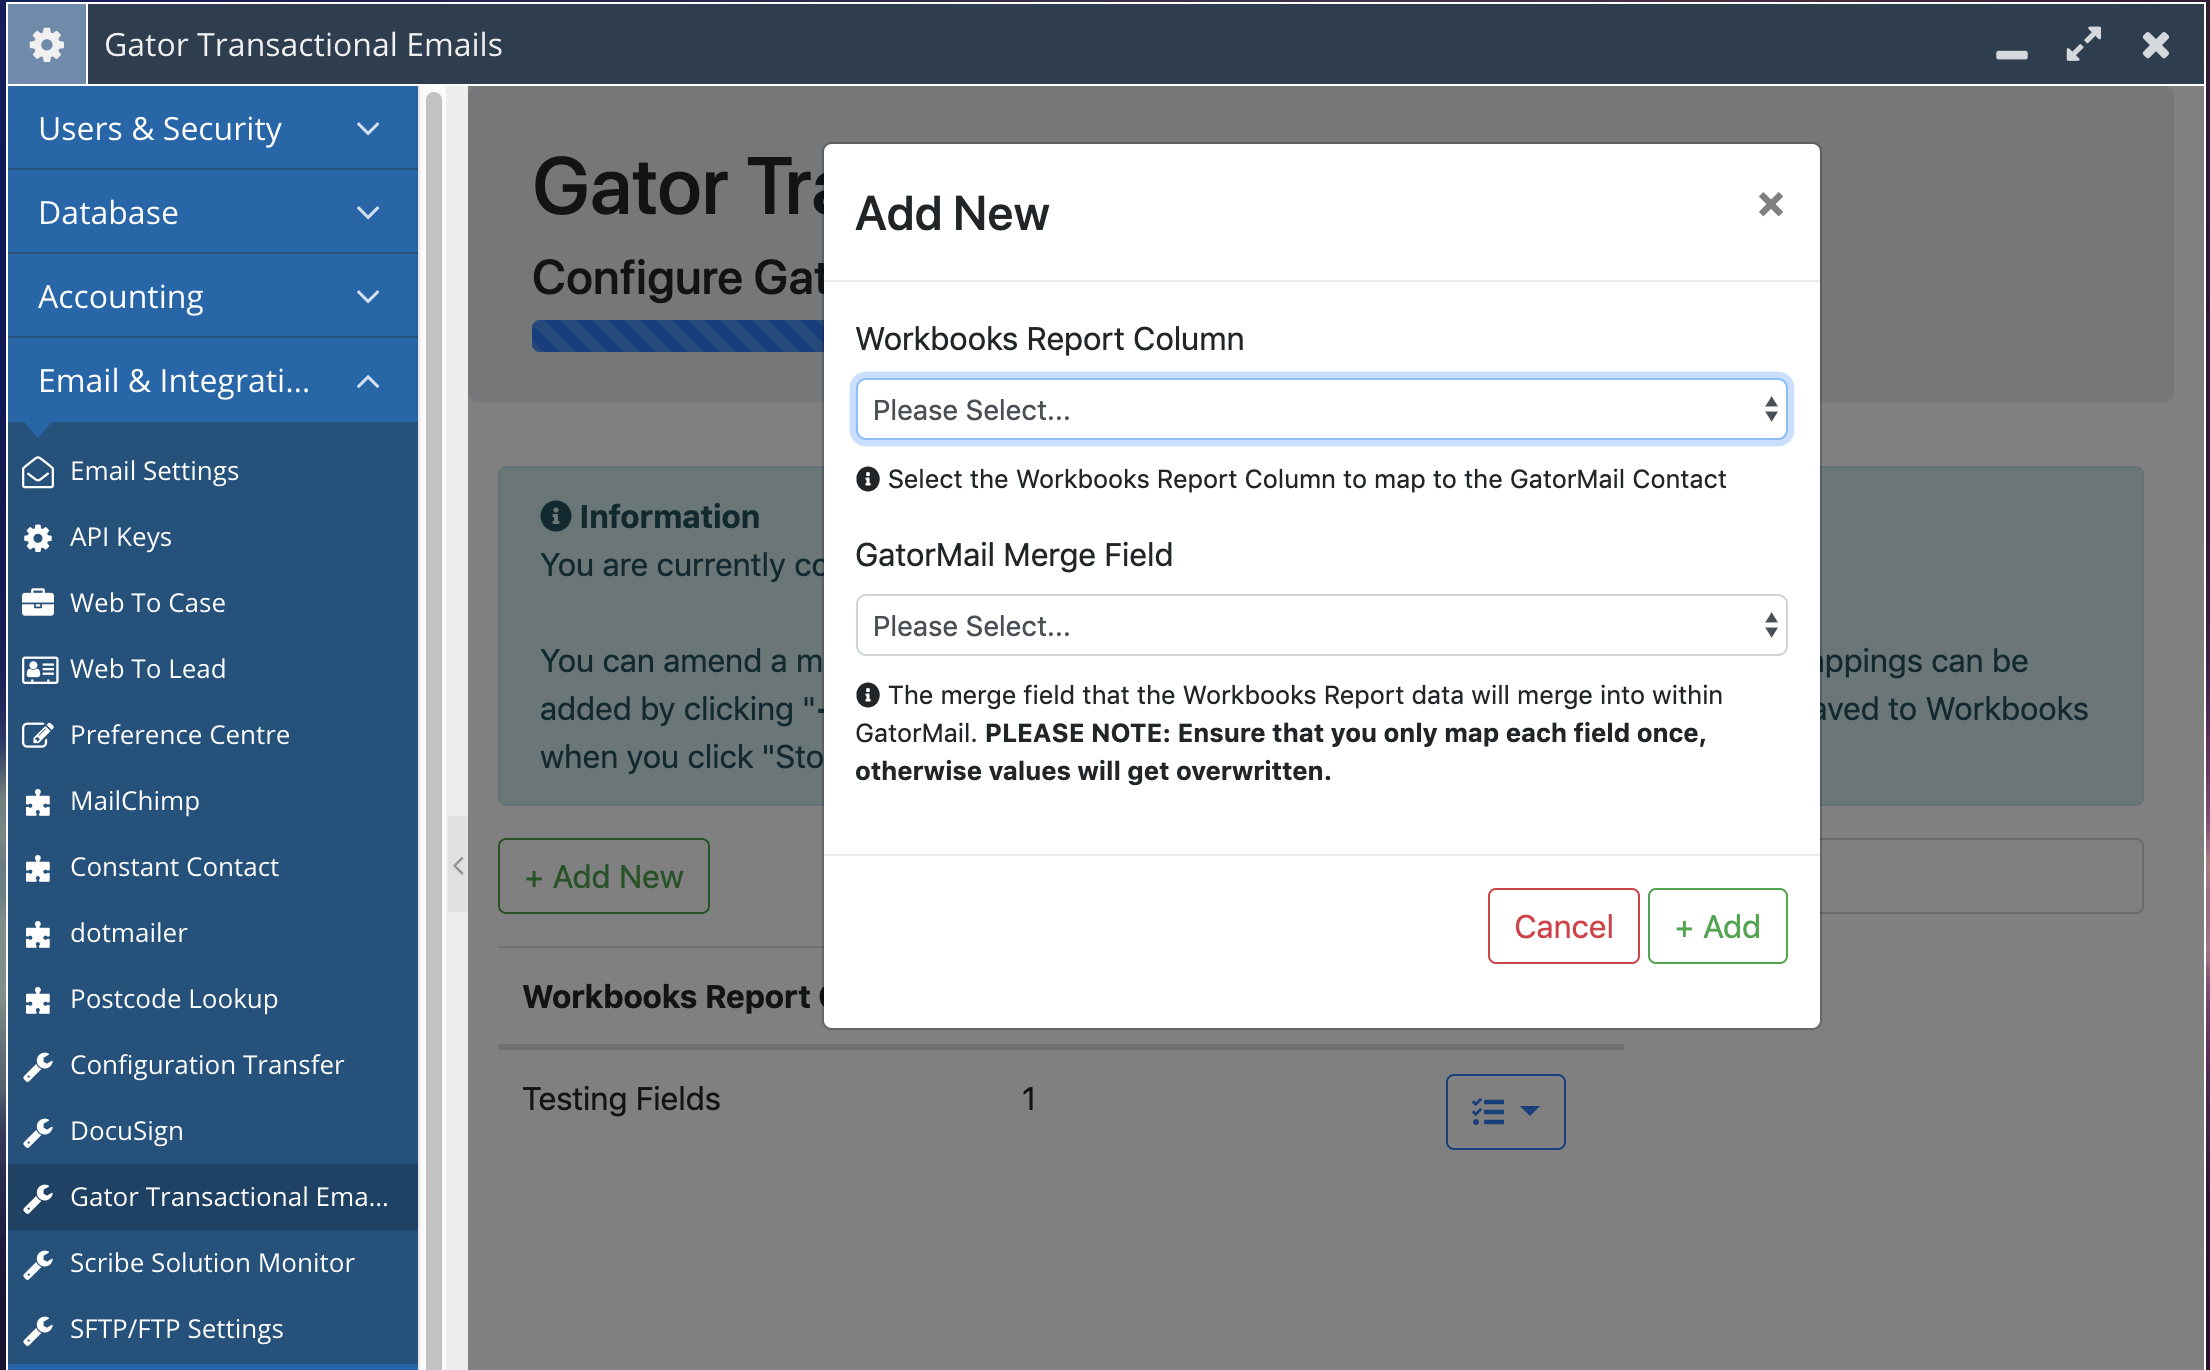
Step 3:
This step allows you to configure field mappings to synchronise data from your selected Workbooks Report into a GatorMail Creative within GatorMail which is then sent out to the Primary Contact. This functionality is achieved by using Gator Merge fields on the GatorMail Campaign, not Contact Merge Fields.
There are 2 limitations to this functionality:
- You are unable to have more than 10 Merge Fields in an Email
- You cannot use this Merge Field data in Dynamic Content
Click "Add New" to add a new mapping, selecting the Report Column that identifies the value you wish to sync and then an appropriate Merge Field. Once you have added a mapping, you can edit it or delete it by clicking the button under the "Actions" column.
Step 4:
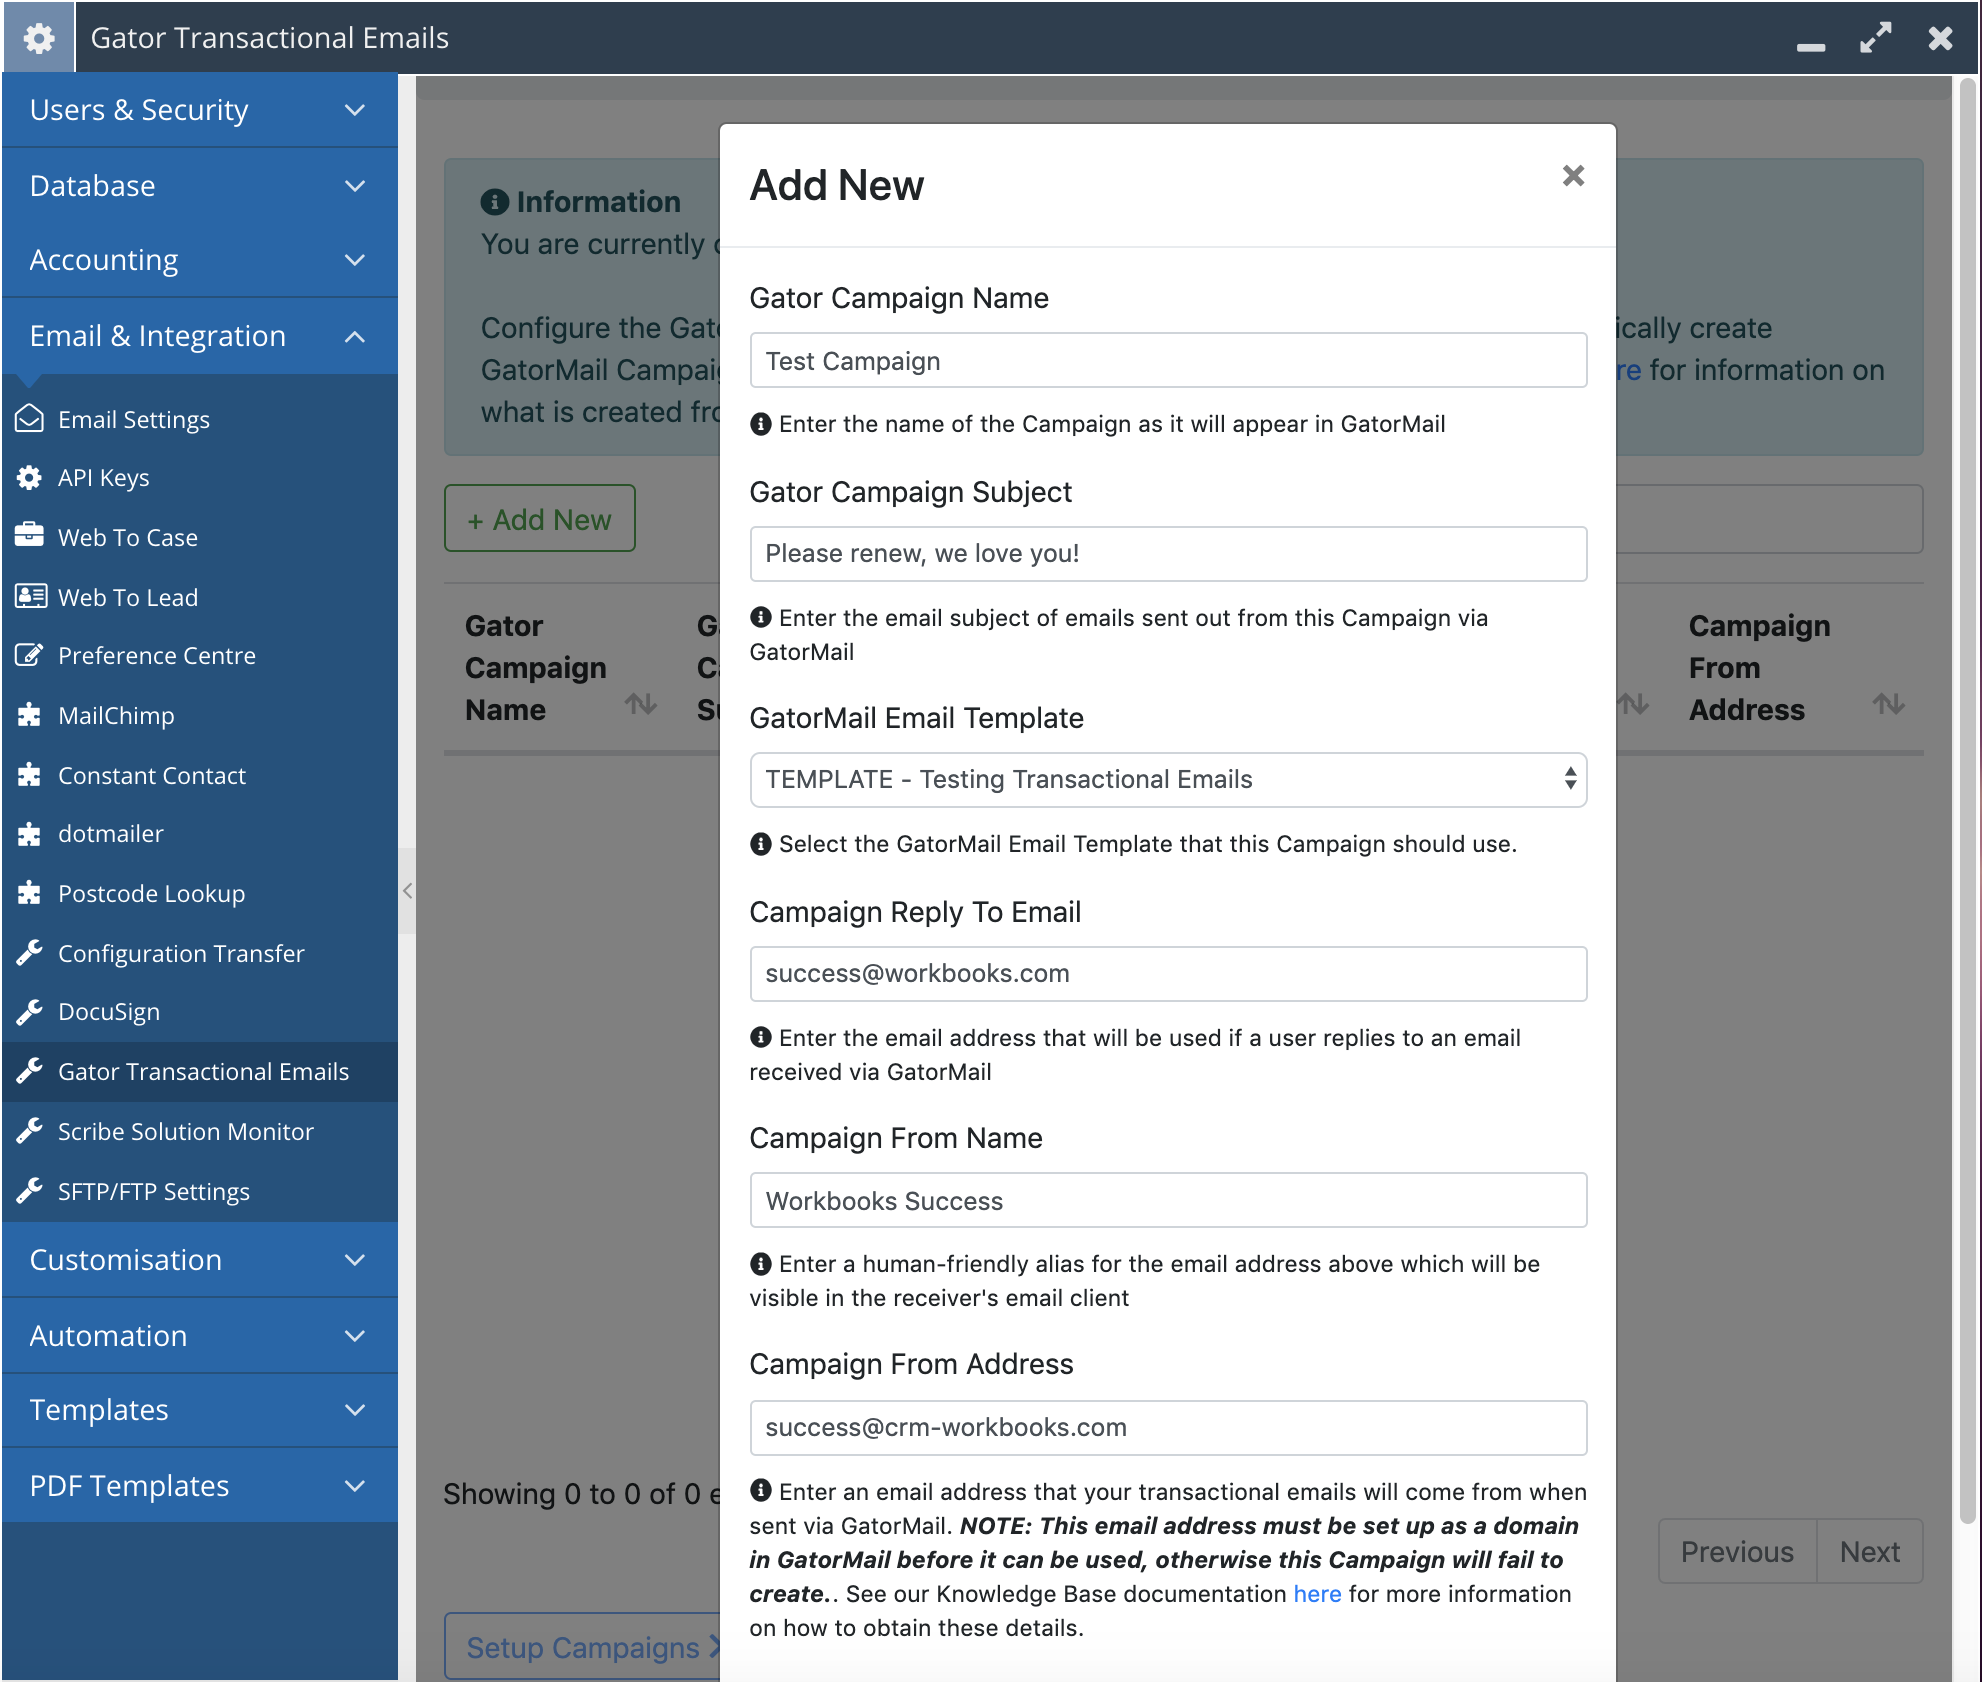
This step allows you to configure a GatorMail Campaign from the Workbooks Plugin wizard. Click "Add New" and enter the following details:
| Field Name |
Field Description |
| Gator Campaign Name |
The name of the Campaign as it will appear in GatorMail under the Campaigns menu |
| Gator Campaign Subject |
This text will appear in any emails that are sent out via this Campaign |
| Gator Email Template |
Shows a list of GatorMail Creatives (not Email Templates) from GatorMail where the name starts with "TEMPLATE".
NOTE: If you don't see your Email in the list, make sure that it definitely starts with the word "TEMPLATE" (case sensitive) and that the user you are using to drive this process can access it.
|
| Campaign Reply To Email |
If a user clicks "Reply" to your email notification, this is the email address that will be used |
| Campaign From Name |
This is the alias that will be displayed in the recipient's email client rather than an email address. |
| Campaign From Address |
This is the email address that your email will come from. It must be a pre- configured domain in GatorMail otherwise the Campaign creation will fail
See: https://help.communigator.co.uk/m/Setup/l/993225-domain-setup-guide-company-business-domain
|
Step 5:
This final page shows the result of your GatorMail campaign creation.
When successful, you can use the "Copy to Clipboard" button to copy an example formula to your clipboard. This formula has key information about the Campaign that was created including it's GatorMail Name and Campaign Id. The automation uses the Id to send an email via GatorMail when it runs. Our worked example page here, shows you how to manipulate this formula and add it your report.
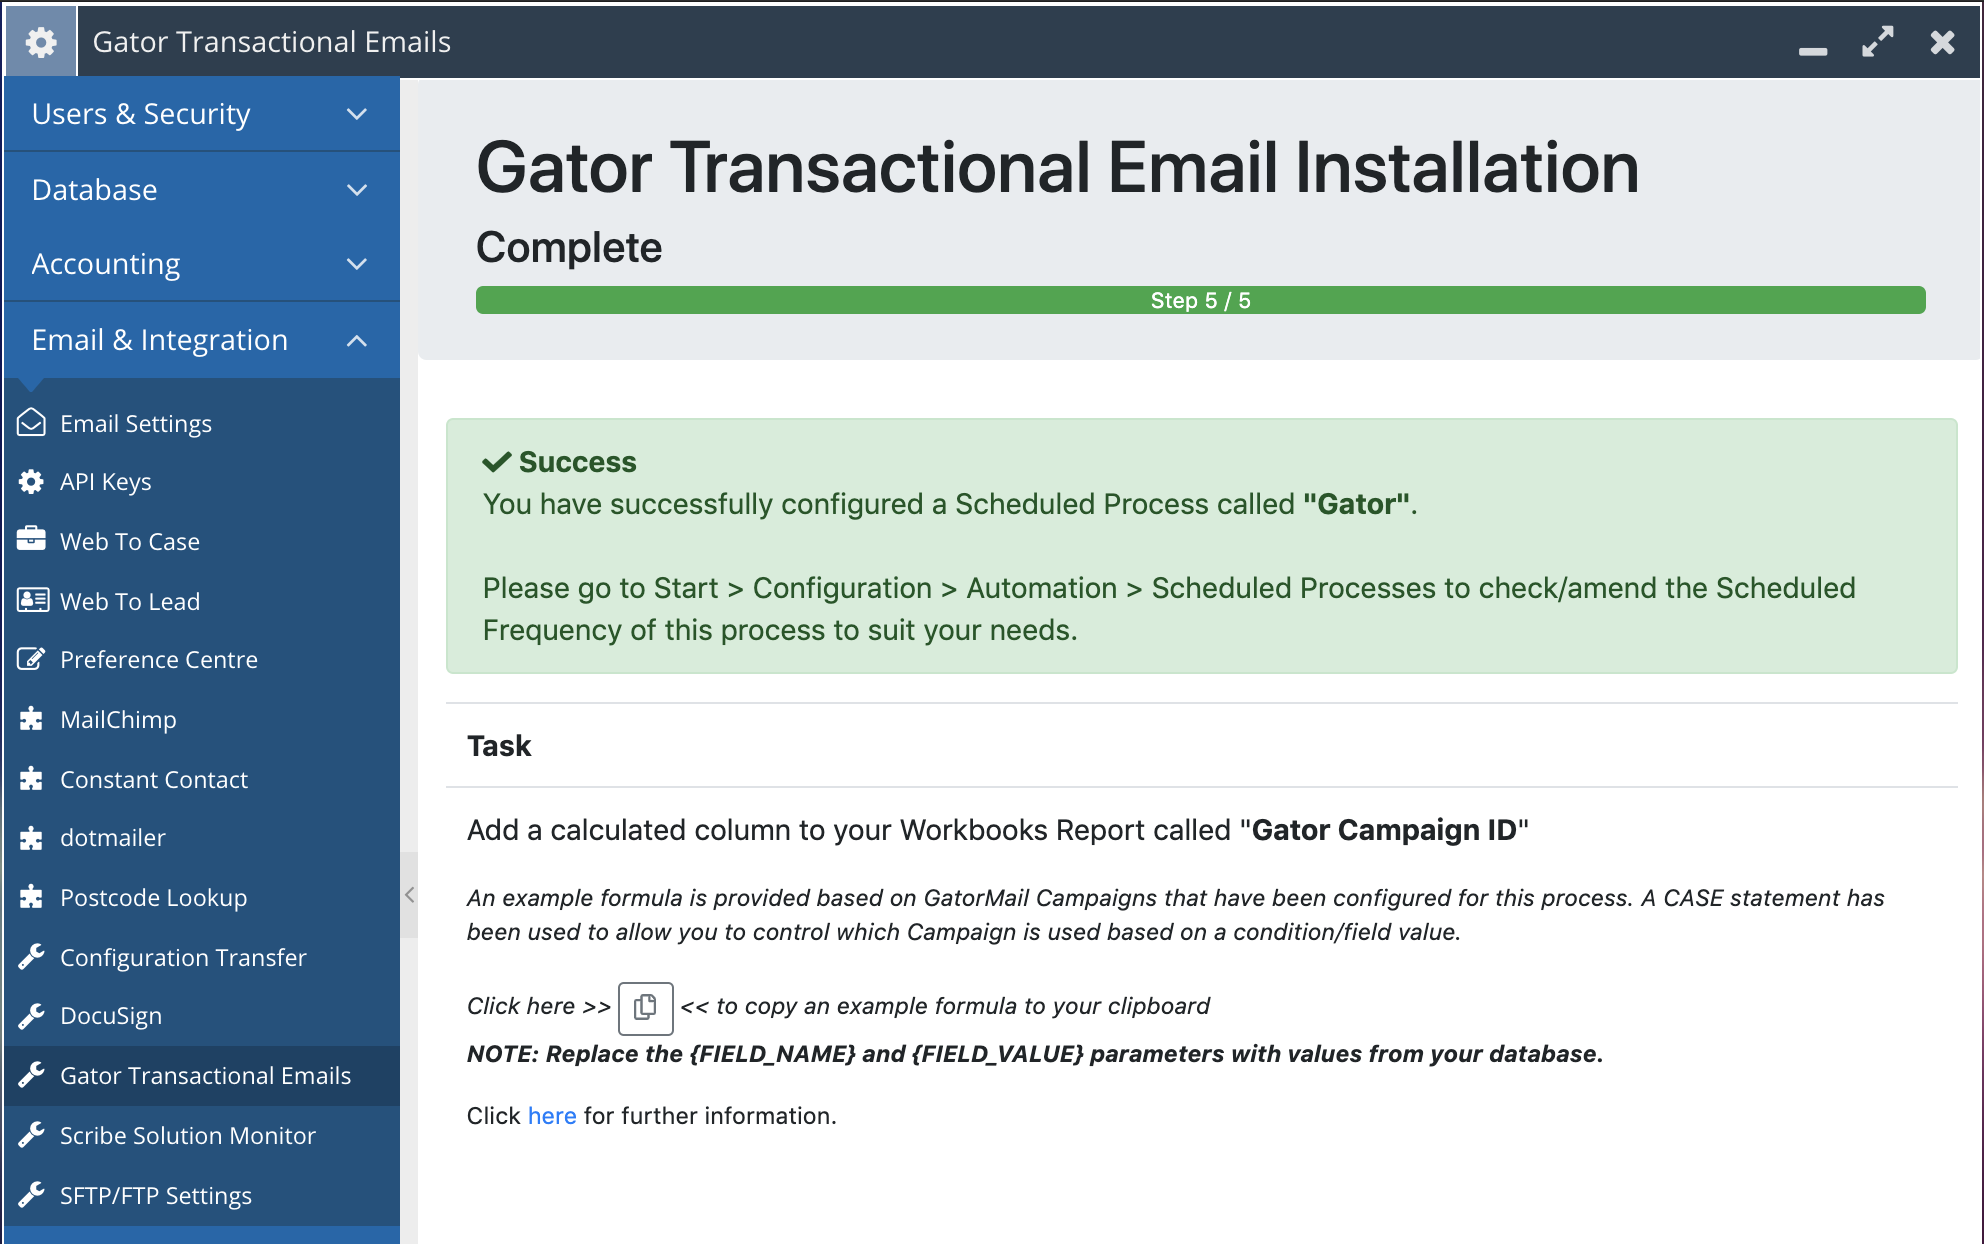
If there were any errors, these will be shown clearly in red at the top of the page. Where possible, useful links to help debug the problem are displayed. If you are still experiencing issues after reviewing the provided URLs, please contact Workbooks Support.
|
