- Welcome to the Knowledge Base
- Introduction
- Training
- Getting Started
- Preferences
- Activities
- Cases
- Forecasts & Quotas
- Importing Data
- Leads
-
Marketing
- Introduction to Marketing
- Marketing Campaigns
- Mailing Lists
- Products
- Mailshots
- Upload Library
- Templates
- Event Management
- Compliance Records
-
Spotler Integration
- What is Spotler?
- Navigating your Spotler homepage
- GatorMail
-
GatorLeads / Web Insights
- Tracking Code
- Setting up the Plugin
- Viewing Web Insights Data on your Form Layouts
- Domain Names and Online Activities
- Reporting incorrect Leads created through Web Insights
- Reporting on Web Insights data
- Using UTM Values
- Why aren’t Online Activities being created in the database?
- Why is GatorLeads recording online activities in a foreign language?
- GatorSurvey
- GatorWorkflow
- GatorPopup
- Opportunities
-
Integrations
- Mapping
- Electronic Signing Tools
- Creditsafe Integration
-
Zapier
- Introduction to Zapier
- Available Triggers and Actions
- Linking your Workbooks Account to Zapier
-
Setting up Zaps
- Posted Invoices to Xero Invoices
- Xero payments to Workbooks Tasks
- New Case to Google Drive folder
- New Case to Basecamp Project
- New Workbooks Case to JIRA Ticket
- Jira Issue to new Case
- 123FormBuilder Form Entry to Case
- Eventbrite Attendee to Sales Lead and Task
- Facebook Ad Leads to Sales Leads
- Wufoo Form Entry to Sales Lead
- Posted Credit Note to Task
- QuickBooks Online
- Survey Monkey responses to Tasks
- Multistep Zaps
-
Email Integrations
- Email Dropbox
- Workbooks Exchange Server Sync
- Workbooks Outlook Connector
- RevenueGrid Intelligence and Engage
-
Event & Webinar Integration Tools
- GoToWebinar
- ON24
- Microsoft Office
-
Outreach
- Installation
- Outreach Authentication
- Sync People to Outreach Prospects
- Sync Organisations to Outreach Accounts
- Sync Workbooks Opportunities to Outreach
- Sync Tasks/Activities from Workbooks to Outreach
- Sync Outreach Sequences to Workbooks
- Sync Outreach Sequence States to Workbooks
- Sync Outreach Sequence Step Numbers to Workbooks
- Sync Prospects/Accounts/Opportunities from Outreach to Workbooks
- Sync Outreach Tasks/Calls/Meetings to Workbooks
- Scribe/Workbooks Connector
- RingCentral
- Auditing
- Comments
- People & Organisations
- Projects
-
Reporting
- Introduction to Reporting
- Using Reports
- Charts
- Exporting Reports
- Advanced Reporting
- Report Snapshots
- Dashboards
-
Transaction Documents
-
Introduction to Transaction Documents
- Displaying & Adding Transaction Documents
- Copying Transaction Documents
- Transaction Documents Fields Help
- Transaction Documents Line Items Help
- Printing & Sending Transaction Documents
- Managing Transaction Document Currencies
- Managing Transaction Document Statuses
- Setting a Blank Default Currency on Transaction Documents
- Credit Notes
- Customer Orders
- Invoices
- Quotations
- Supplier Orders
- Contract Management
- Sagelink
-
Introduction to Transaction Documents
- Auditing
-
Configuration
- Introduction to System Administration
- Users & Security
- Preferences
- Database
- Accounting
- Email & Integration
-
Customisation
- Creating & Modifying Picklists
- Theme
-
Record Types
- Creating Custom Fields
- Report-based Custom Fields
- Linked Fields & Reference Fields
- Record Templates
- Form Layouts
- Customising relationships between parties
- Opportunity Stages
- Custom Records
- Automation
- PDF Configuration
- Contact Support
- Releases & Roadmap
Before downloading the Outlook Connector
Before you download and install the Workbooks Outlook Connector we recommend that you run through the following steps. This will minimise the risk of encountering issues
Check our System Requirements page
Ensure that the Workbooks Outlook Connector is compatible with your version of Windows and Outlook. The versions that we support can be found on our System Requirements page.
Check for a corrupt OST or PST file.
The correct operation of the Workbooks Outlook Connector is not guaranteed if you have a corrupt OST file. An OST is an Offline Folder file which is maintained by Outlook so that you can access your emails, contacts, and calendar entries while not connected to the Exchange Server. As a precaution, we recommend that before installing the Connector you remove and re-create your OST file. The Microsoft Office Knowledge Base provides some additional instructions on how to carry out this task.
Check to see whether you have the Microsoft Business Contact Manager add-in installed.
If so please disable it or uninstall completely as this is not currently compatible with the Workbooks Outlook Connector. The Microsoft Office Knowledge Base is a good starting point for this information but there are other sites available which provide instructions on how to carry out this task.
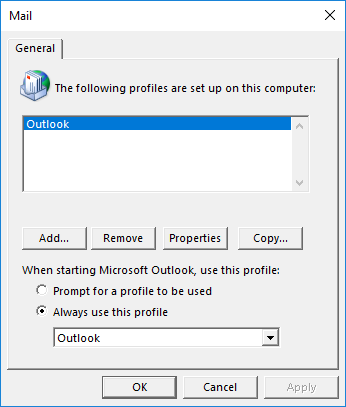
Make sure you know which Outlook Profile you will be using
Note: If you only have one Outlook Profile then this will not apply.
You may have multiple Profiles connected to your Outlook, such as your personal profile and your business profile. If this is the case then you must choose which one the Workbooks Outlook Connector will use, as you will only have full functionality on one Outlook Profile. When installing the Workbooks Outlook Connector it will select whichever one Outlook loads by default.
To find out which Profile is your default within Outlook go to File > Account Settings > Manage Profiles > Show Profiles. From here you can select which Profile will be loaded by default, and hence which one the Outlook Connector will use.

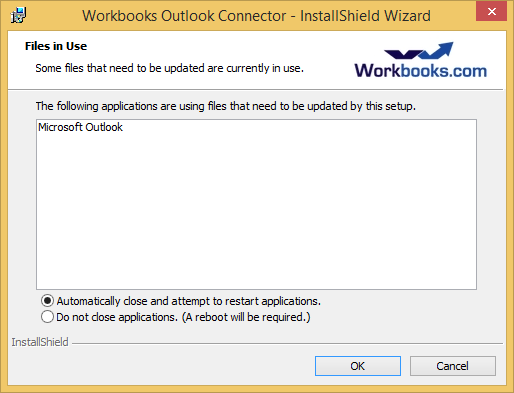
Close Outlook before you run the installation.
The Outlook Connector will require for you to restart Outlook while it is installing, closing Outlook beforehand bypasses this step and will make for a faster installation process.

Ensure the Workbooks Outlook Connector is enabled for Users
In order to use the Outlook Connector you will need to ensure that this is enabled on your database as well as for each User account that will be using the Connector. Full instructions on how to check to see if this has been enabled can be found on our Knowledge Base.

