- Welcome to the Knowledge Base
- Introduction
- Training
- Getting Started
- Preferences
- Activities
- Cases
- Forecasts & Quotas
- Importing Data
- Leads
-
Marketing
- Introduction to Marketing
- Marketing Campaigns
- Mailing Lists
- Products
- Mailshots
- Upload Library
- Templates
- Event Management
- Compliance Records
-
Spotler Integration
- What is Spotler?
- Navigating your Spotler homepage
- GatorMail
-
GatorLeads / Web Insights
- Tracking Code
- Setting up the Plugin
- Viewing Web Insights Data on your Form Layouts
- Domain Names and Online Activities
- Reporting incorrect Leads created through Web Insights
- Reporting on Web Insights data
- Using UTM Values
- Why aren’t Online Activities being created in the database?
- Why is GatorLeads recording online activities in a foreign language?
- GatorSurvey
- GatorWorkflow
- GatorPopup
- Opportunities
-
Integrations
- Mapping
- Electronic Signing Tools
- Creditsafe Integration
-
Zapier
- Introduction to Zapier
- Available Triggers and Actions
- Linking your Workbooks Account to Zapier
-
Setting up Zaps
- Posted Invoices to Xero Invoices
- Xero payments to Workbooks Tasks
- New Case to Google Drive folder
- New Case to Basecamp Project
- New Workbooks Case to JIRA Ticket
- Jira Issue to new Case
- 123FormBuilder Form Entry to Case
- Eventbrite Attendee to Sales Lead and Task
- Facebook Ad Leads to Sales Leads
- Wufoo Form Entry to Sales Lead
- Posted Credit Note to Task
- QuickBooks Online
- Survey Monkey responses to Tasks
- Multistep Zaps
-
Email Integrations
- Email Dropbox
- Workbooks Exchange Server Sync
- Workbooks Outlook Connector
- RevenueGrid Intelligence and Engage
-
Event & Webinar Integration Tools
- GoToWebinar
- ON24
- Microsoft Office
-
Outreach
- Installation
- Outreach Authentication
- Sync People to Outreach Prospects
- Sync Organisations to Outreach Accounts
- Sync Workbooks Opportunities to Outreach
- Sync Tasks/Activities from Workbooks to Outreach
- Sync Outreach Sequences to Workbooks
- Sync Outreach Sequence States to Workbooks
- Sync Outreach Sequence Step Numbers to Workbooks
- Sync Prospects/Accounts/Opportunities from Outreach to Workbooks
- Sync Outreach Tasks/Calls/Meetings to Workbooks
- Scribe/Workbooks Connector
- RingCentral
- Auditing
- Comments
- People & Organisations
- Projects
-
Reporting
- Introduction to Reporting
- Using Reports
- Charts
- Exporting Reports
- Advanced Reporting
- Report Snapshots
- Dashboards
-
Transaction Documents
-
Introduction to Transaction Documents
- Displaying & Adding Transaction Documents
- Copying Transaction Documents
- Transaction Documents Fields Help
- Transaction Documents Line Items Help
- Printing & Sending Transaction Documents
- Managing Transaction Document Currencies
- Managing Transaction Document Statuses
- Setting a Blank Default Currency on Transaction Documents
- Credit Notes
- Customer Orders
- Invoices
- Quotations
- Supplier Orders
- Contract Management
- Sagelink
-
Introduction to Transaction Documents
- Auditing
-
Configuration
- Introduction to System Administration
- Users & Security
- Preferences
- Database
- Accounting
- Email & Integration
-
Customisation
- Creating & Modifying Picklists
- Theme
-
Record Types
- Creating Custom Fields
- Report-based Custom Fields
- Linked Fields & Reference Fields
- Record Templates
- Form Layouts
- Customising relationships between parties
- Opportunity Stages
- Custom Records
- Automation
- PDF Configuration
- Contact Support
- Releases & Roadmap
Adding Terms & Conditions to your Documents
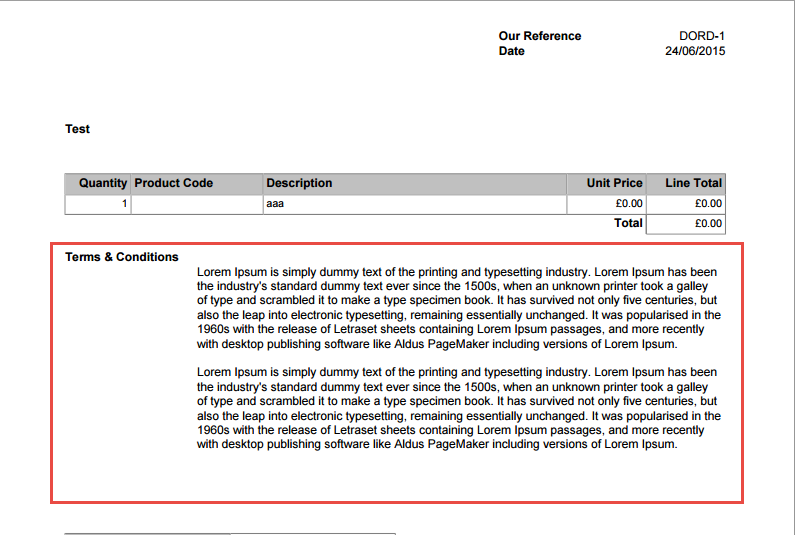
It is possible to add a single line of text or a multi-line text field using Template-Specific Settings. In the example below, we will add Terms and Conditions to the standard “unified.xsl” template provided with Workbooks. These will appear under the line items table as shown below:
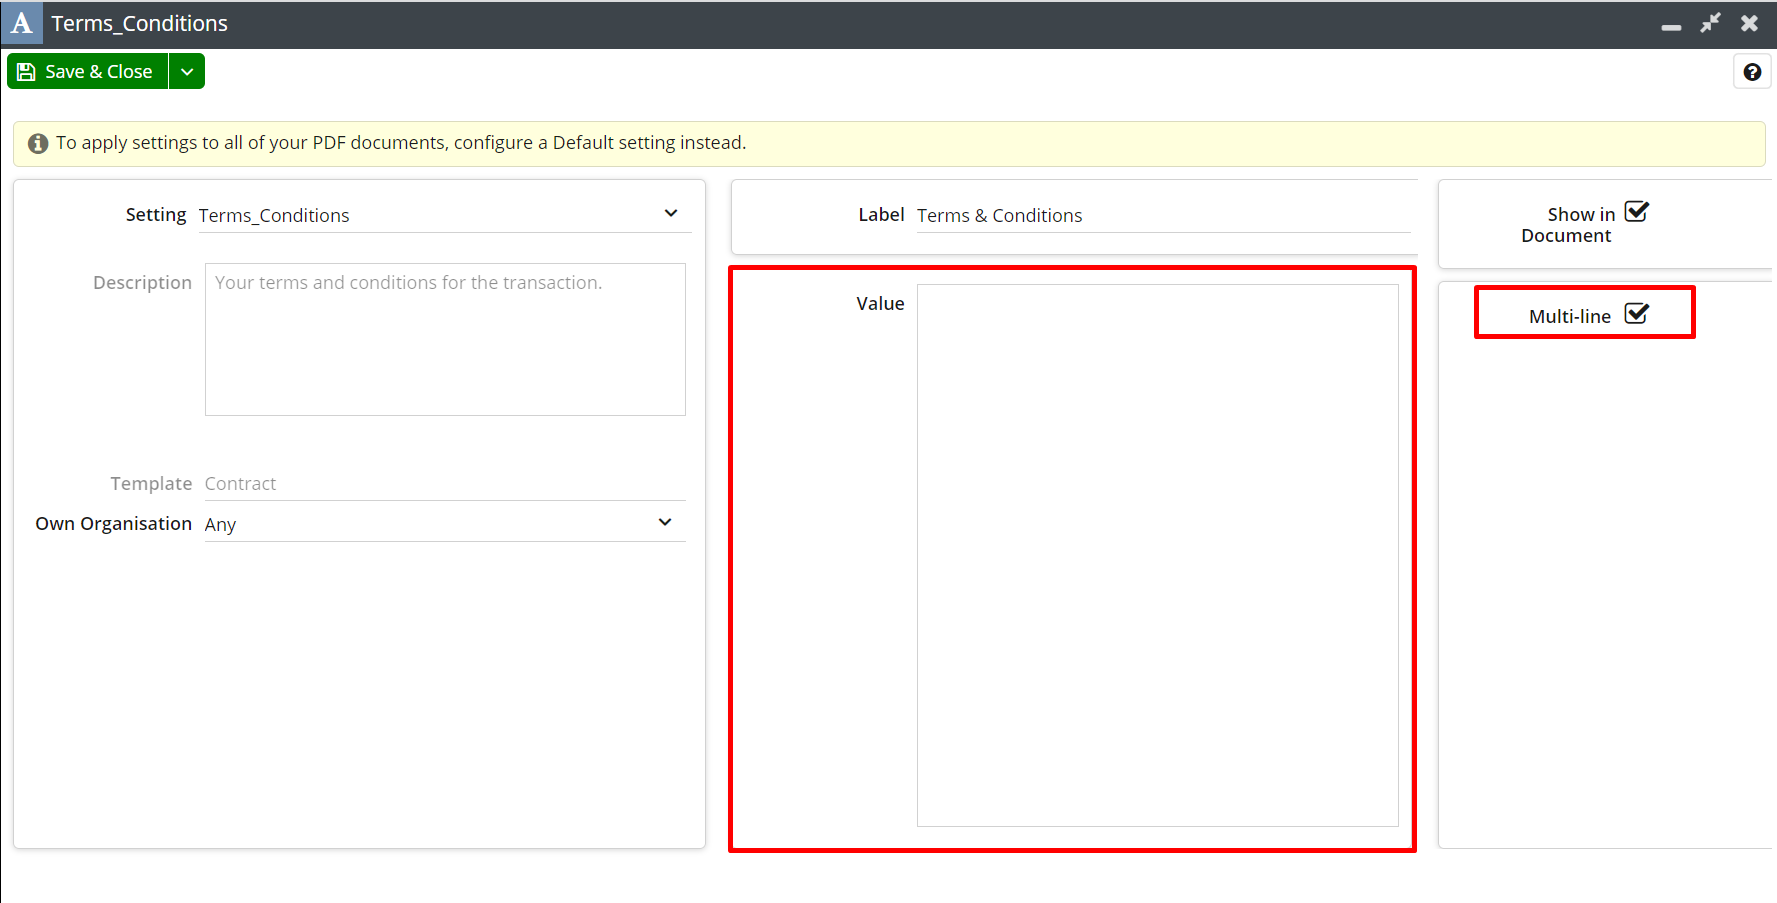
Click “Add Template Specific Setting” as described on this page. Select “Terms_Conditions” from the list of settings. On the right-hand side of the screen, you will see a “Multi-line” checkbox. Simply tick this to reveal a bigger value area:

You can then paste your company’s Terms and Conditions into the value textbox. Click Save & Close when you are finished.
This can be taken one step further to include certain words as bold text, underline text, change the colour of specified words. Imagine you have the following piece of multi-line text describing your Terms and Conditions:
ABC Company Terms and Conditions
1. Any alterations, variations or additions to this Order must be made in writing and signed by a person authorised to do so on behalf of your Company.
2. It is a condition of this Order that the Customer will allow ABC Company's representatives free and unrestricted access at mutually agreed times to carry out all works and services relating to this Order.
THESE TERMS DO NOT AFFECT YOUR STATUTORY RIGHTS AS A CONSUMER.
Let's say we want to centre the title and make it bold. We also want to make the final sentence (shown in capitals) red. To do this, add a <center> and <b> tag to the beginning of the title, and close them off again using </b></center>.
Next, add <red> </red> to either side of the final sentence, as shown below:
<center><b>ABC Company Terms and Conditions</b></center>
1. Any alterations, variations or additions to this Order must be made in writing and signed by a person authorised to do so on behalf of ABC Company.
2. It is a condition of this Order that the Customer will allow ABC Company's representatives free and unrestricted access at mutually agreed times to carry out all works and services relating to this Order.
<red>THESE TERMS DO NOT AFFECT YOUR STATUTORY RIGHTS AS A CONSUMER.</red>
Click save & close when you are finished. The next time your Order PDF is generated, you should see the above under your line item grid. There are a limited number of other tags that can be applied to your settings, see here for more information.


