- Welcome to the Knowledge Base
- Introduction
- Training
- Desktop Environment
- Preferences
- Activities
- Cases
- Forecasts & Quotas
- Importing Data
- Leads
-
Marketing
- Introduction to Marketing
- Marketing Campaigns
- Mailing Lists
- Products
- Mailshots
- Upload Library
- Templates
-
Workbooks Web Insights
- Tracking Code
- Setting up the Plugin
- Viewing Web Insights Data on your Form Layouts
- Domain Names and Online Activities
- Gator Popup
- Reporting incorrect Leads created through Web Insights
- Reporting on Web Insights data
- Using UTM Values
- Why aren’t Online Activities being created in the database?
- Why is GatorLeads recording online activities in a foreign language?
- Using HubSpot with Workbooks
- Event Management
- Compliance Records
- GatorMail Integration
- Opportunities
-
Integrations
- Mapping
- Electronic Signing Tools
- Creditsafe Integration
-
Zapier
- Introduction to Zapier
- Available Triggers and Actions
- Linking your Workbooks Account to Zapier
-
Setting up Zaps
- Posted Invoices to Xero Invoices
- Xero payments to Workbooks Tasks
- New Case to Google Drive folder
- New Case to Basecamp Project
- New Workbooks Case to JIRA Ticket
- Jira Issue to new Case
- 123FormBuilder Form Entry to Case
- Eventbrite Attendee to Sales Lead and Task
- Facebook Ad Leads to Sales Leads
- Wufoo Form Entry to Sales Lead
- Posted Credit Note to Task
- QuickBooks Online
- Survey Monkey responses to Tasks
- Multistep Zaps
-
Email Integrations
- Email Dropbox
- Workbooks Exchange Server Sync
- Workbooks Outlook Connector
-
Event & Webinar Integration Tools
- GoToWebinar
- ON24
- Microsoft Office
- Outreach
- Scribe/Workbooks Connector
- People & Organisations
- Reporting
- Dashboards
- Transaction Documents
- Auditing
-
Configuration
- Introduction to System Administration
- Users & Security
- Database
- Accounting
- Email & Integration
- Customisation
- Automation
- PDF Configuration
- Contact Support
-
Releases & Roadmap
- Roadmap
- December 2020 Release
- September 2020 Release
- April 2020 Release
- January 2020 Release
- September 2019 Release
- February 2019 - Event Management Release
- January 2019 Release
- October 2018 Release
- May 2018 Release
- February 2018 Release
- January 2018 Release
- November 2017 Release
- September 2017 Release
- June 2017 Release
- March 2017 Release
- December 2016 Release
- August 2016 Release
- January 2016 Release
- Workbooks Glossary
Record Templates
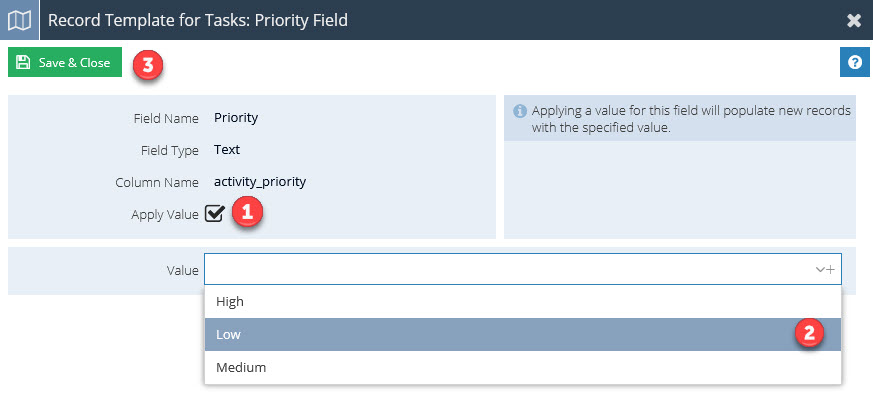
Record Templates allow you to have any record filled with a pre-existing value when you open a form, essentially a default value. For example, if you set the Priority field to "Urgent" then every time you create a new object where this field is available, its priority will be set to "Urgent" automatically unless you physically change it on the form itself.
Everywhere a record can be created, the record templates that have been made available for that record type can be used.
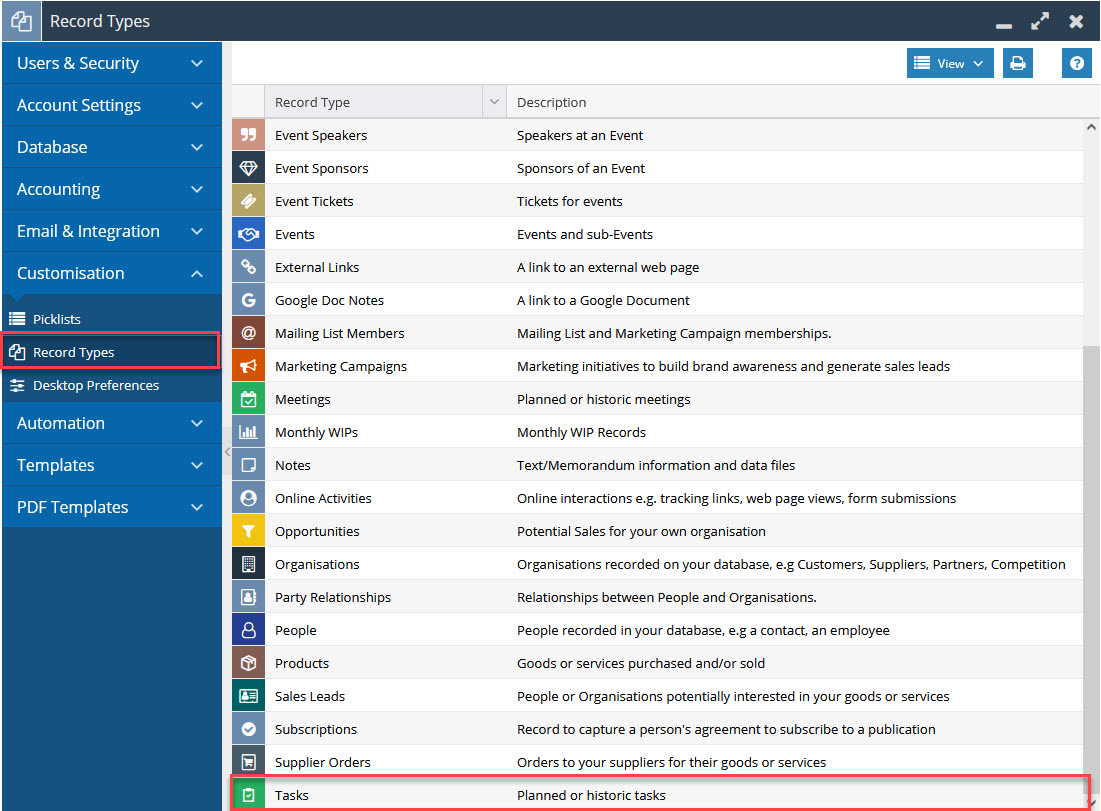
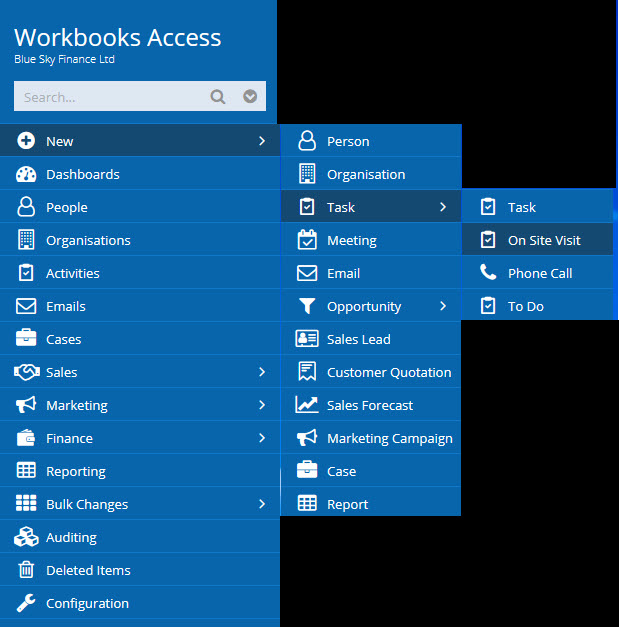
To create a new record template, click Start > Configuration > Customisation > Record Types > [select type of object] > Record Templates > New Record Template.
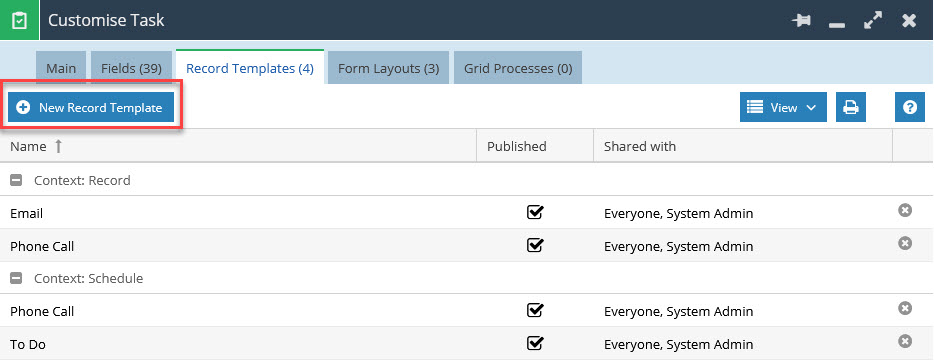
 (Click to enlarge the screenshots below.)
How to create record templates
An example of how this could be used is within Tasks. We'll create a Task Record Template here to setup an "On Site Visit" template. Create a new Record Template using the above method:
- (1) Set the name: It's important that you do not include apostrophes in the naming of your Record Templates as doing so will cause problems with the rendering of your Workbooks User Interface.
- (2) Set the description: This will help users to identify where each Record Template is being used on your database.
- (3) Set the context: For Tasks and Meetings there is an extra field on the Template form called Context.
- Use the dropdown to select 'Schedule' if you want the template to apply to Tasks or Meetings scheduled to happen in the future.
- If the template is to be applied to Tasks or Meetings that have already happened, choose 'Record'. These Tasks and Meetings will automatically be given a status of Complete (and thus will have an Associated State of Closed).
- (4) Published Checkbox: Make sure to tick the checkbox next to Published otherwise the template won't be available for use within your database.
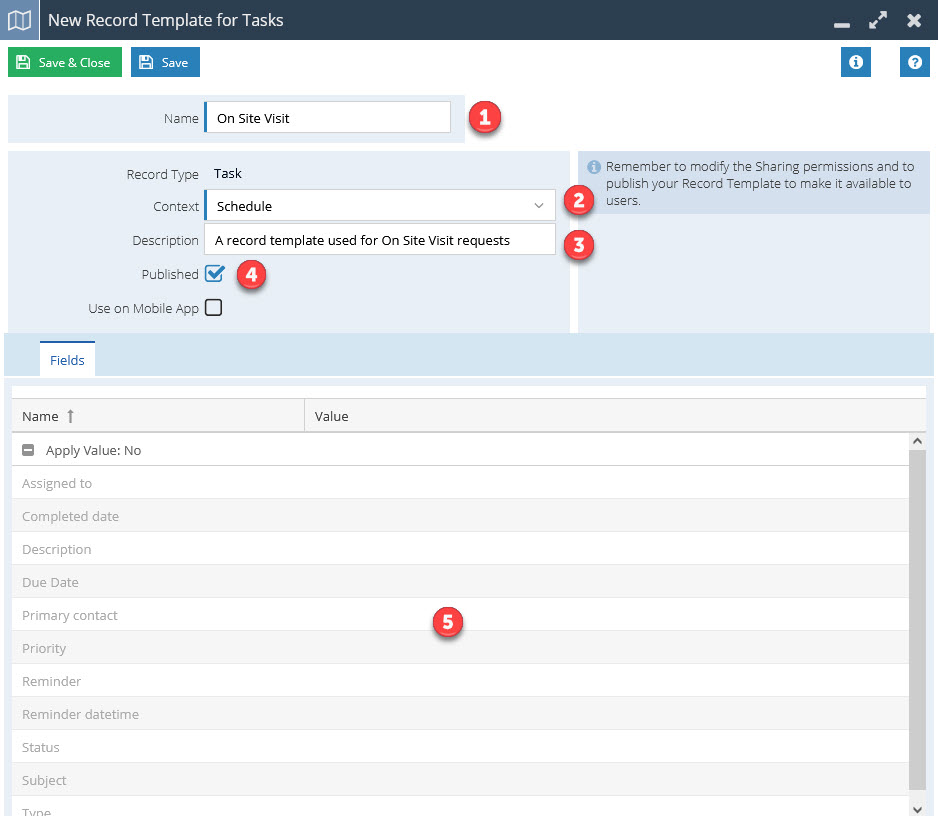
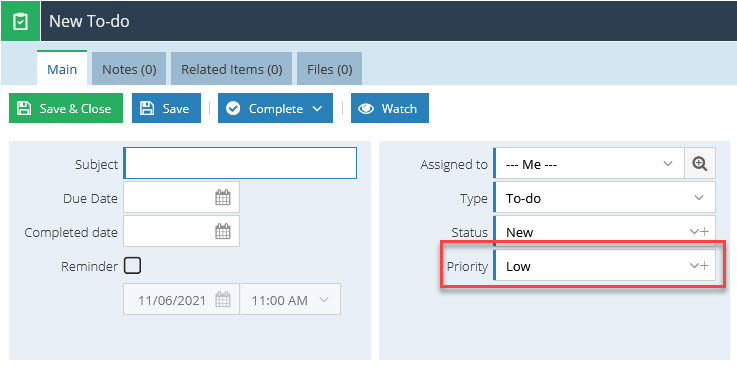
Next, we need to set the fields that we wish to have a default value. You'll see a list of greyed out fields (6) at the bottom of the newly created Record Template. These are the fields that do not currently have a value set. We'll use "Priority" in this example, click on it to open:
- (1) Apply Default Value: Put a tick in the checkbox next to Apply Value, which allows you to enter a value in the (2) Value field. You can use the dropdown picklist to select an existing value or type in a new one. Let's add High. This status will be filled in automatically when a new Task is created using this template.
- Click (3) Save & Close.
You can set as many default values as you like including any Custom Fields that you might have configured. If you choose to add a default value on the "Assigned to" value, it's worth noting that if you set the value to "Me", every record created using that template will show your name in the Assigned to field, not the creating User's name.
When you are happy, remember to click Save & Close on the Record Template itself. Notice that when we click Start > New > Task, the Record Template can now be selected. Creating a Task in this way, ensures that any default we set previously applies to this record:
NOTE: By combining these Record Templates with Form Layout rules you can create/tailor any form design and name needed. For example, you could create two different types of Case: internal and external with different fields auto-populated for each type of Case.
Related content