


Setting your Preferences
What options Users have available within their Preferences such as notification options, language settings and search settings.
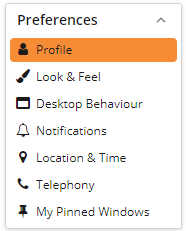
User Preferences are divided into seven different groupings –
Your System Administrator dictates whether any of these settings can be changed at the user level or not. If you’re unable to change a specific setting, reach out to them to see if they can amend the setting for you.
Profile
You can upload a profile picture that shows alongside your name when viewing summaries as Lists (rather than grids). A square image works best.
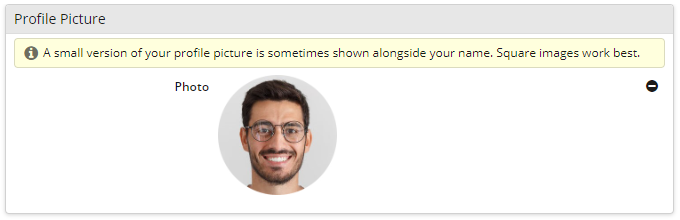
NOTE: When authenticating via Google or Microsoft, Workbooks will use the profile picture uploaded to the respective profile.
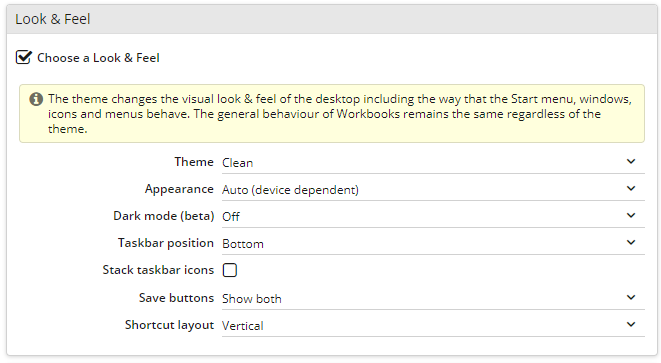
Look & Feel
Within Look & Feel you can change the theme used in Workbooks (Modern or Clean), as well as control where the Taskbar is positioned, whether to display the Save and Save & Close as separate buttons or combined and the layout of any shortcuts. Please see more information about themes here.
You can also choose your own Wallpaper – either one of the standard ones we provide or you can personalise things by uploading your own photo.
Desktop Behaviour
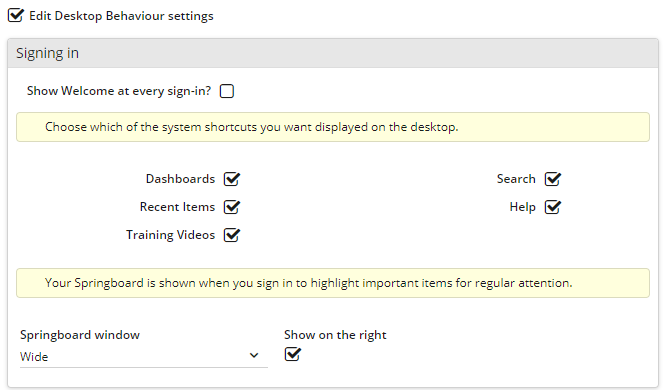
This section controls how you interact with Workbooks – it contains various settings that can help make Workbooks more convenient for you.
Signing in allows you to choose which shortcuts are displayed on your Desktop and the Springboard settings allow you to change the size of your Springboard on log-in, and whether it snaps to the right or not.
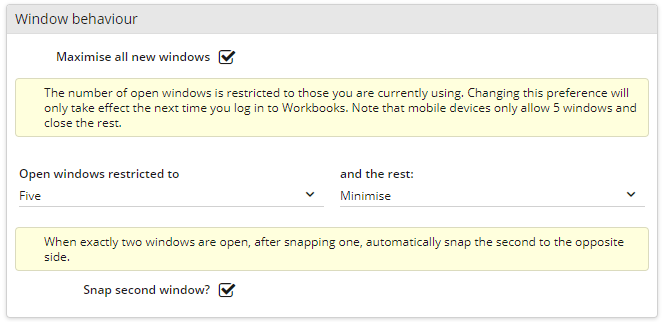
You can control the number of Workbooks windows that can be open at any one time using the dropdown picklist next to Restrict to. You can specify how Workbooks behaves once the maximum number of windows has been reached – either minimising the ‘oldest’ open record to the system tray or closing the record completely. If you choose to close windows, Workbooks will prompt you to save any changes you’ve made before the record closes.
Additionally, you can choose to always open windows in full screen via a checkbox in this section.
NOTE: Changing this setting only takes effect when you next login.
Within this section, you can also specify the day of the week that your Calendar view starts on. You can set your week to start on Sunday, Monday or Saturday.
There are a number of standard desktop shortcuts that appear on Workbooks by default. It is possible to toggle these on/off to suit your needs. The shortcuts that can be changed are Dashboards, Recent Items, Training Videos, Search and Help.
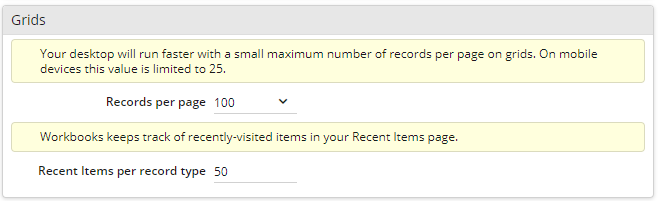
By default Workbooks displays a maximum of 20 rows of data on each page. You can change this default using the dropdown picklist with the Grids section. Please be aware that choosing more rows to display in a grid might impact the speed with which the data is displayed.
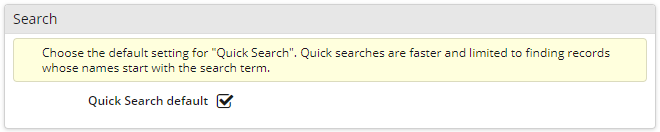
When searching, you have the option to do a ‘Quick Search’, which is limited to finding records whose names start with the search term. Turn this setting off if you would prefer the Search to be more thorough.
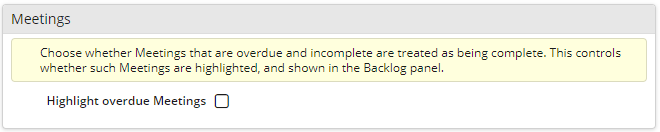
Lastly, you can also choose whether a meeting is highlighted when overdue or not. If you mark you meetings as ‘Complete’ when you finish them, you might find this setting beneficial to highlight overdue meetings.
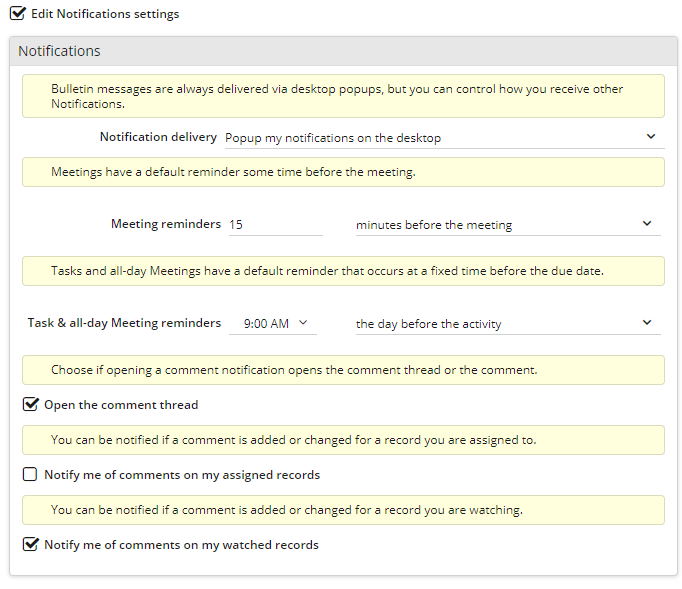
Notifications
Workbooks can deliver desktop popups or emails or a combination of both – you can find out more about this here.
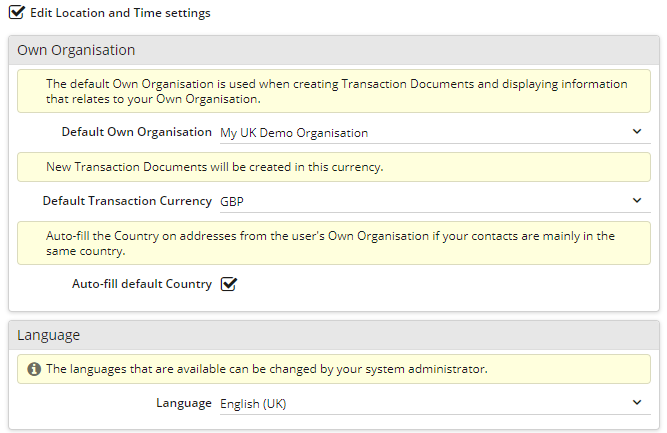
Location & Time
If your Workbooks account contains more than one Own Organisation, you can choose which one should be used by default. The default will be used unless an alternative is selected. If you only have one Own Organisation, only one option will be available in the dropdown list.
You can do the same for your Default Transaction Currency.
When you are filling in the Main Address on a record, Workbooks will automatically populate the Country for you with the Country from your Default own Organisation. If you often deal with Organisations or People from other countries, then you can turn off the ‘Auto-fill default Country’ setting.
If you have the Multi Language Extension, you can choose which language you would like to view Workbooks in. You can choose from the list of languages that your System Administrator has enabled on your database, or you can ‘Use browser default’. ‘Use browser default’ will use the first language in your browser settings that matches the available languages that your System Administrator has set up.
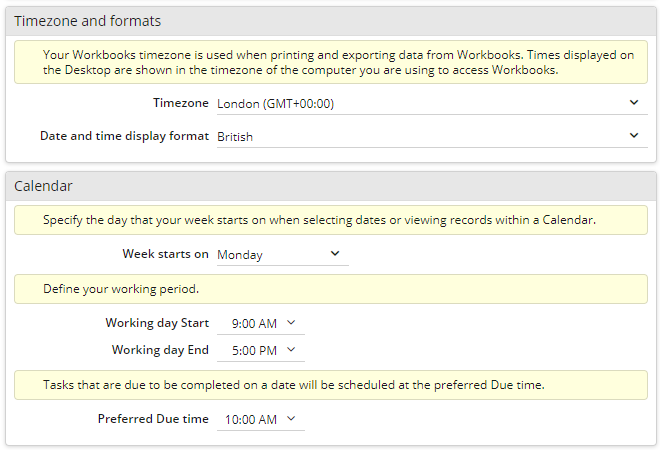
Users that log in to Workbooks in a time zone that differs from their Preferences or that move into a different time zone while logged in will receive a message alert. If the time zone is supported, the time zone of the session will be updated to match it. Otherwise, the time zone that is set in the user’s Preferences will be used. The timezone that is set in Workbooks is only important for when you Export to CSV, XLS or you are printing records as this is what will control the timezone of the data when exporting or printing.
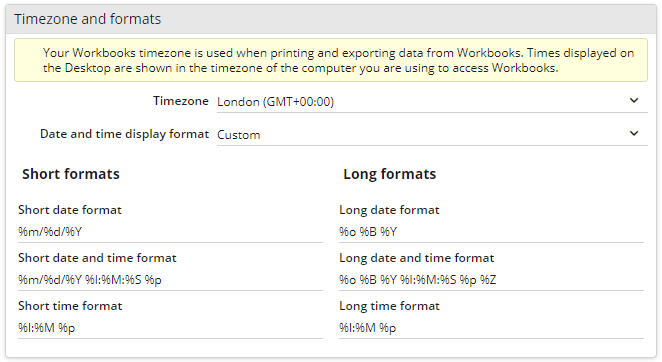
Using the Date and time display format dropdown you can specify how you want your dates to appear, British, American, International and Custom. Choosing Custom will present additional options for short and long formats.
A date format contains placeholders that start with ‘%’, that will be replaced by the equivalent date/time value. For example, if I were to type “%Y” the ‘%Y’ will be replaced with the date’s 4 digit year in your Start menu. Some more examples of formatting you could use include, but are not limited to:
%A – The full weekday name (“Sunday”)
%B – The full month name (“January”)
%I – Hour of the day, 12-hour clock (01..12)
%p – Meridian indicator (“AM” or “PM”)
You can also edit various calendar settings here, such as ‘Week starts on’ day setting and ‘Working Day Start/End’ times settings.
Telephony
If you want to use VOIP software with Workbooks you may need to modify the default settings provided here for the formatting of phone links and the country code.
Workbooks can be configured to work with a variety of telephone systems. By default, Workbooks uses:
- callto:@number@, as it’s the most widely-used
but depending on your telephony system, you might need to change this to:
- tel:@number@
- sip:@number@
or a URL such as:
- https://system.com/@number@

My Pinned Windows
Throughout Workbooks you’ll see the pushpin symbol towards the top right hand corner of all Landing Pages and records. Clicking on this symbol changes the symbol and causes the Landing Page or record to open when you first login.
NOTE: The window will appear the same size and in the same position as it was when you pinned it. You can stop the window from opening on login by clicking on the pushpin again or by deleting the option from the My Pinned Windows section within Preferences.

In addition, there are a few other settings that can be managed from the user preferences screen –
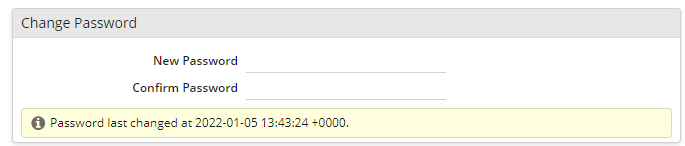
Change Password
Within the Security section of the column on the left, click Change Password. You’ll need to enter your current password followed by your new password twice. The format of the password will be based on the configuration of your system; your System Administrator should be able to help you if you are having difficulties. To return to the main screen select the Preferences icon.
NOTE: Depending on how your System has been configured you may not be able to reuse a previous password. For security reasons the reuse of passwords is not recommended.
Trusted Identities
Instead of logging in using your email address and password you can use a Trusted Identity. You can use Open ID or Google Apps.
NOTE: If you want to use the Google Docs functionality within Workbooks you must be logged into Google Apps. For more information on logging in via Third-Party Identities, click here.
API Keys
Within the API Keys section, you can see all the API keys you own and can edit their capabilities and access like normal. See our full page on API Keys for more information.
Email Accounts
If you’ve been given the right capabilities (ie, Manage Email Credentials and View Email Credentials) you can set up new Email Connections which allow you to send emails from an ‘alias’ address. For example, you might want to send emails from a generic address such as support@xyz.com or sales@xyz.com and so on.
For more information on setting up new accounts please click here.
Email Signatures
You can set up one or more Email Signatures for use when sending emails from Workbooks and define one of them to be the default one that’s applied to your outbound emails. To set up a signature, click on My Signatures in the left-hand column and then click New Signature.
Give the signature a name and enter the text in the Body. (You can enter your signature as HTML by first clicking the HTML button in the formatting toolbar.) If you want the signature to be used as your default, remember to tick the checkbox next to Default Signature.
You can control whether or not the signature can be applied to Email, Notes and Google Docs templates using the appropriate checkboxes. Finally, in order to be able to use this signature, click Activate.
Email Dropbox
Workbooks users can send emails from within the system which are stored against the relevant record(s). The Email Dropbox extends this functionality so that inbound emails or those generated outside Workbooks can be sent to a special Workbooks address, which will then automatically store the email and any attachments against the relevant record(s).
To enable this functionality the user should generate a Dropbox email address and specify who can send emails to that address. For more information on Dropbox, click here.
Integration
If you have the Workbooks Exchange Server Sync set up on your account, you will be able to monitor it here.