









Creating Custom Record Types
Custom Record Types allow you to extend Workbooks with entirely new business objects that sit alongside standard record types such as Organisations, People, Cases and Opportunities. They are ideal when you need to capture information that does not naturally fit within the standard Workbooks data model while still benefiting from familiar functionality such as Custom Fields, Form Layouts, Reporting, Imports, API access and security permissions.
Before You Begin
Before creating a Custom Record Type, ensure that:
- The Custom Record Types module is available and enabled within your database.
- You have System Administrator access.
Creating a Custom Record Type
- Navigate to: Start > Configuration > Customisation > Record Types
- Click Add Custom Record Type to begin creating your new record type.
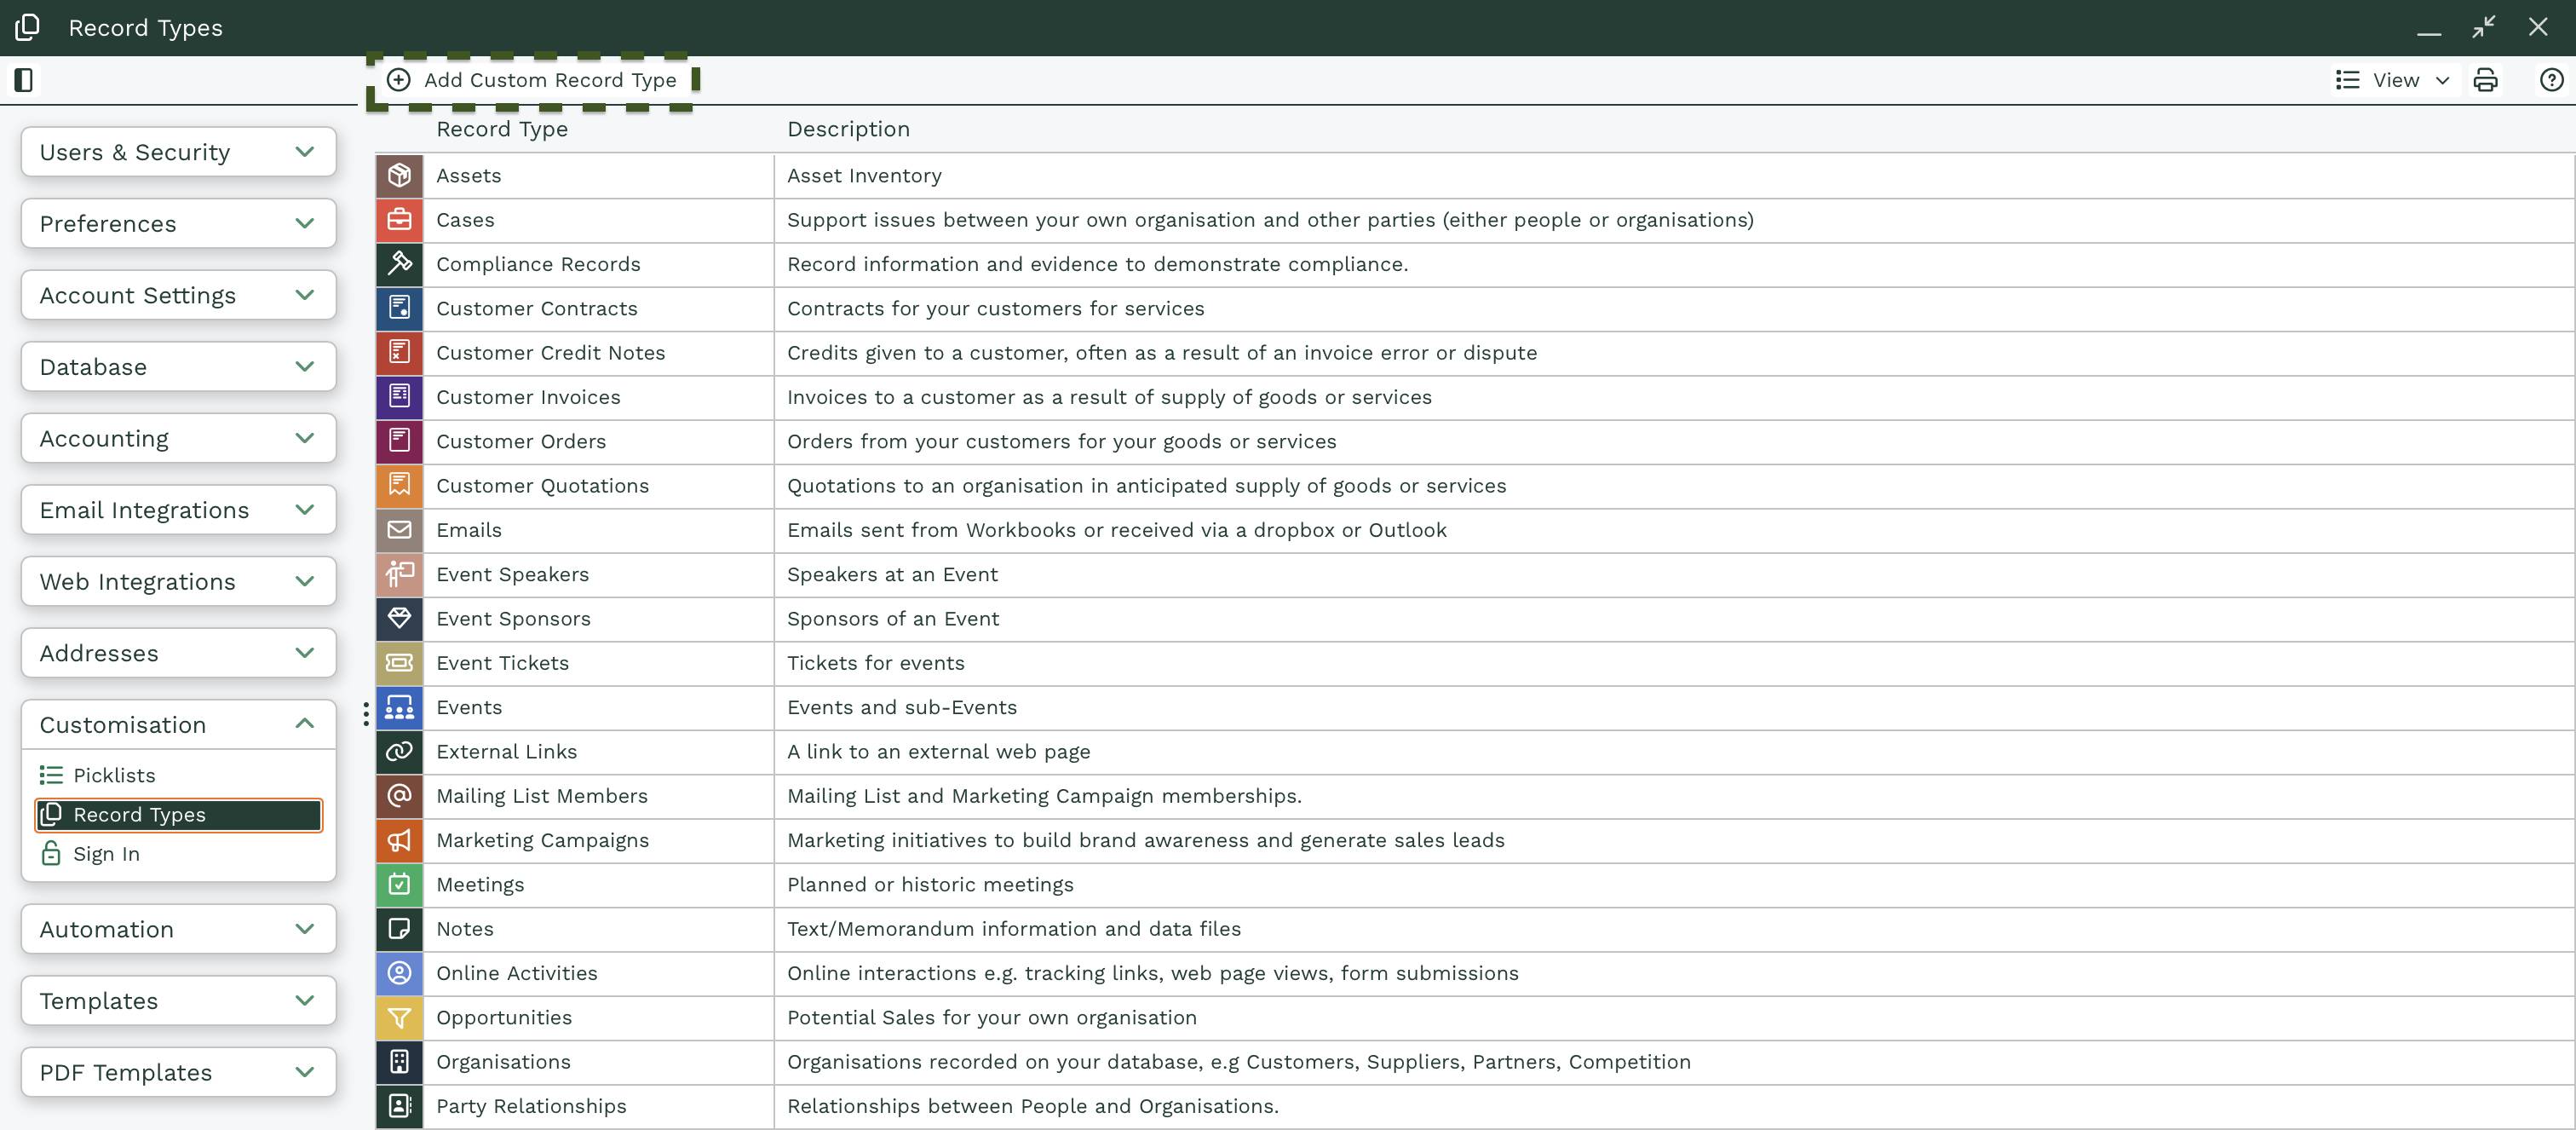
Configuration Options:
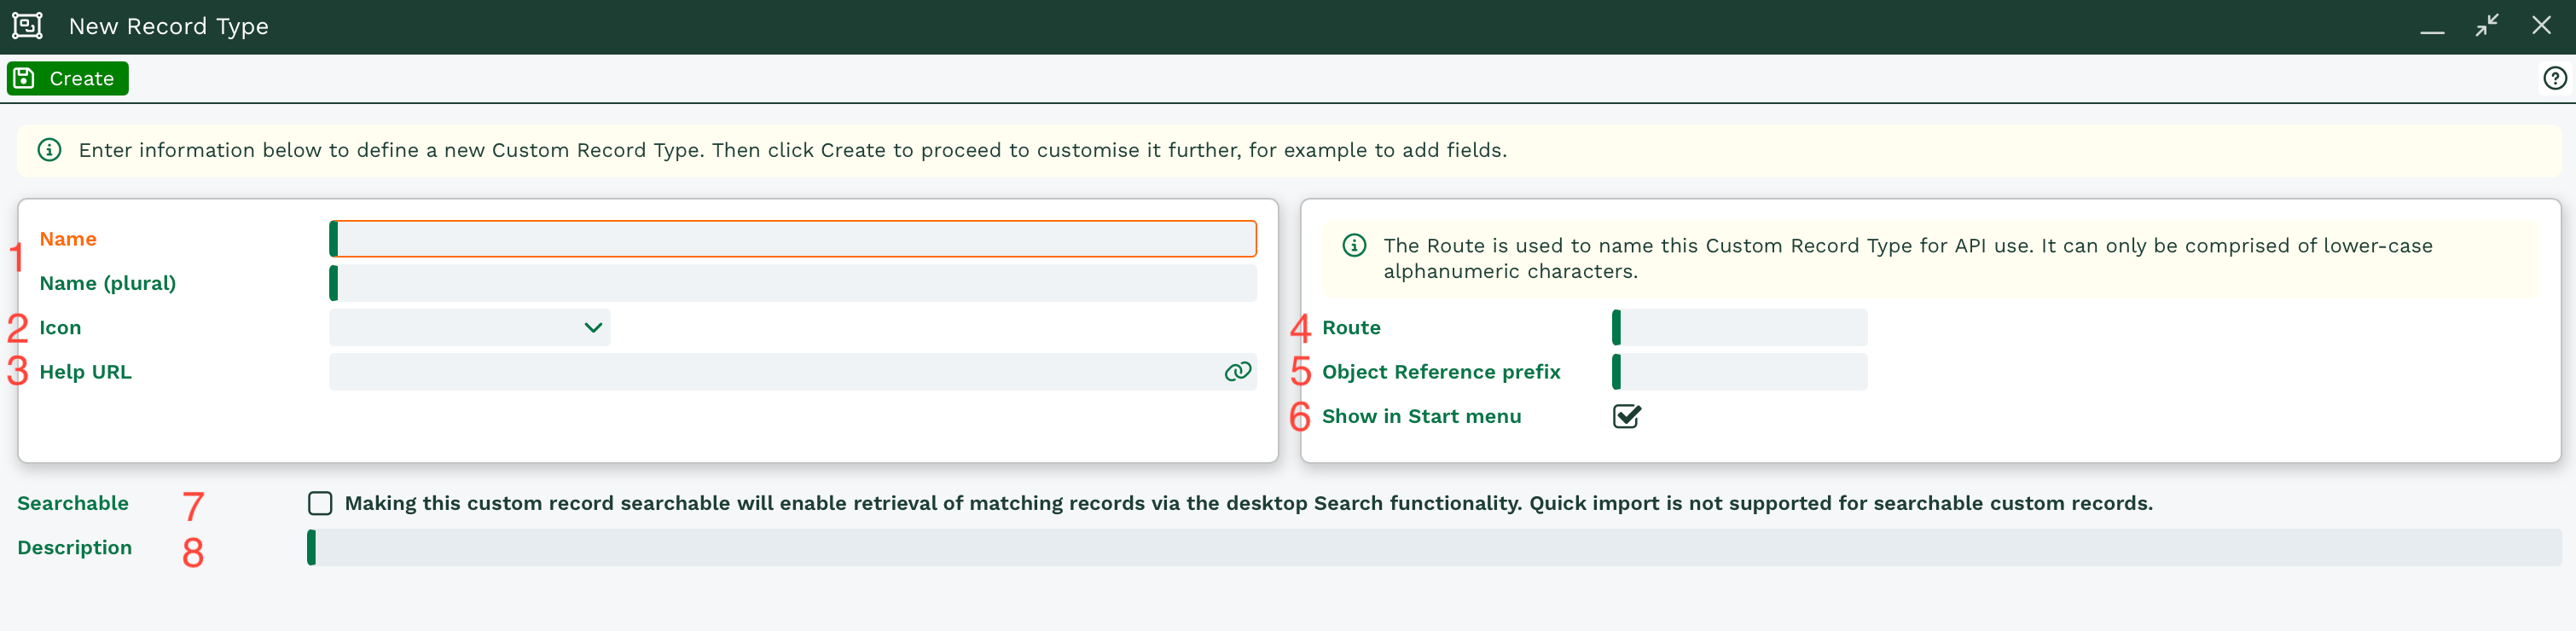
1. Name and Name(Pural)
The name of the Custom Record Type, as users will see database.
2. Icon
Select an icon that represents the Custom Record Type and helps users easily identify records. The icon will be displayed throughout Workbooks, including the Start menu and Landing Pages.
3. Help URL
If you have internal documentation or a knowledge base, you can provide a URL here. Users who click the Help button on the record will be directed to the specified page.
4. Route
The Route defines the API endpoint used to access this record type.
For example, a Route of Custom Record type:
asset
would create an API endpoint similar to:
custom_record/asset.api
5. Object Reference Prefix
Defines the prefix used when generating unique record references.
For example:
ASSET
will create Object References for new Records for the ASSET Custom Record Type:
ASSET-1
ASSET-2
ASSET-3
6. Show in Start Menu
When enabled, the record type will appear within the Start menu. Users must still have the relevant View capabilities to access these records.
7. Searchable
When enabled, Users will be able to search for custom records using Workbooks Search Functionality available on Workbooks Desktop and Start Menu
8. Description
Enter a description explaining the purpose of the record type. This helps administrators understand how the record type is intended to be used.
After Creating the Record Type
Once the record type has been created, Workbooks opens the customisation area for that record type. From here you can:
- Create Custom Fields
- Create Relationships to other records
- Configure Form Layouts
- Access API Metadata and documentation
Standard Fields
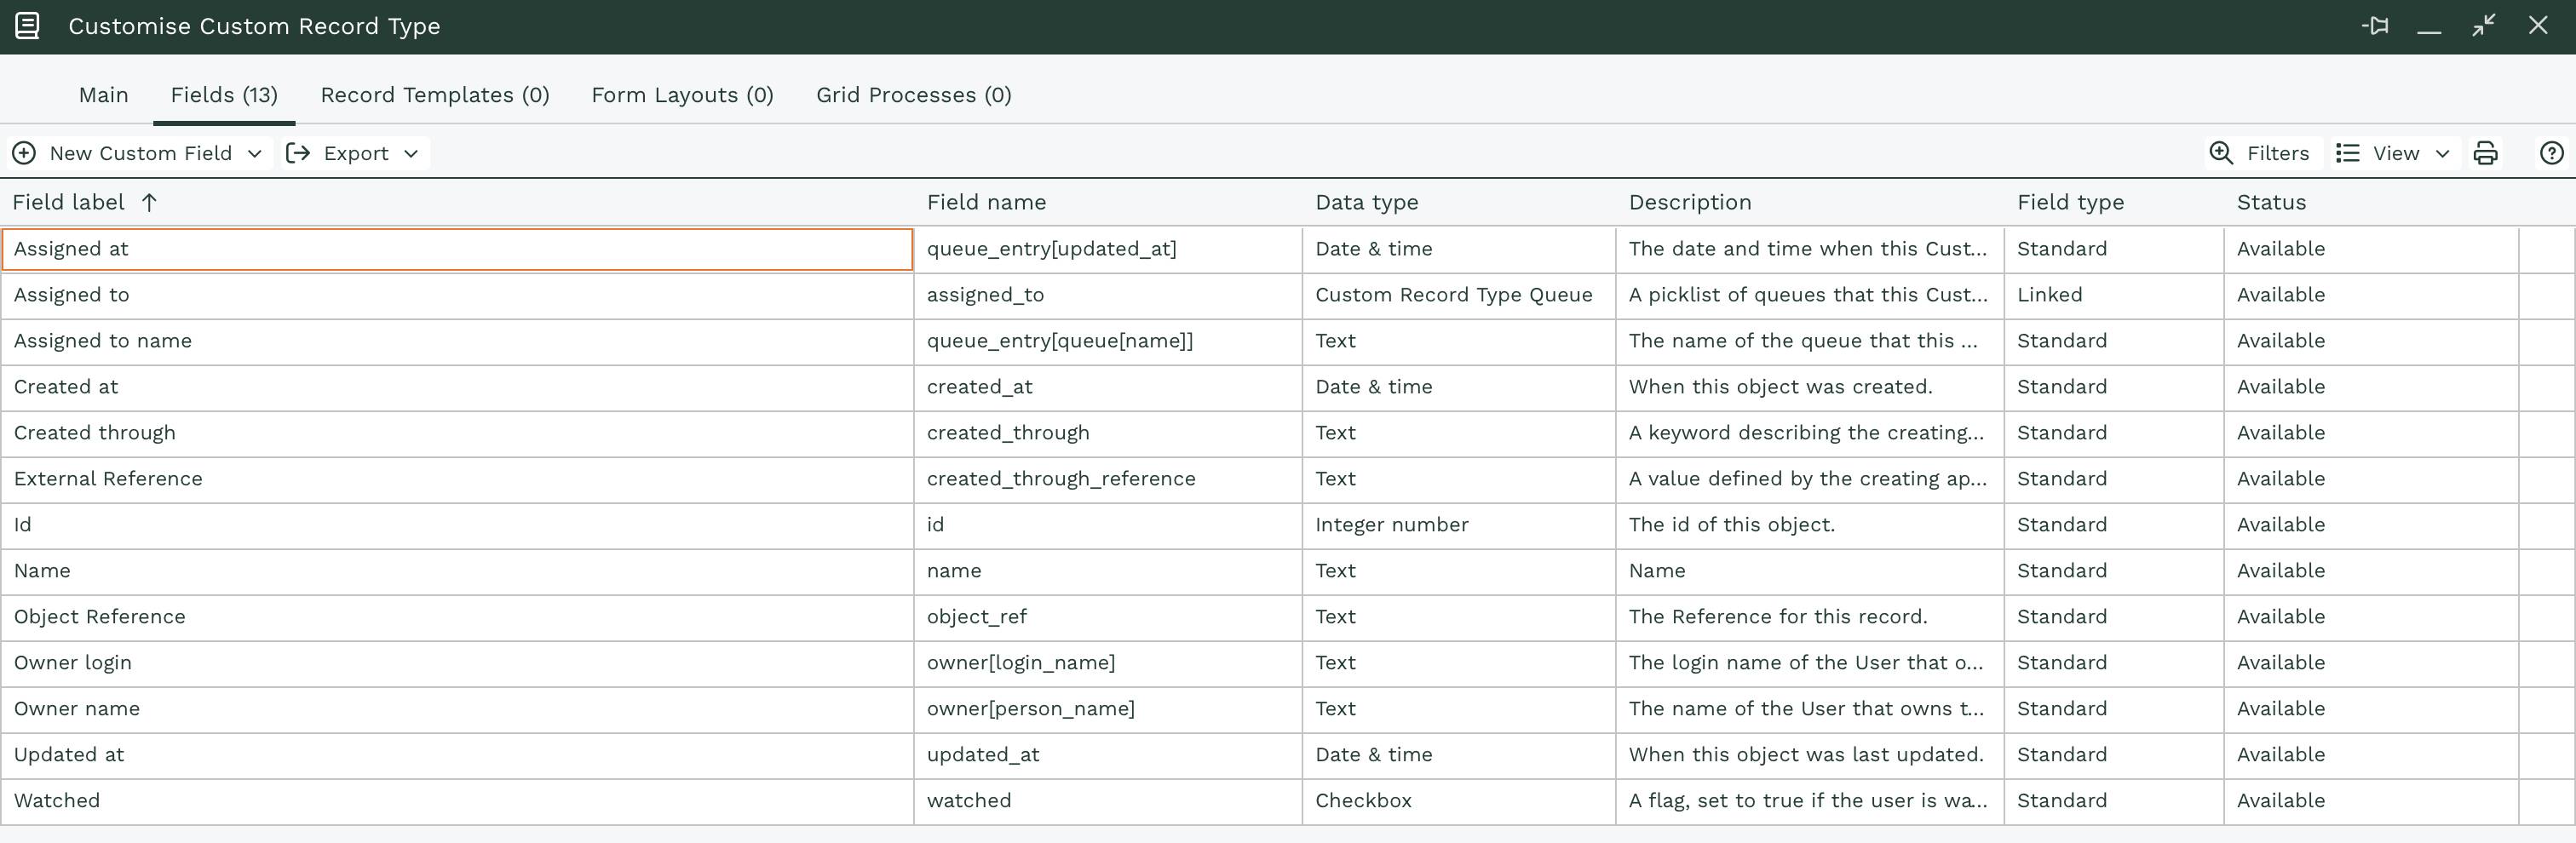
New Custom Record Types are automatically created with a set of standard fields, including fields such as Name, Assigned To, Created By, Updated By and Object Reference. By default, thirteen standard fields are created for each Custom Record Type.
Security and Permissions
When a new Custom Record Type is created, Workbooks automatically generates the following capabilities:
- View
- Create
- Modify
- Delete
- Allow Editing in Grid
Initially, only System Administrators have these capabilities. If other users require access, assign the appropriate capabilities through User Groups.
Create a Form Layout
A newly created Custom Record Type will not automatically have a useful layout for end users. To make the record usable, create at least one Form Layout and share it with the appropriate users. Without a Form Layout, users may only see a limited number of fields on the record.
Landing page View
The Landing Page for your custom object will show the record’s Name, who it’s assigned to and the object reference but as with all grids, you can customise this to suit your needs.
Optional: Remove the Requirement for a Name Field
Some Custom Record Types do not require an individual name for each record. When appropriate, the Custom Record Type can be configured so that the Name field is not mandatory.