









Knowledgebase articles
- Welcome to the Knowledge Base
- Training
- Welcome to Workbooks Support: Your Go-To Guide
- Workbooks Customer Hub
- Getting Started
- Preferences
- Activities
- Cases
- Email
- Importing Data
- Leads
- Marketing
- Introduction to Marketing
- Mailshots
- Templates
- Event Management
- Compliance Records
- Spotler Integration
- What is Spotler?
- Navigating your Spotler homepage
- Introduction to GatorMail
- GatorMail Configuration
- GatorMail Hard Bounces
- Advanced Features
- Sending Emails in GatorMail
- GatorCreator
- Setting up the Plugin
- Viewing Web Insights Data on your Form Layouts
- Domain Names and Online Activities
- Reporting incorrect Leads created through Web Insights
- Reporting on Web Insights data
- Using UTM Values
- Why aren’t Online Activities being created in the database?
- Why is GatorLeads recording online activities in a foreign language?
- GatorSurvey
- GatorPopup
- Dotdigital
- Integrations
- SFTP/FTP Processes
- Docusign Integration
- DocuSign Functionality
- Adobe Sign Integration
- Zapier
- Introduction to Zapier
- Available Triggers and Actions
- Linking your Workbooks Account to Zapier
- Posted Invoices to Xero Invoices
- Xero payments to Workbooks Tasks
- New Case to Google Drive folder
- New Case to Basecamp Project
- New Workbooks Case to JIRA Ticket
- Jira Issue to new Case
- 123FormBuilder Form Entry to Case
- Eventbrite Attendee to Sales Lead and Task
- Facebook Ad Leads to Sales Leads
- Wufoo Form Entry to Sales Lead
- Posted Credit Note to Task
- Survey Monkey responses to Tasks
- Multistep Zaps
- Email Integrations
- Microsoft Office
- Auditing
- Comments
- Using Postcode Lookup
- Data Enrichment
- Reporting
- Using Reports
- Advanced Reporting
- Reporting FAQs
- Transaction Documents
- Displaying & Adding Transaction Documents
- Copying Transaction Documents
- Transaction Documents Fields Help
- Transaction Documents Line Items Help
- Printing & Sending Transaction Documents
- Managing Transaction Document Currencies
- Managing Transaction Document Statuses
- Setting a Blank Default Currency on Transaction Documents
- Credit Notes
- Customer Orders
- Invoices
- Quotations
- Supplier Orders
- Sagelink
- Configuration
- Releases & Roadmap
- Workbooks Glossary
Amending Event Portal Parameters
Last updated : 5th October 2026
Once the Event Portal has been installed, you can change any of the parameters that were set during the installation.
To access the parameters, go to Start > Configuration > Other Integrations > Event Management. This opens the Event Management Configuration page, which shows all of the parameters and your current settings.
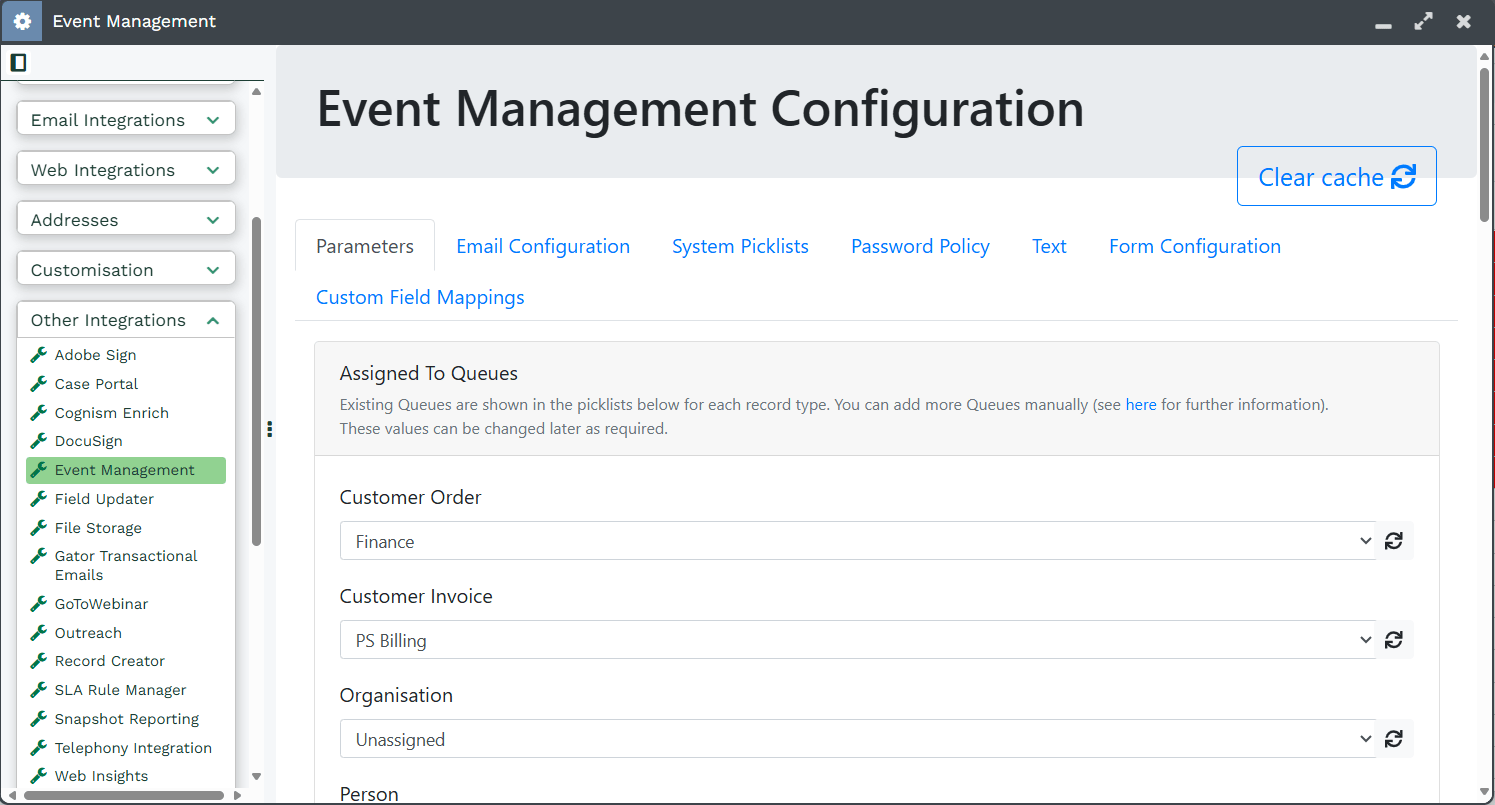
From here, you can access seven tabs, each relating to a different part of the plugin:
- Parameters: mostly settings that control the look and feel of the Portal.
- Email Configuration: the Email Account and templates used by the Event Portal.
- System Picklists: which picklists are used throughout the Portal, such as Dietary Requirements and Countries.
- Password Policy: how many characters, and what type of characters, must be used in Portal User passwords.
- Text: customize any information text that appears throughout the Portal, such as at the top of the Order Details page.
- Form Configuration: whether to show the phone number for free events, and the default customer type during the registration process.
- Custom Field Mappings: edit existing Custom Field Mappings, or add new ones, that are set within Workbooks.
Was this content useful?