September 2023 Release
Release date: 9th September 2023
This exciting release is one of our biggest yet, and includes some great enhancements to Activities, plus the introduction of other new features, including:
- Drag-and-drop Calendar
- Project Records
- Kanban View
- Comments
Security change – Screen Lock
For added security, we have introduced a screen lock, which will lock Workbooks if left inactive for more than 30 minutes. You will be asked to enter your password to unlock the screen. This has been introduced to protect the data you store in Workbooks in case your computer is left unlocked and unattended.
This will only impact users who have Password Login enabled. The timeout duration can be changed by a System Admin in Configuration > Account Settings > Authentication. We highly recommend that this setting is left enabled if your company has not implemented automatic Lock Screen timeouts on your computers. In this area you can also now amend the Inactivity Timeout, which currently defaults to 8 hours. Find out more details here.
Your Activities
We have made many improvements to Activities, giving you more options for how you create, edit and schedule them:
Scheduling Tasks
The first difference you’re likely to come across is on Tasks. We’ve amended the Due field so that it can be set for a specific time, not just a date. We’ve also introduced two new fields, Start and Finish. Just like Meetings, the Start and Finish fields allow you to schedule when you will carry out the Task, helping you plan out your days. For example, you may need to put together some slides for a meeting that is happening on Friday, so you set the Due to Friday, but you schedule to spend Thursday afternoon working on them.
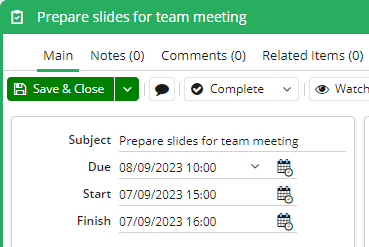
For all three fields, the time is optional, and you can simply select a date only, if you prefer. Similarly, you don’t have to populate the new Start and Finish fields at all, but we hope you find them useful in managing your workload.
These new fields will be added automatically to most of your Task Layouts but can be removed by a System Admin if they’re not needed.
Find out more about using Activities here.
Editable Calendar View
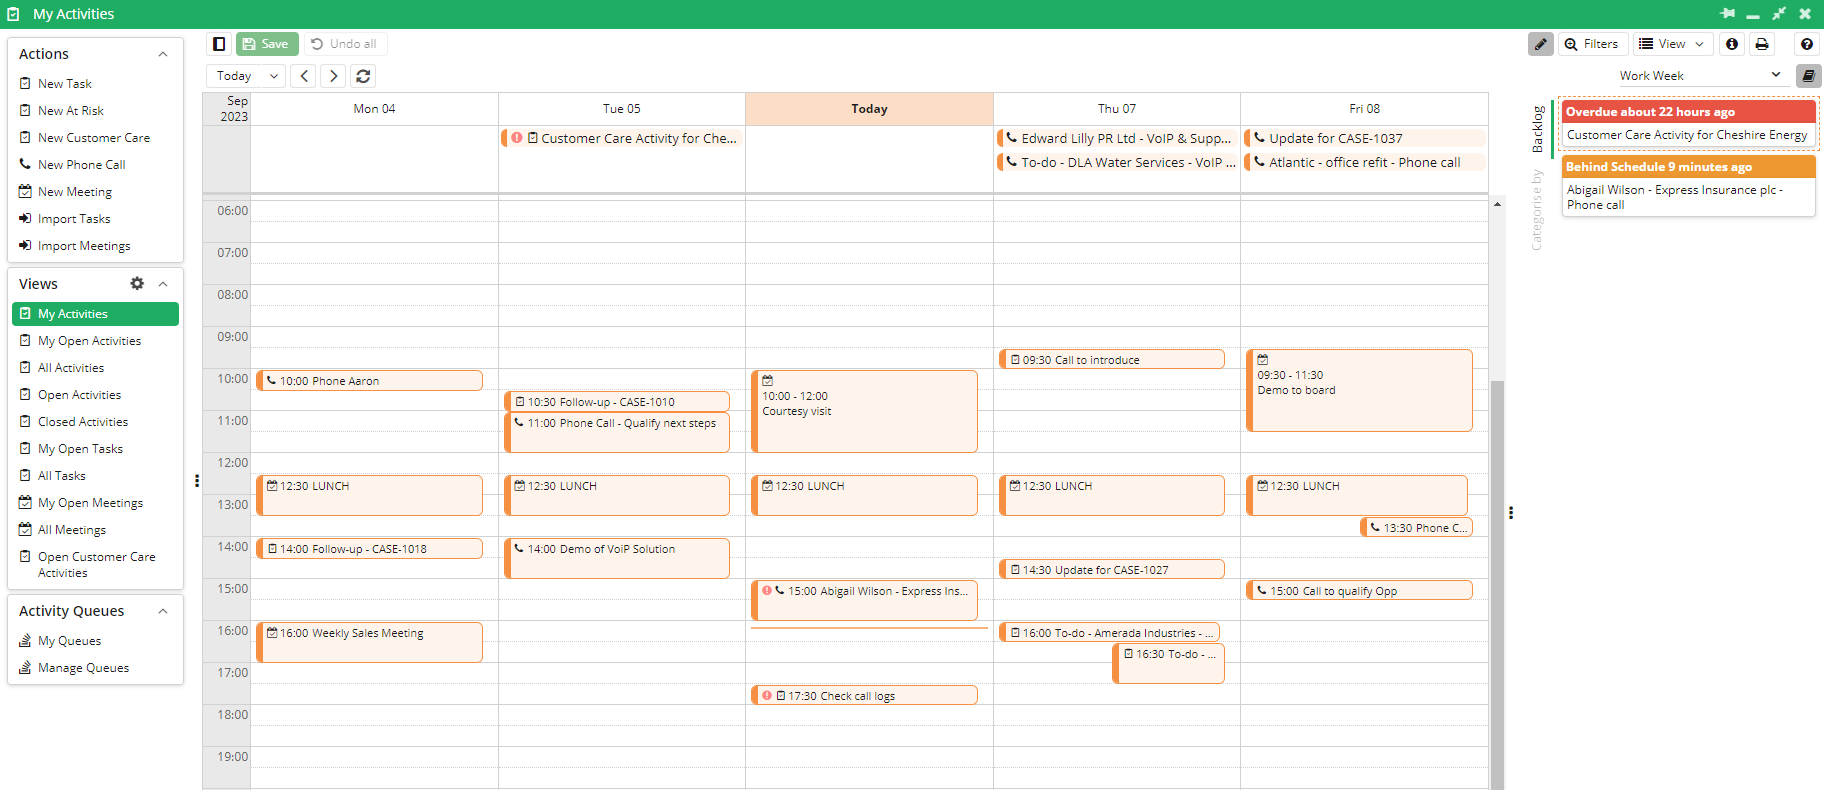
Thanks to the new fields mentioned above, our Calendar View can now bring Tasks and Meetings together in one view, giving you a unified view of all your Activities and helping you see what you’ve got planned for the day/week/month. The Tasks will show in the Calendar at the times you’ve set in Start and Finish, or at the Due Time, helping you to plan in your Task around the Meetings you have.
Not only that, but the calendar now has an Editable Mode, allowing you to drag and drop your Meetings and Tasks around to update their dates and times. It’s also easy to create new Activities from within the Calendar.
On the right-hand side, the Calendar View displays your Backlog: open Tasks that have a Due or Finish in the past, that are not marked as complete. These Activities can be dragged into the calendar to re-schedule them, to help ensure you don’t overlook any actions.
You’ll get this new Calendar View by default on the new ‘My Activities’ View, or by choosing View > View as Calendar on your other Views.
Note, we’ve moved where the ‘Categorise By’ and ‘Arrange By’ settings are kept, they are now found in View > Configure View.
You can find out more about how to use the Calendar View here.
My Activities View
We’ve created a new View called “My Activities”, which will open automatically when you go to your Activities Landing Page (unless you’ve already set a different View as your Default).
“My Activities” automatically displays as our new editable Calendar View, described above. This allows you to see everything in the calendar that you have going on in your work week, even after Activities have been completed, unlike the “My Open Activities” View. If you don’t want to use this, you can change your default view by going to the View you want and clicking View > Set as My Default View.
Activity Card View
The ‘View as Activity List’ view has been renamed and is now ‘View as Cards’. With that change comes the ability to customise what information appears on the Cards by clicking View > Configure View. Information on how to customise a Card View is available here.
Edit Grid
The Edit Grid functionality is now available on Activities, so both Meetings and Tasks can be edited in one grid at the same time. You can access Edit Grid mode by clicking the pencil icon to the left of the filters button. Note to Sys Admins: The ‘Allow editing of Activities in grid’ Capability has been added to the Everyone User group so all Workbooks users will be able to make use of this functionality.
We’ve also added the ability to create new Tasks and Meetings in the grid, making it much faster to add multiple Activities in one go.

Date Picker
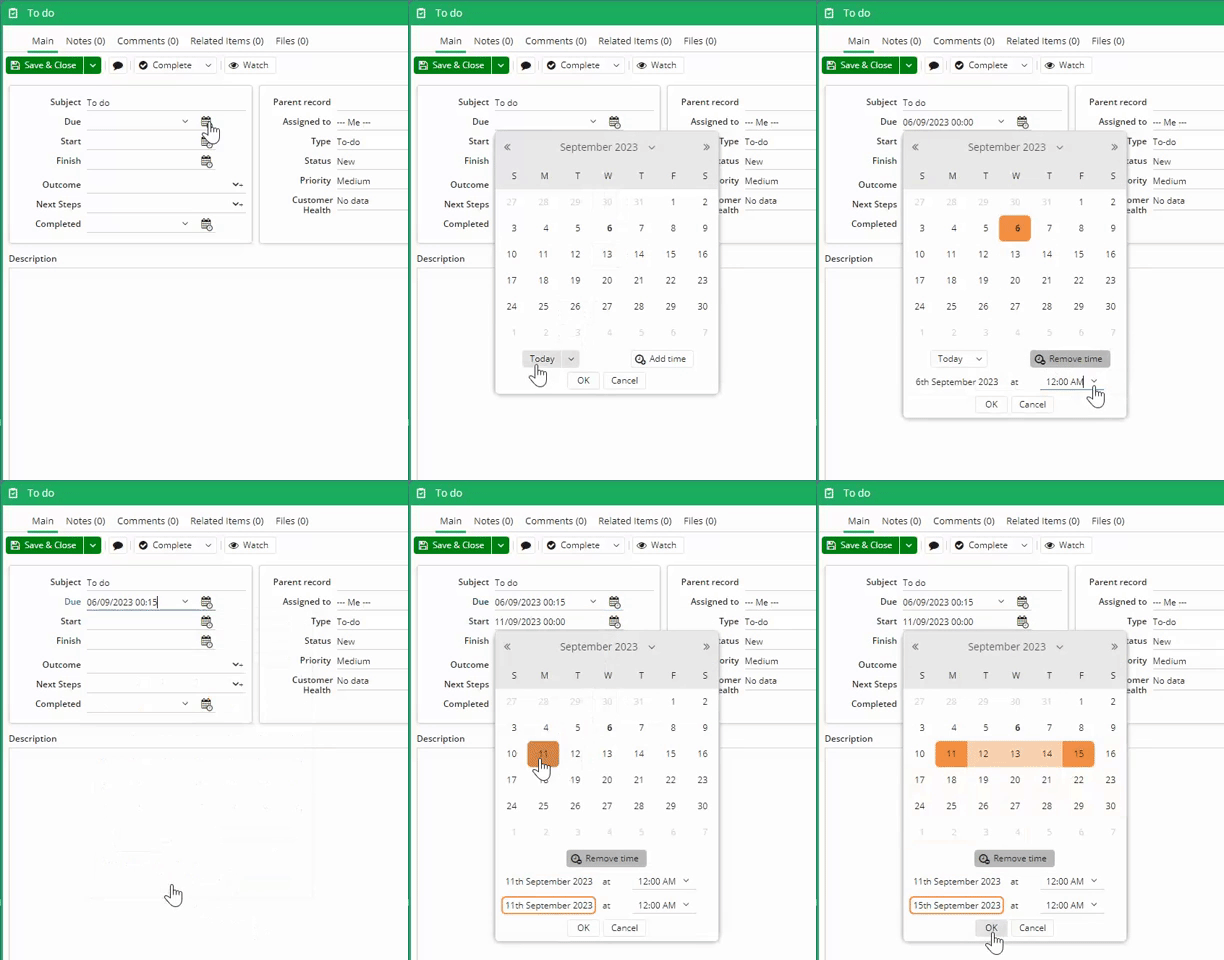
You’ll note the look of Date-time fields has changed slightly, and the Date Picker has been updated to support this, allowing you to select the time within the picker. When selecting the Start and Finish dates, you can now select the range, setting both Start and Finish in one go.
Parent Record
We have added a ‘Parent Record’ field on Activities to make it easier to see what other record they are relevant to. This field will be populated automatically depending on what record you create the Activity from. This will make it clearer for you to see what you are working on as well as making it easier to navigate to the related records.

Bulk Actions
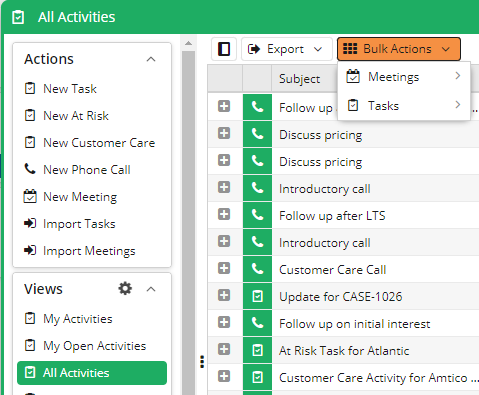
You can now perform Bulk Actions from the Activities Views, whereas before this option was only available on the Tasks or the Meetings Views. You’ll see a split button to control whether the action applies to the Tasks or the Meetings in that View.
NEW Comments
We’ve introduced Comments to make it easier to share information with your colleagues. Comments are like mini notes, linked to a specific record in Workbooks. You could use them to ask questions or offer insight into a record. They offer a great way to collaborate informally. All Users will be able to see and create them. You can @ other Users, which will notify them that you’ve commented and you’ll receive a notification when they respond. You can also be notified when someone comments on a record that is Assigned to you or that you watch, which you can control in your Preferences. You can upload files to Comments and add a range of emojis.
Find out more about comments here.
NEW Project Records
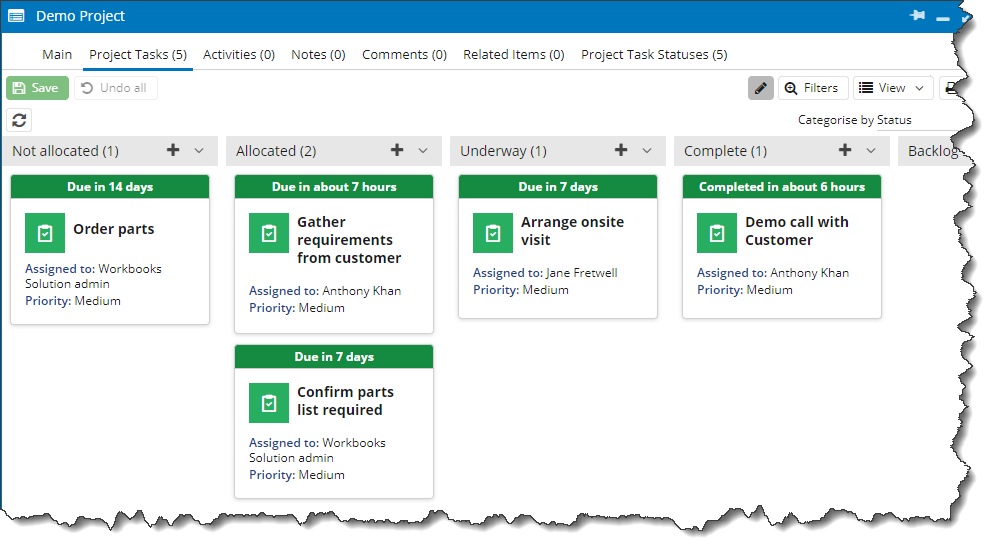
Many of our customers manage projects within Workbooks, so we’re enhancing the platform especially for this. First up is a new Project record type, where you can manage your Project Tasks, together with a new Kanban View for managing those Project Tasks. You could use these for managing internal projects, or for projects you run with your customers.
This is only the first phase of this module, so keep an eye out in our future releases for more Project features. At the moment, this new Module will be included in Professional Licences, so some of you will start seeing Projects in the Start menu.
You can set different Project Task Status values for each Project – for example, an internal Project to redevelop your website might require Status options such as “Content Created” or “Content Approved”, whereas an external Project to install new hardware for a customer might require something more like “Survey Completed”.
Find out more about Projects here.
Kanban View
You can view your Project Tasks in a Grid or Calendar view but we’re excited about the availability of the new Kanban View.
You can quickly add new Project Tasks using the + button on each column, control which columns you want to see, drag and drop from one column to another to change the relevant attribute of the Task and control which fields you see on the Task cards.
Users with a Professional licence and the Projects Module will also be able to apply a Kanban view to their Activity Views.
RingCentral Integration
For those of you using RingCentral, our integration just got better. The integration now supports screen-popping for inbound calls, giving you visibility of who’s calling you and allowing you to decide whether or not to answer. If you do take the call, you’ve then got easy access to that person’s information, which increases productivity as no time is spent trying to find the right record. You can create Task records at the click of a button to track your calls and the recordings of calls you make or receive are uploaded automatically to those Tasks.
To increase efficiency even further, when making outbound calls, you can click on the relevant phone number within Workbooks or you can start typing the Person or Organisation’s name into the RingCentral widget.
Find out more here.
More changes not to be missed…
Search
Our previous ‘Quick Search’ was limited to only searching the Name of your records. We have expanded it to other fields. It’s now much faster to see results when searching by email addresses, telephone numbers, postcodes, and alternate names. You can add your own custom fields into the Quick Search too.
Note: the Quick Search won’t be available on the new fields immediately after the release, as it will take a while to update each database, but will be available after a couple of weeks.
The Search function also will no longer run an Extended Search automatically, and instead will prompt you first:
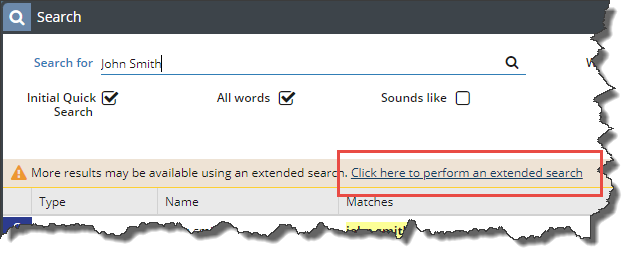
This will give you more control over wait times for results.
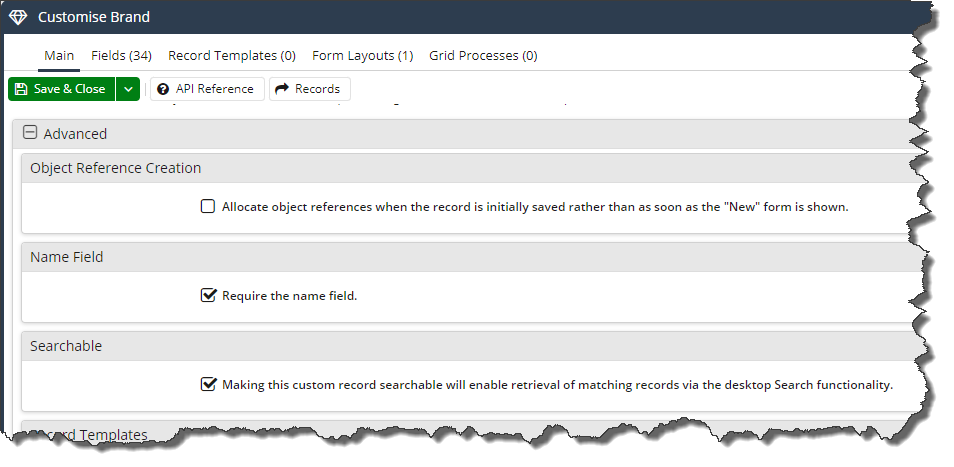
You can also now control whether Custom Records are searchable or not. All your existing Custom Records will be defaulted to Searchable as per their current behaviour, and therefore you might want to disable these. Custom Record Types created in future will not be searchable by default and must be enabled where required. This can help reduce the unnecessary results in Search if you use Custom Records to manage configuration, settings or data snapshots that you wouldn’t search for.
Report View Landing Page
The Reporting Landing Page now includes Views showing all your Report Views. This makes it easier to find the reports in your database, from their Summary View name or description, and you’ll also be able to identify where fields are used in Report Columns or Criteria.

Preferences
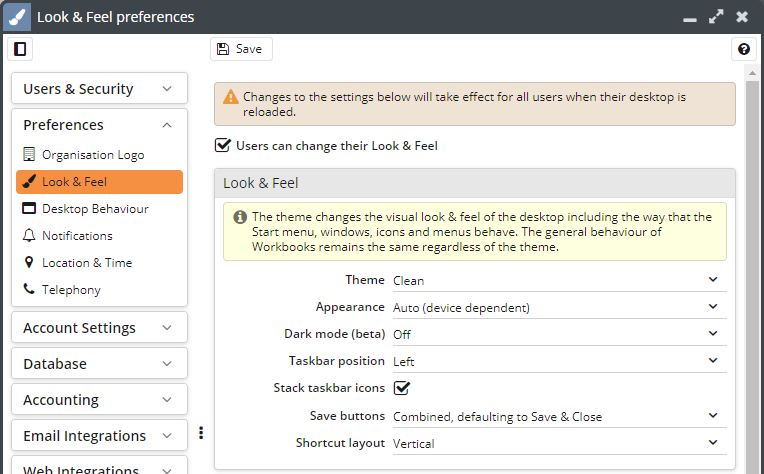
The Preferences area has been split out into separate areas to make it easier to find the right setting. We’ve also made it possible for System Admins to control the default Preferences for all Users.
Dashboard Card Views
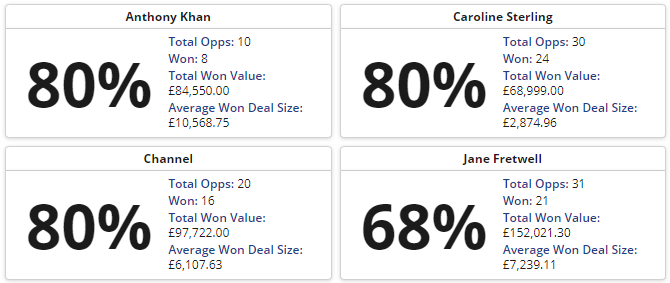
We’ve introduced some new Card View layouts so that you have more options for displaying your reports in a format that is easy to read and brings more focus to the data you need. Try these out on your Dashboards.
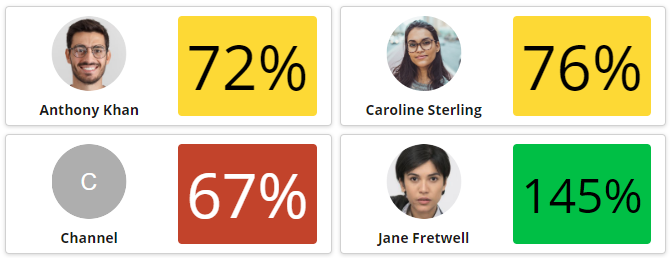
Multi-Card with image & targets (2 col.)
Multi-Card with value & details (2 col.)
Changing Currency
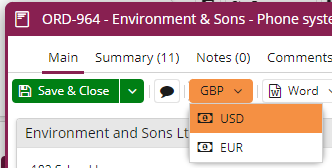
In response to customer requests, we’ve added the ability to change the currency on your Transaction Documents. You can choose to change the currency but keep the numerical values, or convert the currency using your prevailing exchange rate.
Some other small changes…
-
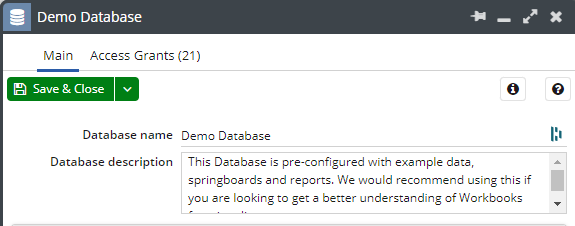
If you have access to multiple databases, you’ll see we have adjusted the Database Selection screen to simply display the names of the databases. We have also added the ability for a System Admin to give a description to the databases, which will also show on the Database Selection screen and can therefore be used to guide users to choosing the correct database.
-
Dynamic Linked Item fields now have a setting to allow them to be searched by ‘contains’ rather than ‘starts with’.

- There are new Capabilities to help you control what buttons show on the screen, especially for users that only need very basic access to Workbooks Records:
- View Object Information – removing this Capability from Users hides the information ‘i’ button from Records.
- View Permissions – removing this Capability from Users hides the permissions padlock button from Records.
- Watch Records – removing this Capability from Users hides the Watch button from Records.
- The ‘From’ field is available again in Signature Templates.
- The Sales Tax Code will now populate automatically if you have Sales Tax Rulesets set up that result in only one Tax Code being valid.
- It is now possible to open a Person or Organisation record from the Recipients tab of a Mailshot.
- The filters applied to a report will now be passed into Report Processes by the $view_params variable, giving you more flexibility when building Processes.
- Button/On Save Processes will now receive an additional variable, $original_values, alongside the existing $form_fields variable. The new $original_values variable will contain the fields that have been changed on the current record, and their values prior to the save.
- Bug Fix: an error will no longer occur when opening Marketing Campaigns linked to Transaction Documents in multiple currencies.

