Sales Tax Rulesets
Introduction to Sales Tax Rulesets
NOTE: Sales Tax Rulesets are part of the Order Processing functionality included Business and Business Pro licenses only. In addition to the licenses a System Administrator will need to enable the ‘Sales Tax Ruleset’ module in Start > Configuration > Account Settings > Licenses & Modules.
Once you have created Sales Tax Codes within Workbooks you are then able to further configure them by applying Sales Tax Rulesets for your products. By using this functionality, you can simplify the Sales Tax process and remove the overhead of manual input.
When a Sales Tax Ruleset is configured and applied to a Product in Workbooks, it will limit the available Tax Codes by only showing the ones that you have configured in your Sales Tax Ruleset. This is based on the location of your customer and where you are delivering to. This means that users will only be able to apply the relevant tax codes to products within Documents that are relevant to that specific order.
These are useful for when you are working with customers with multiple sites across several countries or are delivering an Event where you are expecting attendees from around the globe.
Creating Sales Tax Rulesets
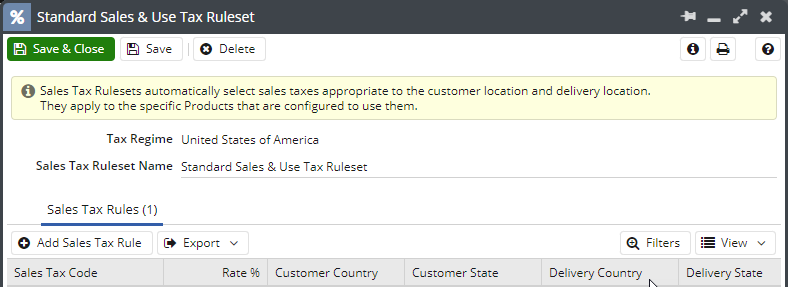
To create a Sales Tax Ruleset, you will need to go to Start > Configuration > Accounting > Sales Tax Regimes and then open the respective regime. Within the Regime you will have a tab called Sales Tax Rulesets next to the Tax Codes tab:

As with Tax Codes, to create a new Ruleset select the Add Sales Tax Ruleset button, this will create a new window which will allow you to configure the ruleset as required. You will first need to name your Ruleset and save it before you can start configuring it further.
Note: Sales Tax Rules will appear in a Picklist as it does within Name field, for this reason if you are going to be creating similar rulesets across multiple Regimes we recommend that you create an easy to follow naming convention that allows you to distinguish them.

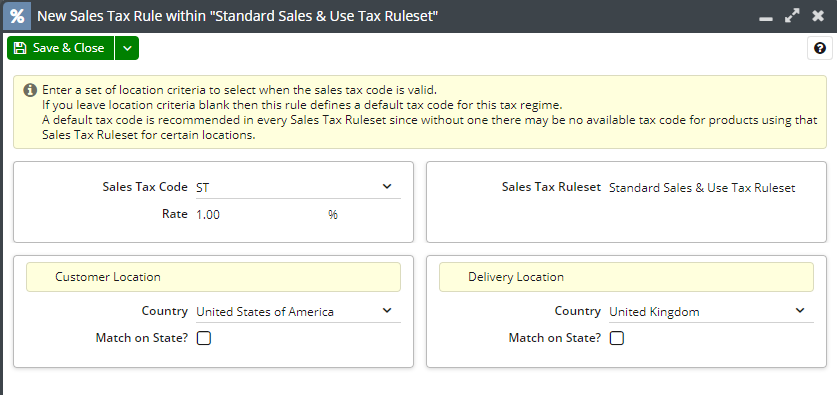
Selecting Add Sales Tax Rule button will then create a new rule.

Sales Tax Code: A picklist of all available Tax Codes that are available within the selected Sales Tax Regime.
Rate: This is a read-only field that is populated when the Tax Code is set by the relevant tax rate.
Customer Country: Here you can set the Country of the customer that will be specified on the Transaction Document.
Delivery Country: Specify where the product will be delivered to, for example while you may be invoicing a Customer may be invoiced in the UK the product may be going to the USA.
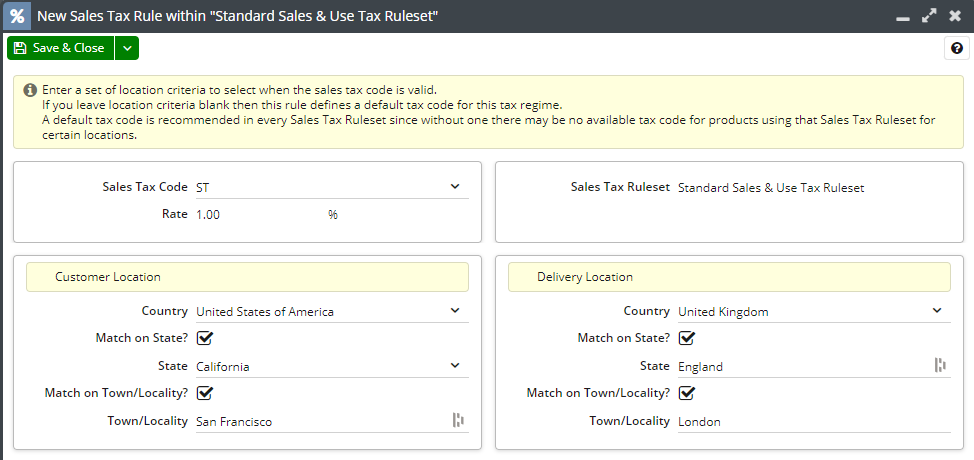
Match on State
Within both the Customer and Delivery Location once the Country has been set you are able to select “Match on State?” checking this box will create a new Field allowing you to set up a new State, for some countries this will appear as a Picklist for others it will appear as a Text Field. Once you have set the State you will have the option to “Match on Town/Locality”.

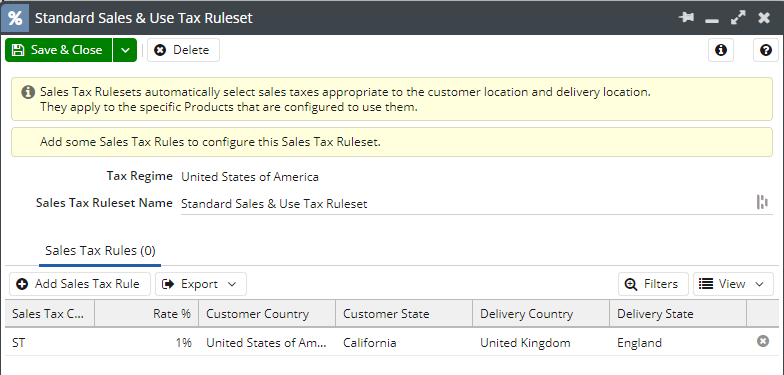
Once you have configured the Rule as required it will appear in the bottom panel of the screen along with any Rules that have been configured.
