


Linking your Workbooks Account to Zapier
To create Zaps between Workbooks and other apps, you must first connect Zapier to your Workbooks account.
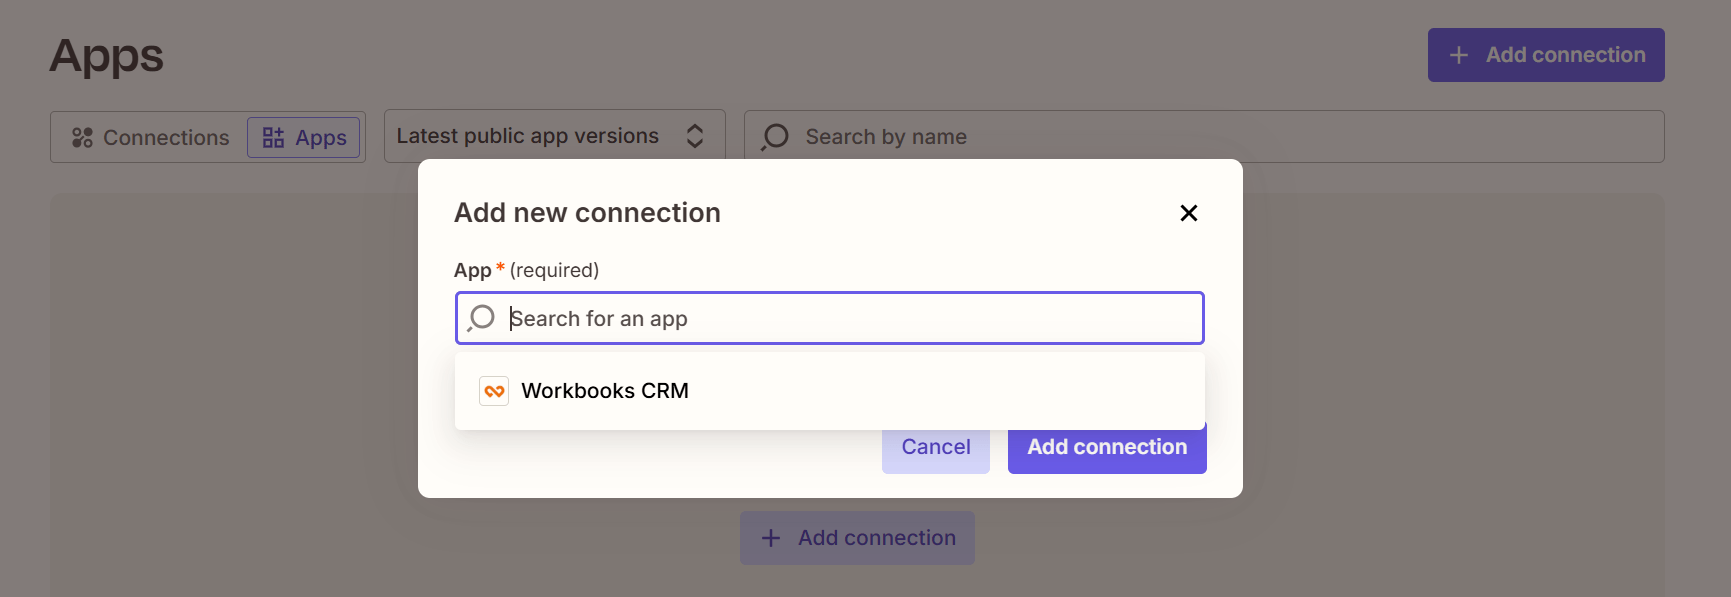
Within Zapier, you can do this either by going to App Connections and click ‘+Add Connection’

or you can do this within the set up of Zap using the ‘Connect a New Account’ button:
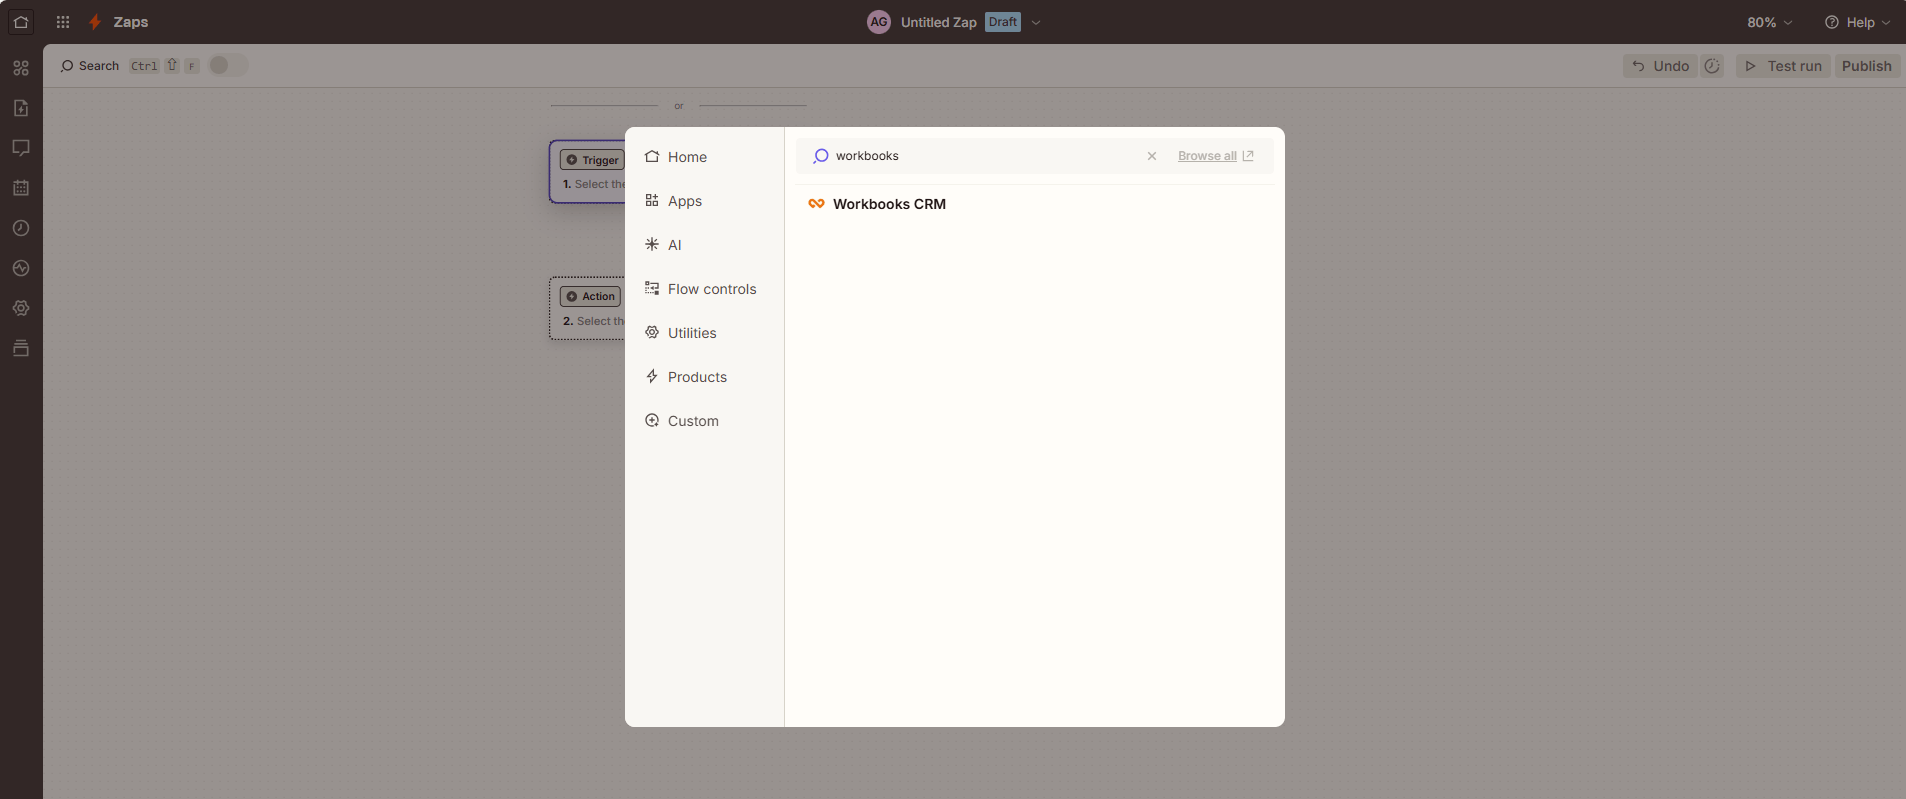
Either option will open a new window, asking for an API key:

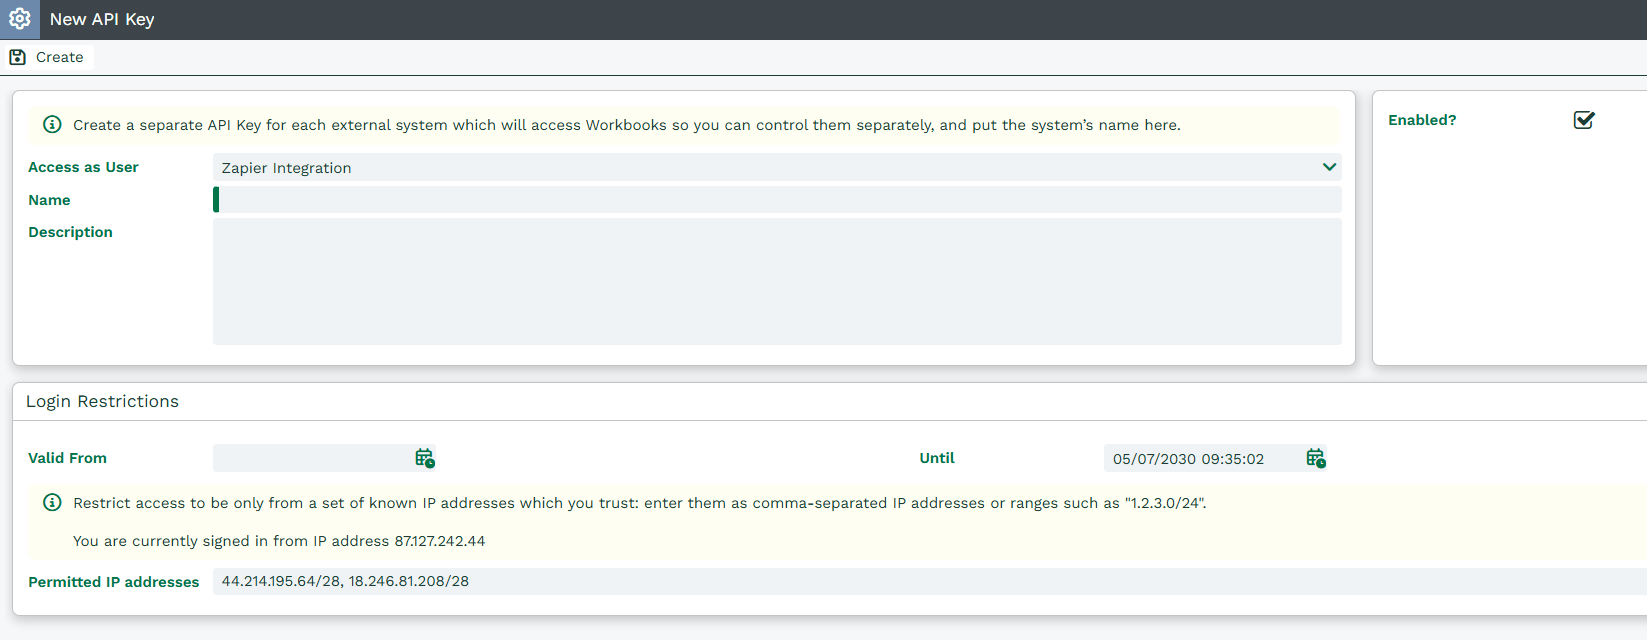
Within Workbooks, you’ll need to create a new API Key. To do this, go to Start > Configuration > Email & Integration > API Keys > ‘New API Key’:
Give the API Key an appropriate name and description. You’ll also be required to set an ‘Until’ date for the API Key to expire, as well as a ‘Permitted IP Address’.
Note
We recommend using the following Permitted IP address range for Zapier API Keys "44.214.195.64/28, 18.246.81.208/28"
Once all fields are populated, click ‘Create’, and then copy the API Key that it generates into the Zapier pop up Authentication window.
After clicking ‘Yes, continue’, Zapier will then connect to your Workbooks and test the connection. You will see a green success message if the test is successful.