Example – Event Invitation Journey
You would like to send people through a journey to invite them to your event, sending invite reminders in the build up to the event. You would like anyone that has registered to automatically come out of the Journey.
Step 1 – Create Force24 Custom Object
Create a Custom Object in Force24 called ‘Event Registration’. Add fields to the object for:
- Event Name (text)
- Attendee Status (text)
- Event Attendee Id (integer)
Make a note of the Custom Object Id for later
Step 2 – Create a Workbooks Report
Create a report from a template, using the template called “TEMPLATE – Force24 Custom Object Sync – Event Registrations”.
Name it “Force24 Sync – Event Registration”. You should not need to add any columns or criteria, unless you are only interested in sending over registrations for certain Event Types. Save the report.
Step 3 – Create a field in Workbooks
On Mailing List Members, create a text field called “F24 Object Id”.
Step 4 – Set up a Scheduled Process
Create a new Scheduled Process, using the ‘Force24 Integration’ Script Library script.
Set the Parameters as follows:
- Mode = send_custom_objects
- Custom Objects Report View Name = “Force24 Sync – Event Registration:Details”
- Custom Objects Type Id = the id of the Object you set up in Step 1
- Custom Objects Mapping =
Event Name : event_name - Event Attendee Id : attendee_id
- Attendee Status : attendee_status
- Person Id Column = “person_id”
- Record Endpoint = “email/mailing_list_entries”
- Record Force24 Identifier Field = “cf_mailing_list_member_f24_object_id”
- Record Id Column = “attendee_id”
- Record Lock Version Column = “attendee_lock_version”
Set the Schedule of the process to run once an hour at least.
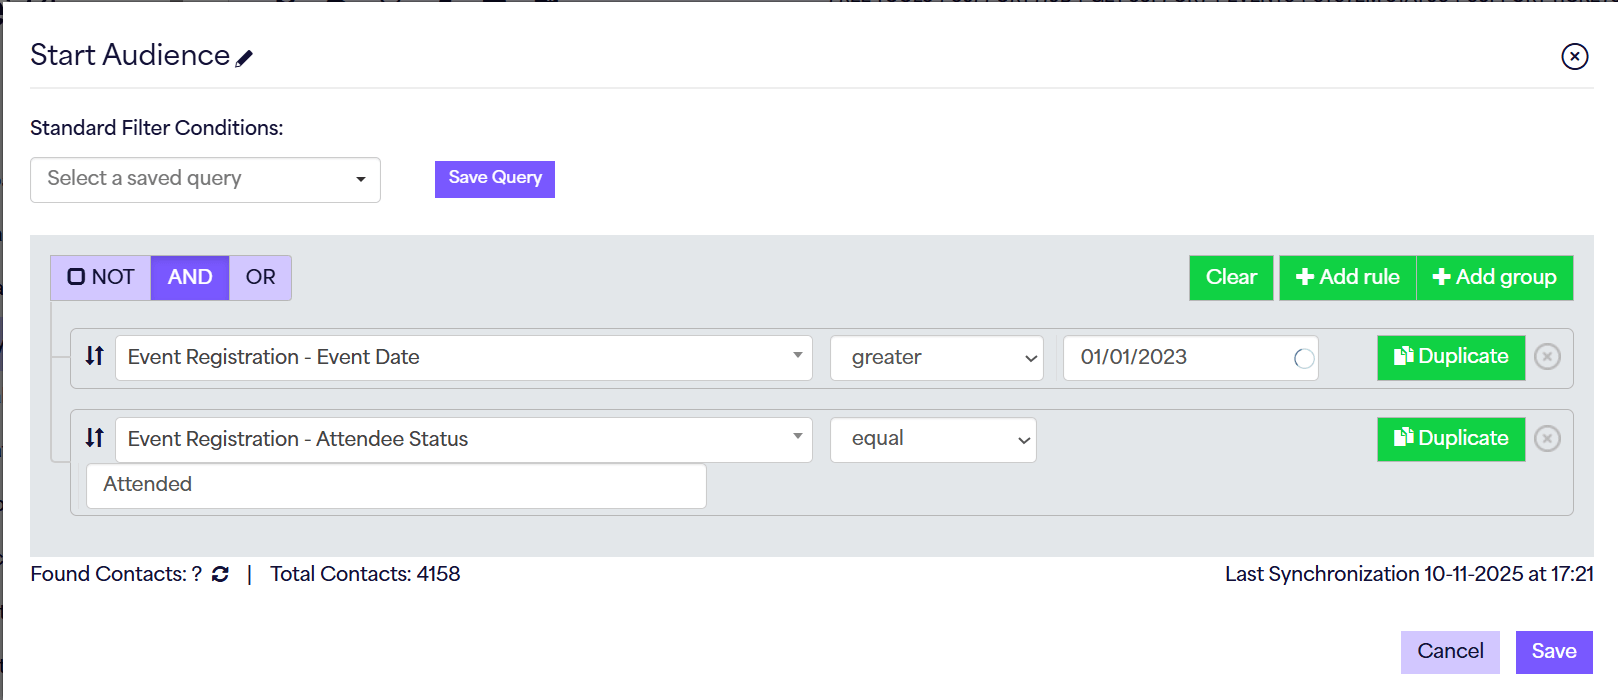
Step 5 – Set up the Force24 Journey
Create a new Journey from a template, using the ‘Event/Webinar Invitation Journey’ template, and set Journey Type to be ‘Standard’.
You can set up the Audience as per your normal criteria.
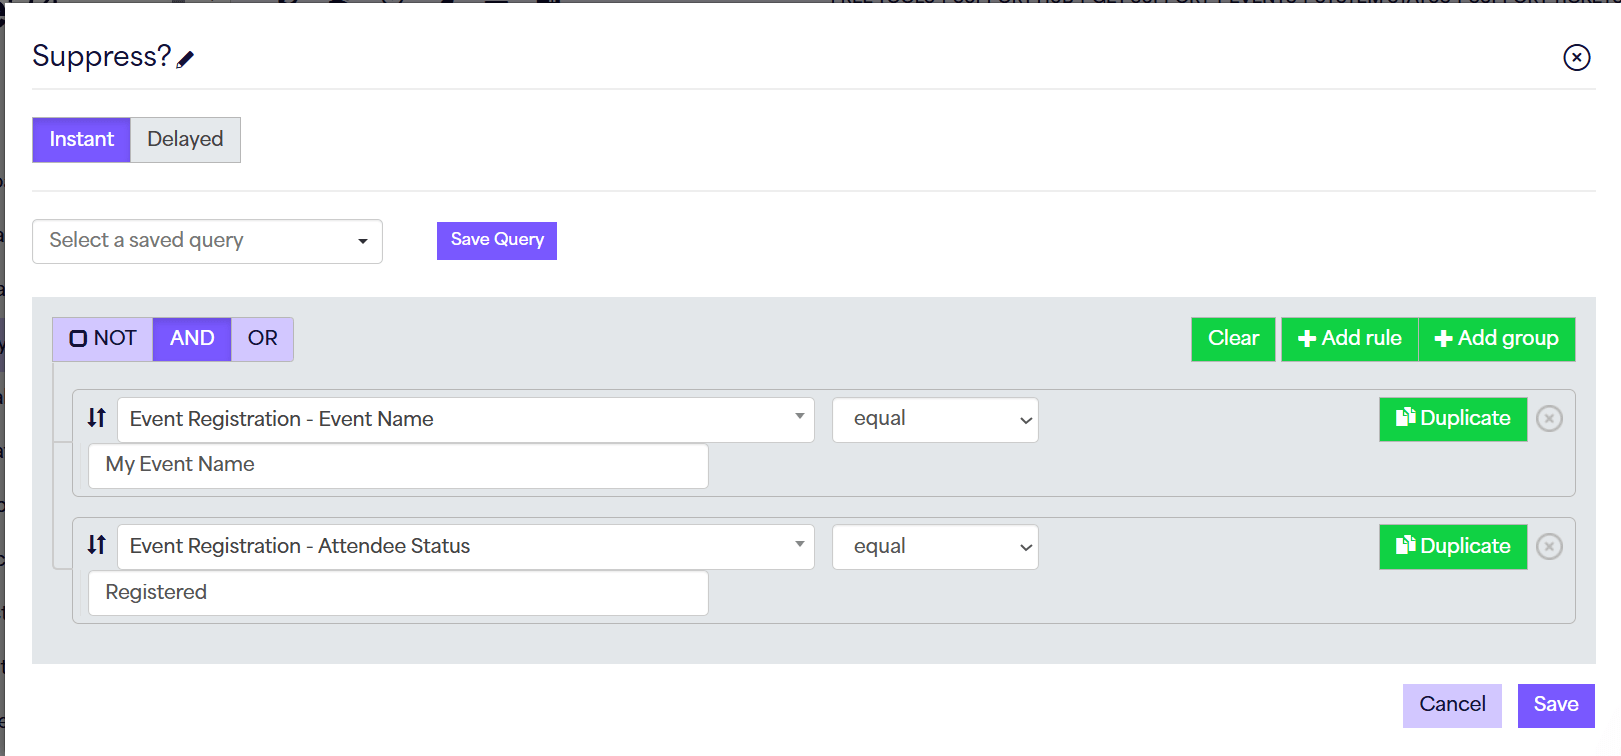
On the “Suppress?” and “Registered?” blocks, amend the criteria to be
- Event Registration – Event Name equal [your event name]
AND
- Event Registration – Attendee Status equal Registered
One step further
If you also map the Event Date onto the Custom Object, you can use this in your criteria when creating the Audience to send different invitation emails to people that have attended your events before.