Setting up your Email Server
How to set up your Email Server to work from within Workbooks.
STEP ONE : Establish the details of your SMTP email server
If you have your own in-house email system, then your IT staff should be able to provide you with the hostname or IP address of your server. If you use a hosted email server, then your service provider can supply you with these details.
STEP TWO: Create a new user on your SMTP email server, which can be used to authenticate against
Nearly all SMTP servers will block unauthenticated connections; therefore you need to create a user name and password on your email server, so that Workbooks can use the credentials to authenticate.
STEP THREE: Allow the Workbooks Servers access to your SMTP server (If you use an in-house email server)
If you use an in-house server, it is likely that your firewall will block SMTP connections from Workbooks. Therefore, your firewall needs to be changed to allow the servers access.
You need to allow access from three IP ranges on port 25.
Range One: 80.69.20.160/28 (i.e. the addresses 80.69.20.161 through 80.69.20.174).
Range Two: 89.187.105.224/28 (i.e. the addresses 89.187.105.225 through 89.187.105.238).
Range Three: 167.98.21.80/28 (i.e. the addresses 167.98.21.81 through 167.98.21.94).
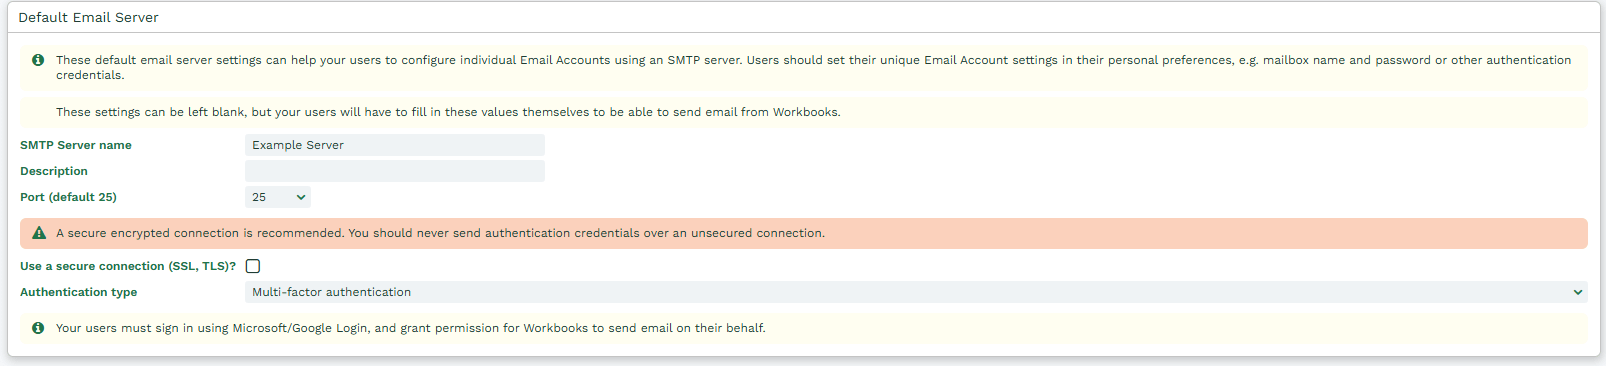
STEP FOUR: Add the details of your SMTP server and the user name and password you created to Workbooks
Click Start > Configuration > Email & Integration > Email Settings.
Enter the hostname (or IP address) of your SMTP server in the SMTP Server name field. If you have multiple SMTP servers then you will enter a hostname here which resolves to more than one IP address in DNS.
In the Description field simply add text to document the SMTP server being used.
Select the port number, this is very likely to be port 25, unless your SMTP server has an unusual configuration.
Remember to click Save.