


Configuring Triggers and Webhooks
Where to locate your Triggers and Webhooks, and how to create new ones to automate your processes.
Locating your Triggers
Under Start > Configuration > Automation > Triggers you will find a list of all Triggers currently located on the database.
Note
Workbooks comes with native Triggers, some examples of which can be seen in the below image.
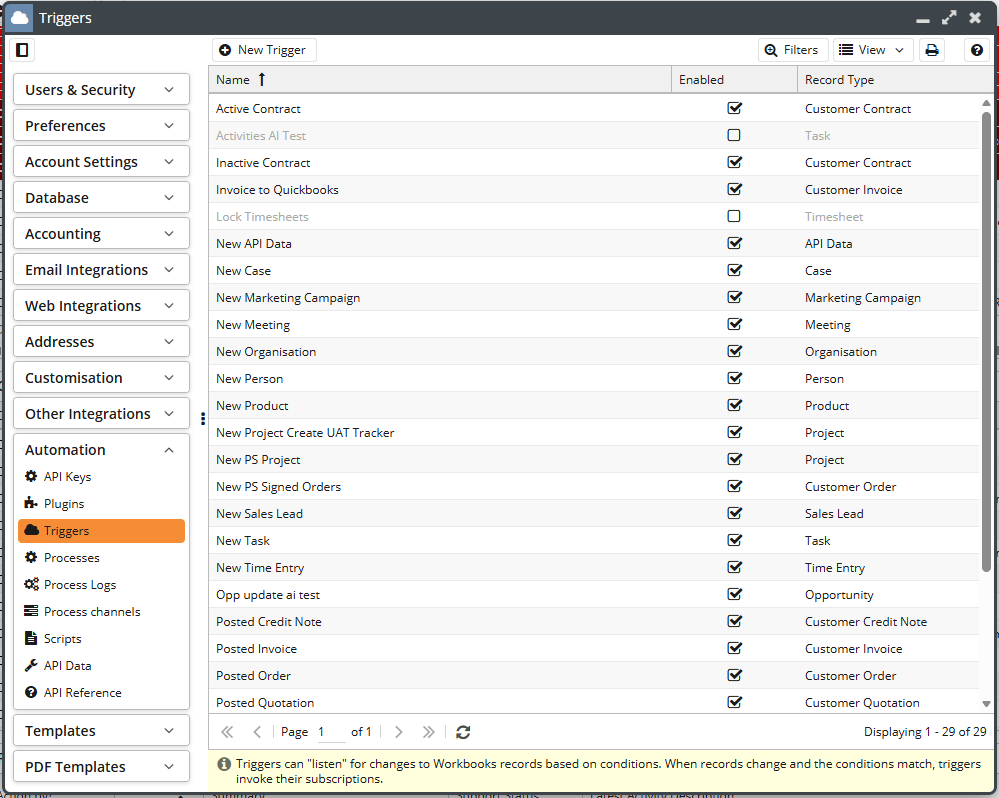
It is best practice to check to see if a Trigger already exists that can be used for the purpose intended.
Note
The example below looks at using a Trigger that monitors the creation of a new Case. This Trigger already exists above but for the purposes of this example a new Trigger will be created.
Creating a new Trigger
To create a new Trigger click the New Trigger Button in the top left of the View above. You will see a New Trigger window in which you will be asked to choose the Record Type that will be monitored and the Name of the Trigger.
Note
It is best practice to fill in the Description column to increase the visibility of what the Trigger is being used for.
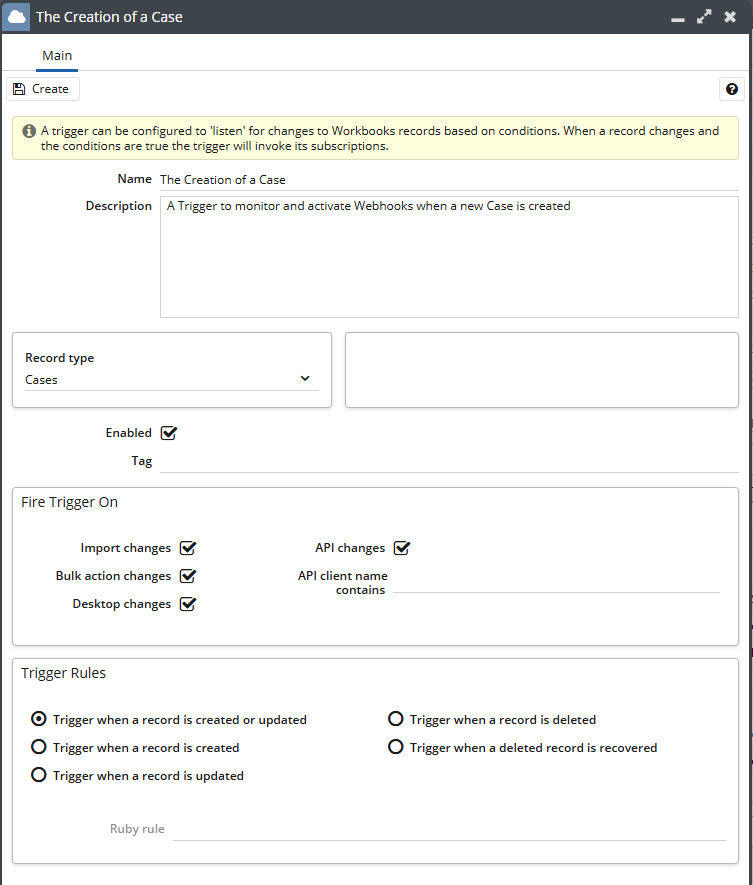
At this point it is also possible to define what types of changes, if not all of them, activate the Trigger. This is done in the Fire Trigger On Section. It is also possible to enable and disable the Trigger by use of the checkbox located just above this Section.
You can pick whether you want the trigger to fire when a record is created, updated, deleted, or recovered.
Note
If you want to restrict the actions that fire the Trigger, for example only new Case records where the Priority is high, then you will need to contact the Support team after creating the Trigger. Workbooks will then update the Ruby Rule section to meet your needs where possible.
After creating the Trigger by clicking the Create button located at the top of the image above two more tabs will become available, the Events and Subscriptions tabs.
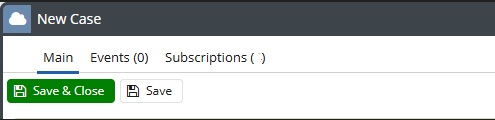
The Events tab logs every occurrence in which the Trigger was fired. The Subscriptions tab stores all of the Webhooks associated with the Trigger.
Creating your Webhooks
On the Subscription tab of the Trigger, click the New Webhook button to create a Webhook.
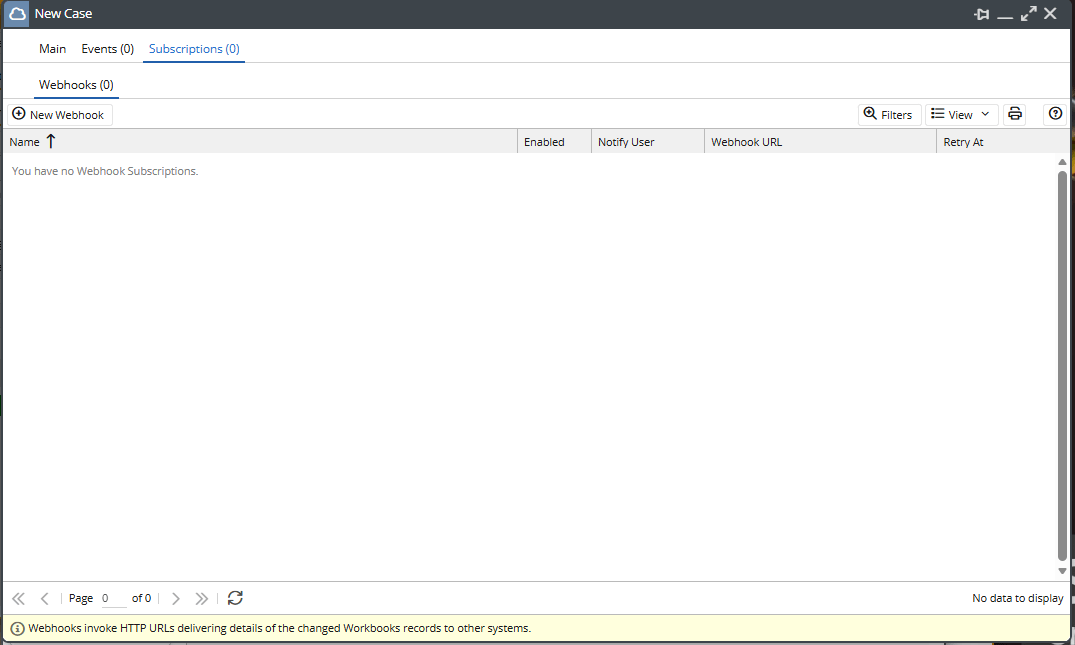
When creating a Webhook, give it a Name, description and Callback URL as well as a User to notify if the Webhook fails.
Note
It is best practice to fill in the Description field here as well. This is particularly useful as multiple Webhooks can be stored under a single Trigger.
The Callback URL can be Workbooks specific or from a different online application. It is a URL that refers to a Process that will be carried out when the Webhook is Triggered.
Note
If the URL corresponds to an external Web Process, then you must make sure that your Web Service is exposed on a standard port such as 443 or 80.
In this example it is referring to a web process located in the same Workbooks database that is designed to send an email to the Support team informing them that a new Case has been created. The complexity of the process triggered by the Callback URL is not limited allowing for an extensive range of automations to be achievable.
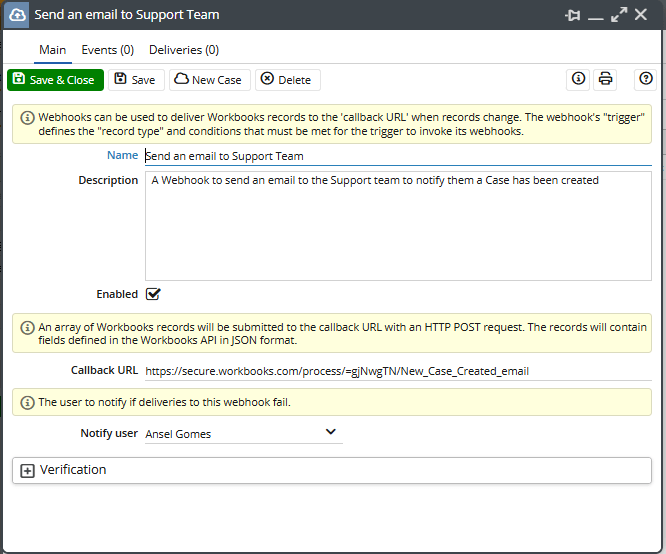
Like Triggers, Webhooks can be enabled and disabled by using the checkbox located below the Description field in the above image. This is again useful when multiple Webhooks are linked to a single Trigger. To finish creating the Webhook, click the Save and Close button.
Webhooks have two additional tabs, the Events tab and the Delivery tab. If the Webhook is triggered then these events are will appear in the Events tab. It is possible to process multiple events in a single delivery to the Callback URL, each delivery that takes place will be stored within the Deliveries tab. These two levels allow for more visibility when investigating the Trigger and Webhooks.