


API Keys
How to create API keys which can be used to allow external systems to communicate with Workbooks.
You can integrate external systems with Workbooks using the Workbooks API. Using API keys allow external systems to access a specified Workbooks Database on the user’s behalf, with all of their Capabilities and Permissions.
Creating an API Key in order to allow external systems to communicate with Workbooks removes the need for the external system to login using a username and password each time.
When creating an API key to allow external access, security is critical to prevent unauthorised access or data breaches. On this basis, always work on the principle of ‘least privilege’ and grant only those permissions necessary for the external system to perform its tasks. Within Workbooks you must also specify an expiry date for the key (and set yourself a reminder to check nearer the time, whether or not the expiry date needs to be amended). It is also good practice to restrict access to known IP addresses or ranges associated with the external system to prevent unauthorised access from unknown sources.
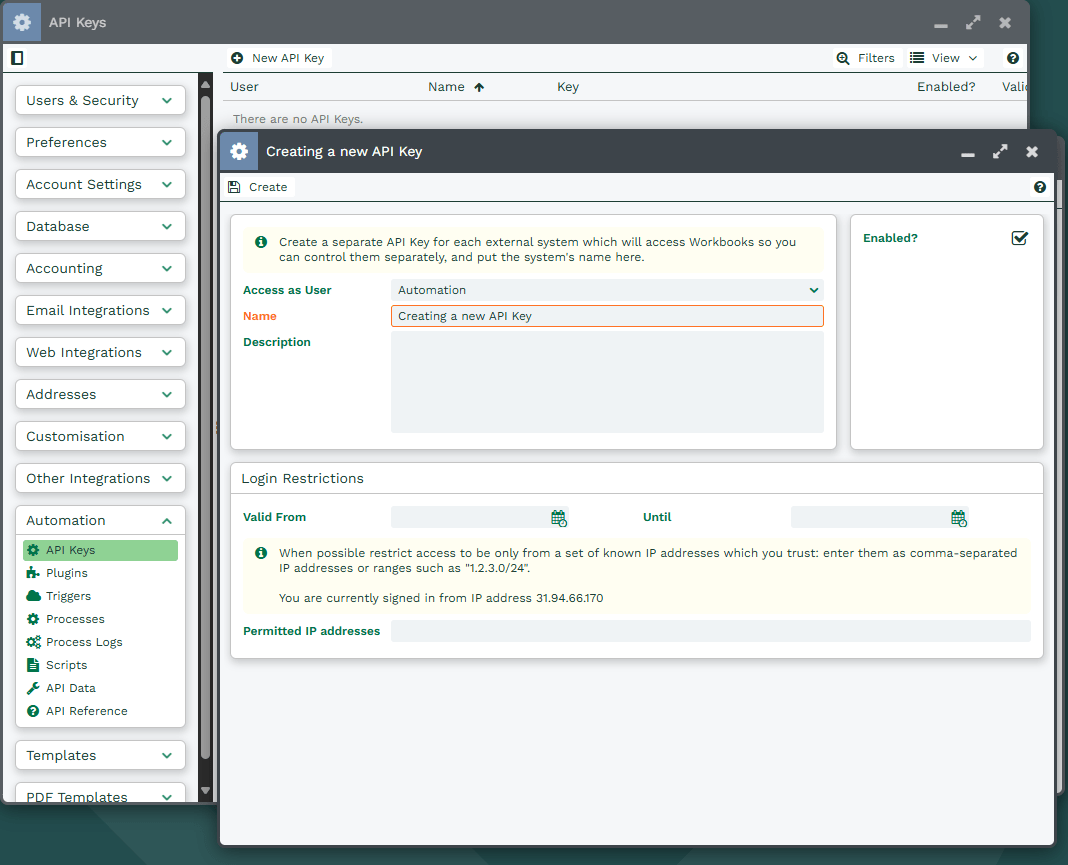
An API Key can be created by going to Start > Configuration > Automation > API Keys > New API Key.
Select a user using the dropdown picklist next to ‘Access as User’. This determines which user the API Key will run as, with all their Capabilities and Permissions. Give the API Key a name which you can use to easily identify what it is used for. It is also helpful to add a meaningful description.
Now enter the Valid From and Until dates. If you don’t specify a Valid From date, it will take effect immediately but populating the Until field is mandatory.
You must also specify at least one Permitted IP address. If you specify more than one IP address you should separate them using a comma. You can also restrict the API Key’s Capabilities to a subset of those of the User which you have selected. If you do not, then the API Key will adopt the same Capabilities as specified in the “Access as User” field.
Click Create. The API key string now shows under the Description field and can be copied to your clipboard from here.
An API key can be manually disabled by removing the tick from the Enabled checkbox.
NOTE: If you delete or disable a user who is designated as the ‘Access as User’, the external system will no longer be able to communicate with Workbooks. You’ll see these keys highlighted in red in the list of API keys. In this circumstance, you should edit the API Key.
For more information on connecting to the API, please see this page on our GitHub: The Workbooks API.