Edit Grids
Edit Grid Overview
To make editing lots of records of the same type quicker, on a Landing Page you can activate ‘Edit Grid’ and carry out inline editing of your data. This is only available within the Desktop not on mobile devices. To use it, the Editable Grids module must have been activated on your database and you must have been given the appropriate capabilities.
You can edit multiple fields on one row of data or different fields on different rows.
The following record types are editable in grids:
- API Data
- Cases
- Event Tickets
- Marketing Campaigns
- Opportunities (header information only, not Line Items)
- Organisations
- People
- Products
- Sales Leads
- Activities (Tasks & Meetings)
In addition, any Custom Records on your database can also be edited in a grid.
Activating Edit Grid Functionality
There are two steps that System Administrators need to take to activate Edit Grid functionality:
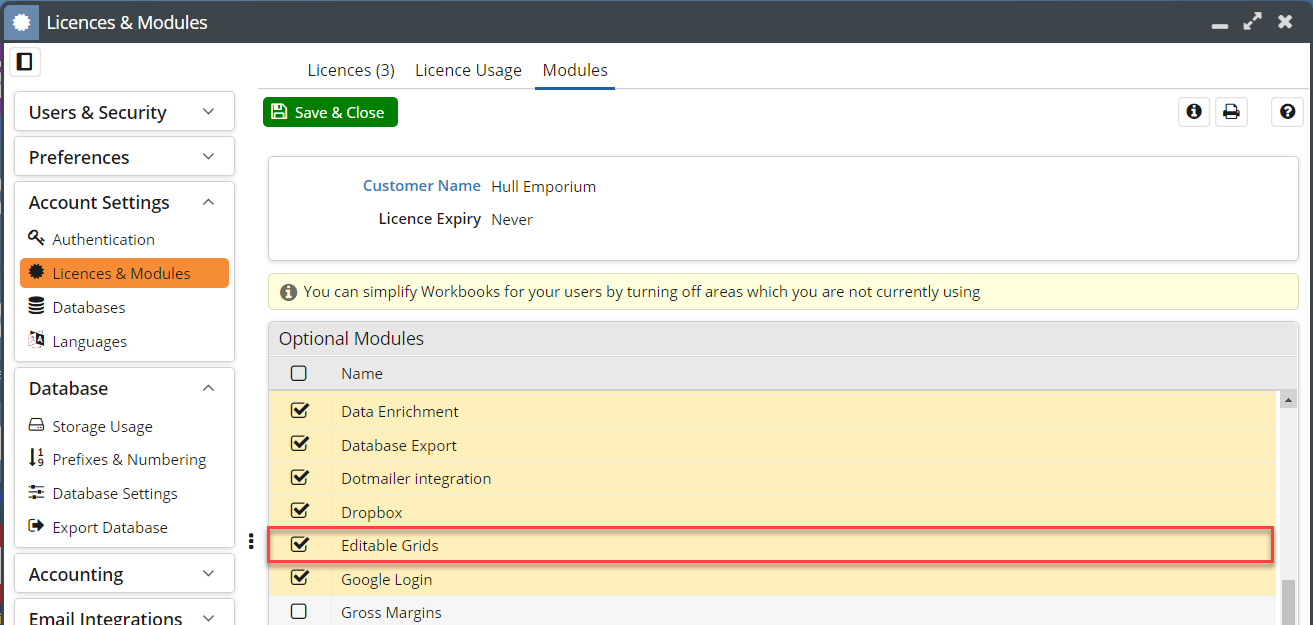
- Switch on the Editable Grids module by navigating to Start > Configuration > Account Settings > Licences & Modules > Modules and ensuring there’s a tick in the checkbox next to Editable Grids.

- Make sure the user has the appropriate Capability/Capabilities to allow them to edit a specific record type in a grid. Each record type that can be edited in a grid has a separate Capability, which is called “Allow editing of xyz records in grid”.
BEFORE activating Editable Grids, please remember the following:
- Any On Save automated processes you have in place will not be initiated when you save a record you’ve edited in a grid
- Multi-select picklists cannot be edited in a grid
- Giving users the ability to edit Landing Pages in grids may give them access to fields that they cannot normally see/edit, so proceed with caution.
Using Edit Grid Functionality
To edit a Landing Page in grid format, navigate to the appropriate Landing Page and whilst on grid view, click the pencil icon in the top right. The screen will change slightly in appearance and you will now be able to click into the fields you want to edit and modify their content. Whilst in edit mode, you’ll notice a new column extend from the left-hand side. This new column presents an icon, offering the ability to open any of the records on the Landing Page.

Clicking or tabbing away from the cell that you’re currently editing will cause a green triangle in the top left-hand corner to appear, giving a clear indication of which field(s) you’ve modified. When you click onto a different row, you’ll see that the ‘Open record’ icon changes to an ‘Undo’ icon. If you want to revert the changes you’ve made to a row, click on the undo icon. This will revert all field changes for that specific row.

If you try to save changes that are not acceptable – for instance removing the value from a mandatory field – you’ll see an error message on the screen and a red triangle in the top left-hand corner of any cells that need to be corrected.
You can edit multi-line text fields and simply click enter to create a new line of test. Standard rich text fields are not available to edit within Edit Grid but you can edit custom rich text fields. Within some broswers (not firefox) you are able to apply a limited range of formatting using the following controls:
- Bold – Ctrl/Cmd + b
- Italicise – Ctrl/Cmd + i
- Underline – Ctrl/Cmd + u
- Insert Timestamp – Alt + Shift + 0
- Subscript – Alt + Shift + 1
- Superscript – Alt + Shift + 2
When you’ve made all the edits you want to make, click the green Save button above the grid and all the changes will be applied.

Creating New Records in Grid View
If you have the same record opened as you are editing in Grid Mode, you will receive a warning and items will be greyed out to let you know that it is being edited elsewhere.

