Mapping Plus
Mapping Plus can do all the same things that standard Mapping can do, but with better accuracy and additional features, using Google Maps as it’s foundation.
Everything listed in our Knowledge Base for the Mapping Module can be done in the Mapping Plus Module. We will only be detailing features exclusive to Mapping Plus on this page.
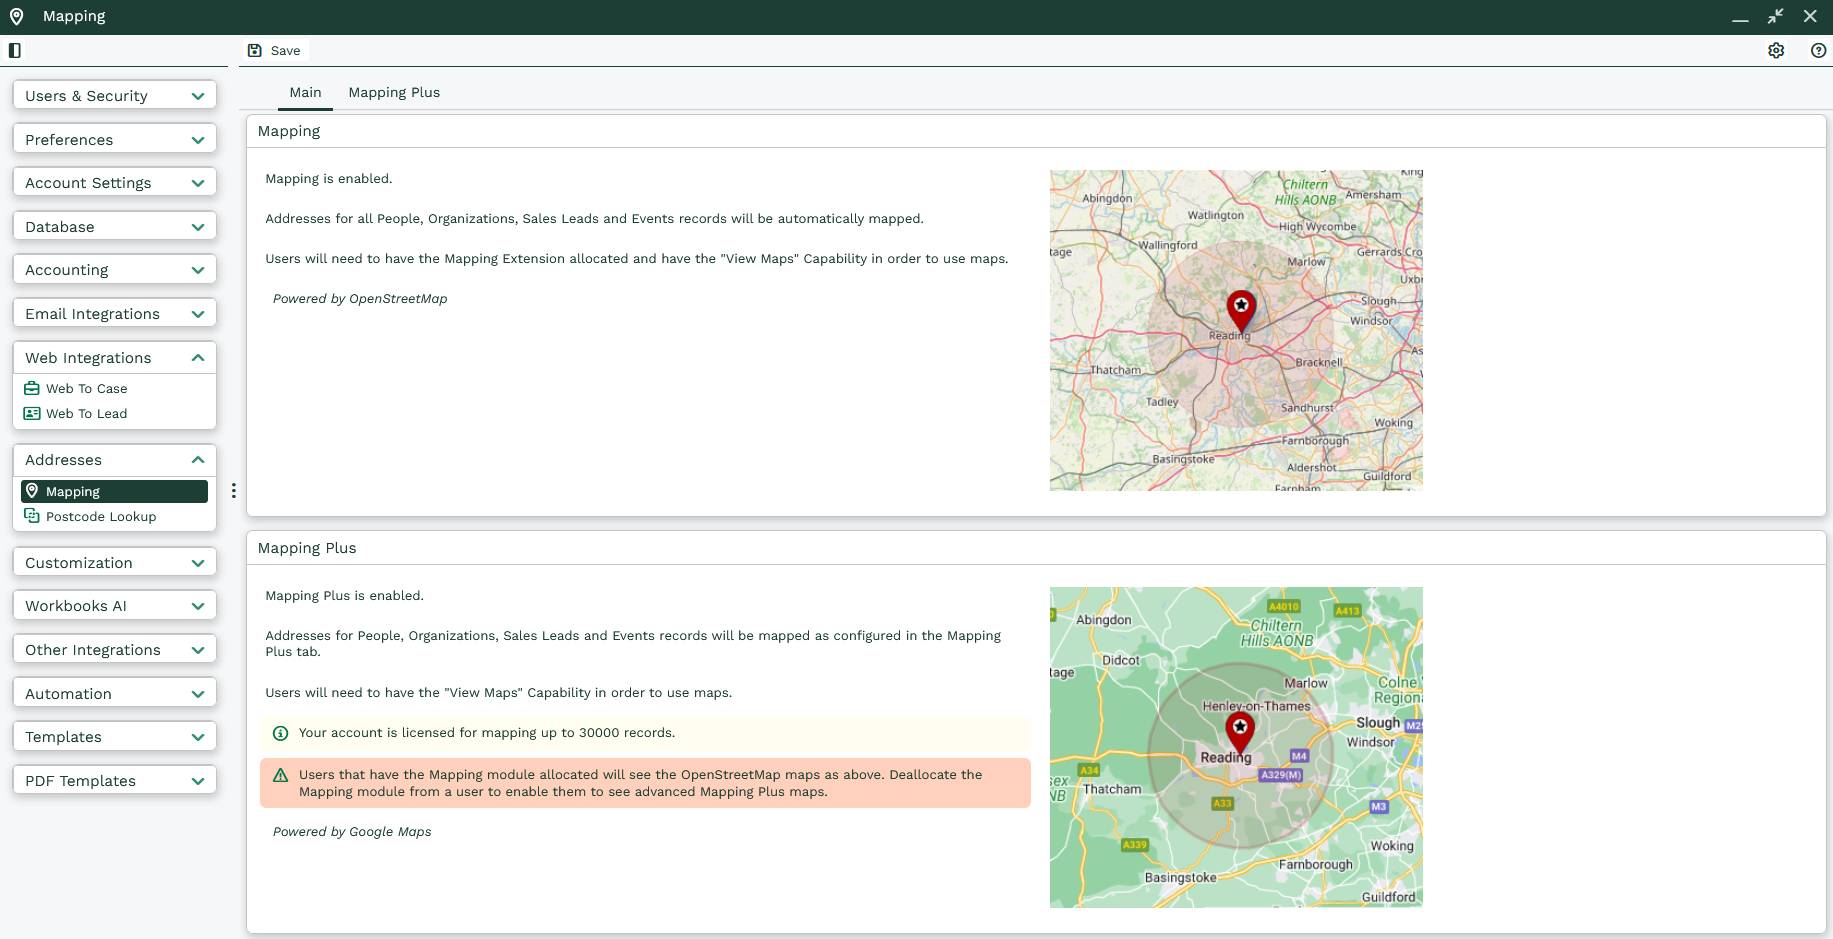
If the Mapping Plus module has been enabled on your database, then you should see the ‘Addresses’ tab under Start > Configuration
Clicking into the Mapping option will show you a brief summary of each module. In the instance of Mapping Plus, it also shows the total number of records that you are licensed to Geocode.
Users must have access to the ‘View Maps’ capability and have the Mapping Module de-allocated from the user in order to use Mapping Plus.
The unique difference in the configuration of Mapping Plus is that you use a report to identify which records that you would like to be geocoded, and thereby usable with Mapping Plus. To do this, create a report based in one of the four available record types: People, Organisations, Sales Leads or Events (Events will only show if you have the relevant module enabled).
Within this report, select all the records that you wish to geocode and map of that type. The report doesn’t have to be based in the record you are attempting to Geocode but must expose at least one identifying column from the record type (Name or Object Reference).
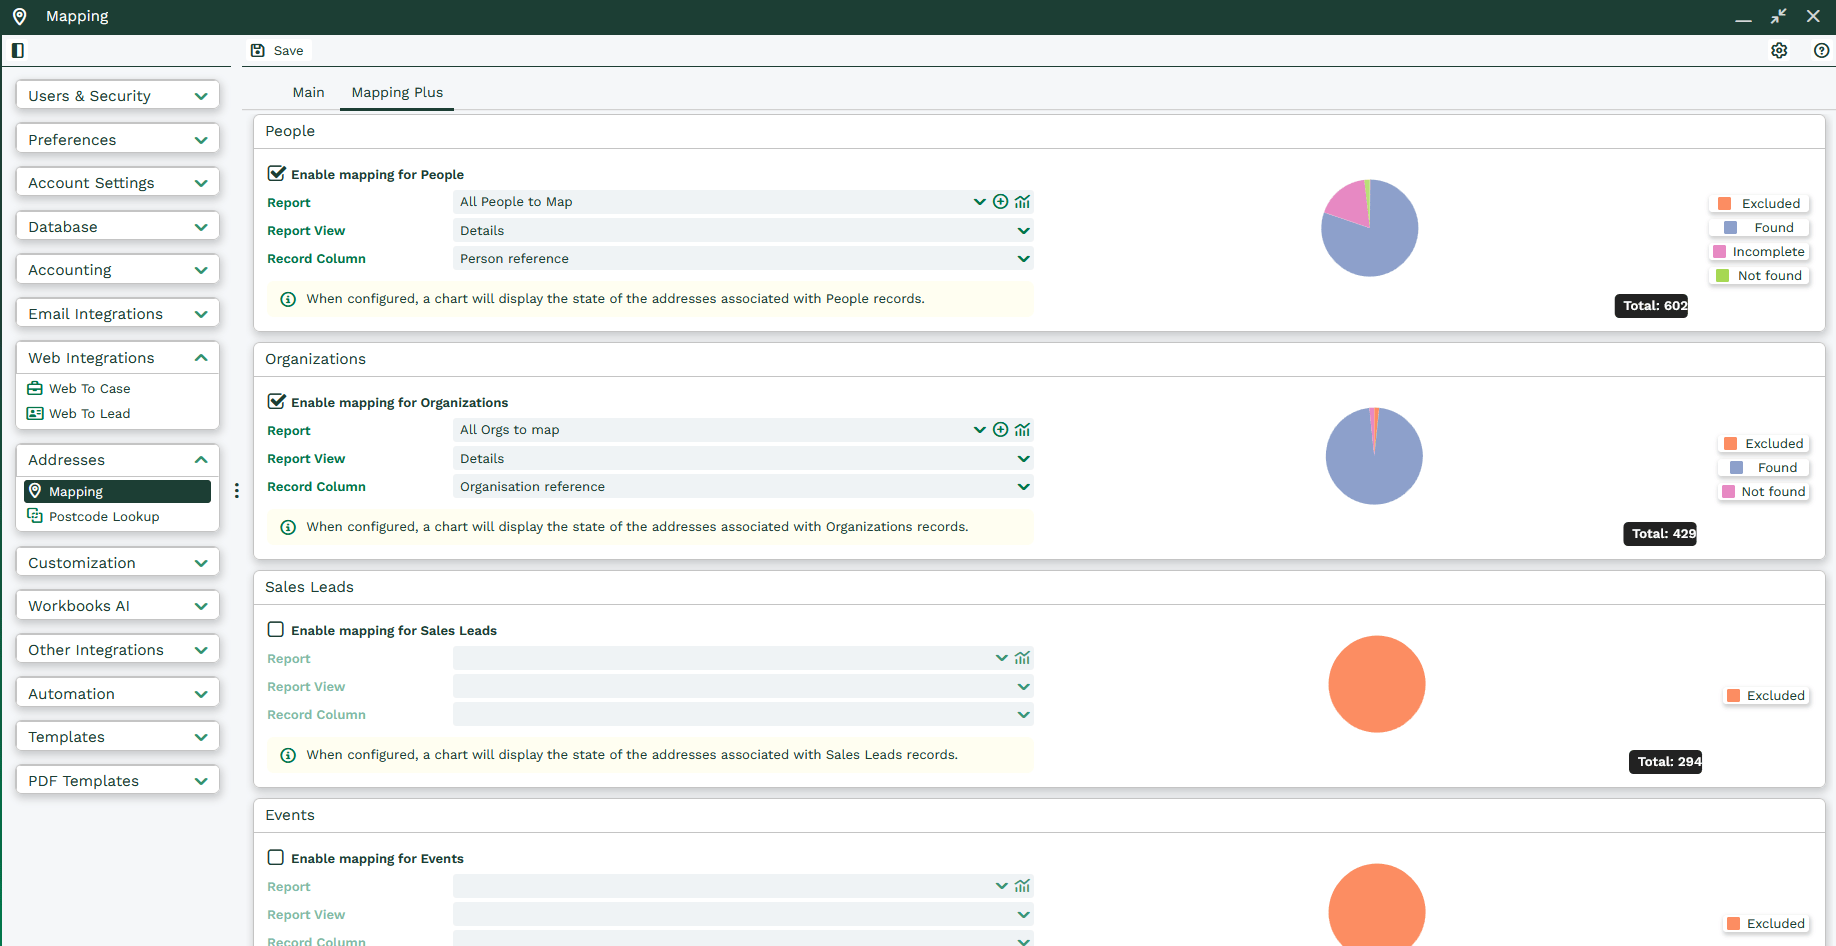
To add a report for Mapping Plus, tick the “Enable Mapping for…” tick box in the relevant section and select the report from the ‘Report’ picklist. Choose the ‘Report View’ that contains the information you want to be mapped, and the ‘Record Column’ that contains the identifier for the record. Remember to click save at the top of the page to keep these settings.
For licensing, we only count the initial record, not the number of mapping locations it contains or is related to it. Each record will likely have a location associated with it, but it will also have a number of related records that also have locations associated with them. For mapping information, we look at the number of locations being geocoded instead of the number of records.
To find all these numbers in the interface:
- On the Main tab under mapping, you will see the number of Records you are licensed to Geocode.
- Looking at the total results in the report will give you the number of records you are attempting to Geocode.
- The numbers shown in the Mapping Plus tab are how many locations have been mapped. This can exceed the number of records selected and is unrelated to your license limitations.

Further to this, you can drill into the details on these locations, by clicking on the five filters to the right of the pie chart and right clicking on the chart itself.
The filters are:
- Error (Server) – Locations that encountered an error when attempting to Geocode from your report.
- Excluded – Locations not included in your report.
- Found – Locations included in your report that could be found.
- Incomplete – Locations included in your report that were incomplete or missing information.
- Not Found – Locations included in your report, but unable to be found with the details given.
By clicking on filters and removing sections from the pie chart, you can right click on the sections that interest you and find out which locations are causing issue and why.
For example, you might want to drill into locations ‘Not Found’ and correct the location information in them.
Favourite Locations
If a user typically works from home, or conversely, works from the office, or knows that they will be staying at a particular hotel for some time, then they may regularly be creating routes that start and finish at the same place.
Users may create/manage their ‘favourite locations’ for planning a Route through Preferences > Route Planning. Here a user can enter an address and give it a name, which can be used to search for it in the Start/Finish fields when creating a Route. Workbooks will attempt to validate that the address is resolvable and will warn the user if we think that it isn’t.
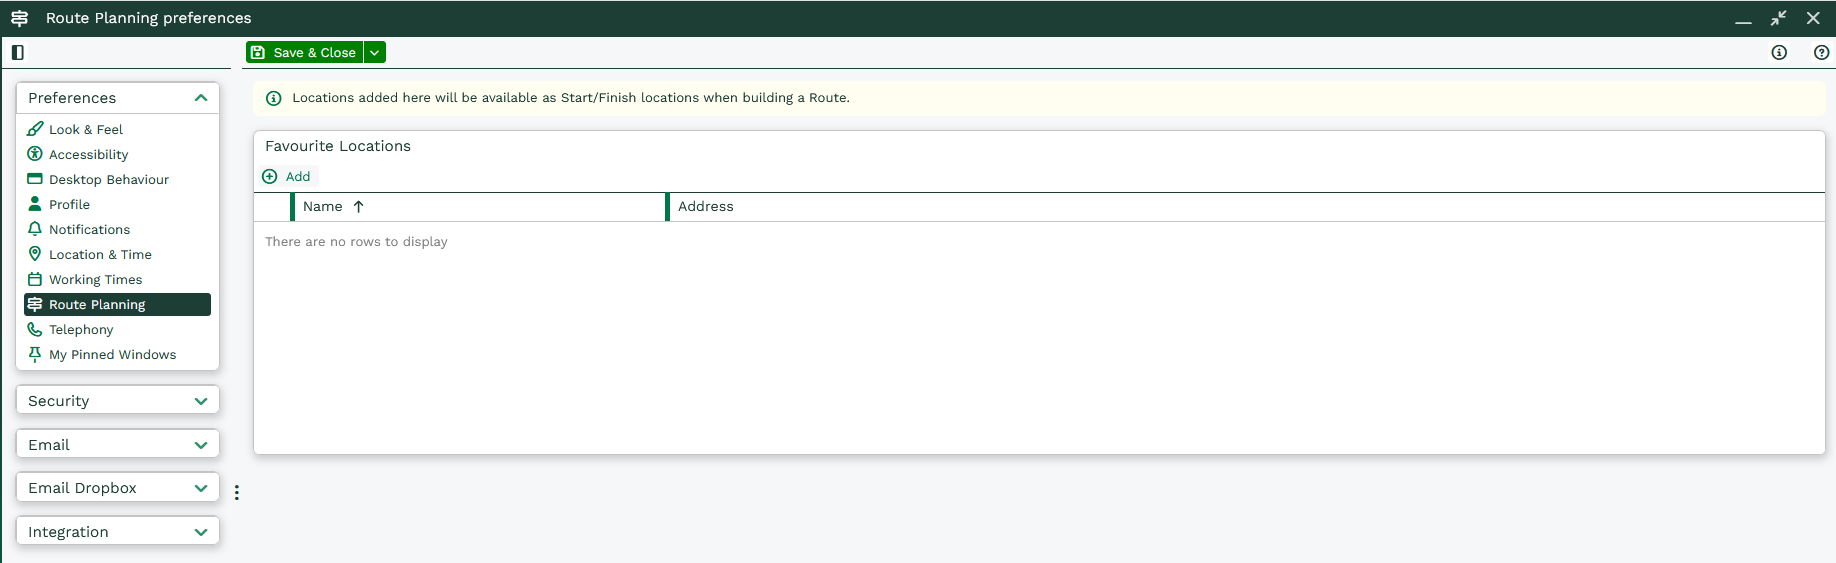
- Users will be warned if they create a favourite location with a “bad” address (one that doesn’t map to a place).
- Favourite locations must have a name and an address.
Creating a Route
A user will still start from a Report but will instead select a “stop” to “add to their route” using the cell context menu on a lat_lng/map_position column, or from a marker popup in the map view(s). Therefore, it is a pre-requisite that this Report must contain a mappable column.
This will then add the stop to their Route, which is accessible via a ‘Route’ button in the toolbar of the Report view, next to the Report Bulk Actions button. This button will become “highlighted” when the route contains some stops, and a count of the number of stops will be displayed.
Note
The same stop cannot be added twice
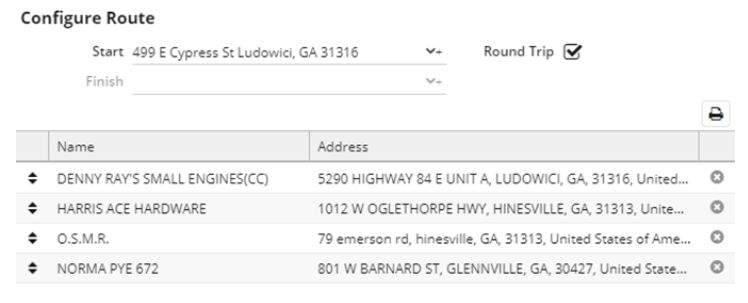
To proceed, the user needs to click the Route button, which will drop a screen down to allow the Route to be finalised. Within this screen, the user will be able to configure the start/finish locations for the route. They can either select an item from the picklist (see Favourite Locations below), or enter an address manually. If the finish location will be the same as the start, the user may check the ’round trip’ checkbox.
Below this, a grid will display the selected stops. The descriptor of the associated record (name and employer for a Person, or name for Organisations, Leads, and Events), and the address, will be displayed for each selected stop. This grid can be re-ordered by dragging and dropping the stops, in the same format as the ‘Configure View’ screen for the Calendar view. Stops can also be removed via a delete row action.
Then, the user may wish to ‘Optimise’ the order of these stops, by clicking the Optimise button at the bottom. This may re-order the stops into a more optimal order. Once this has been completed, optimisation will be unavailable until the order has been changed manually, or a stop has been added/removed.
Finally, the user can either print the route (by clicking the print button above the grid, like they may be used to), which will result in a similar looking print preview being generated, or they can open the route in Google Maps by clicking the ‘Route’ button.