


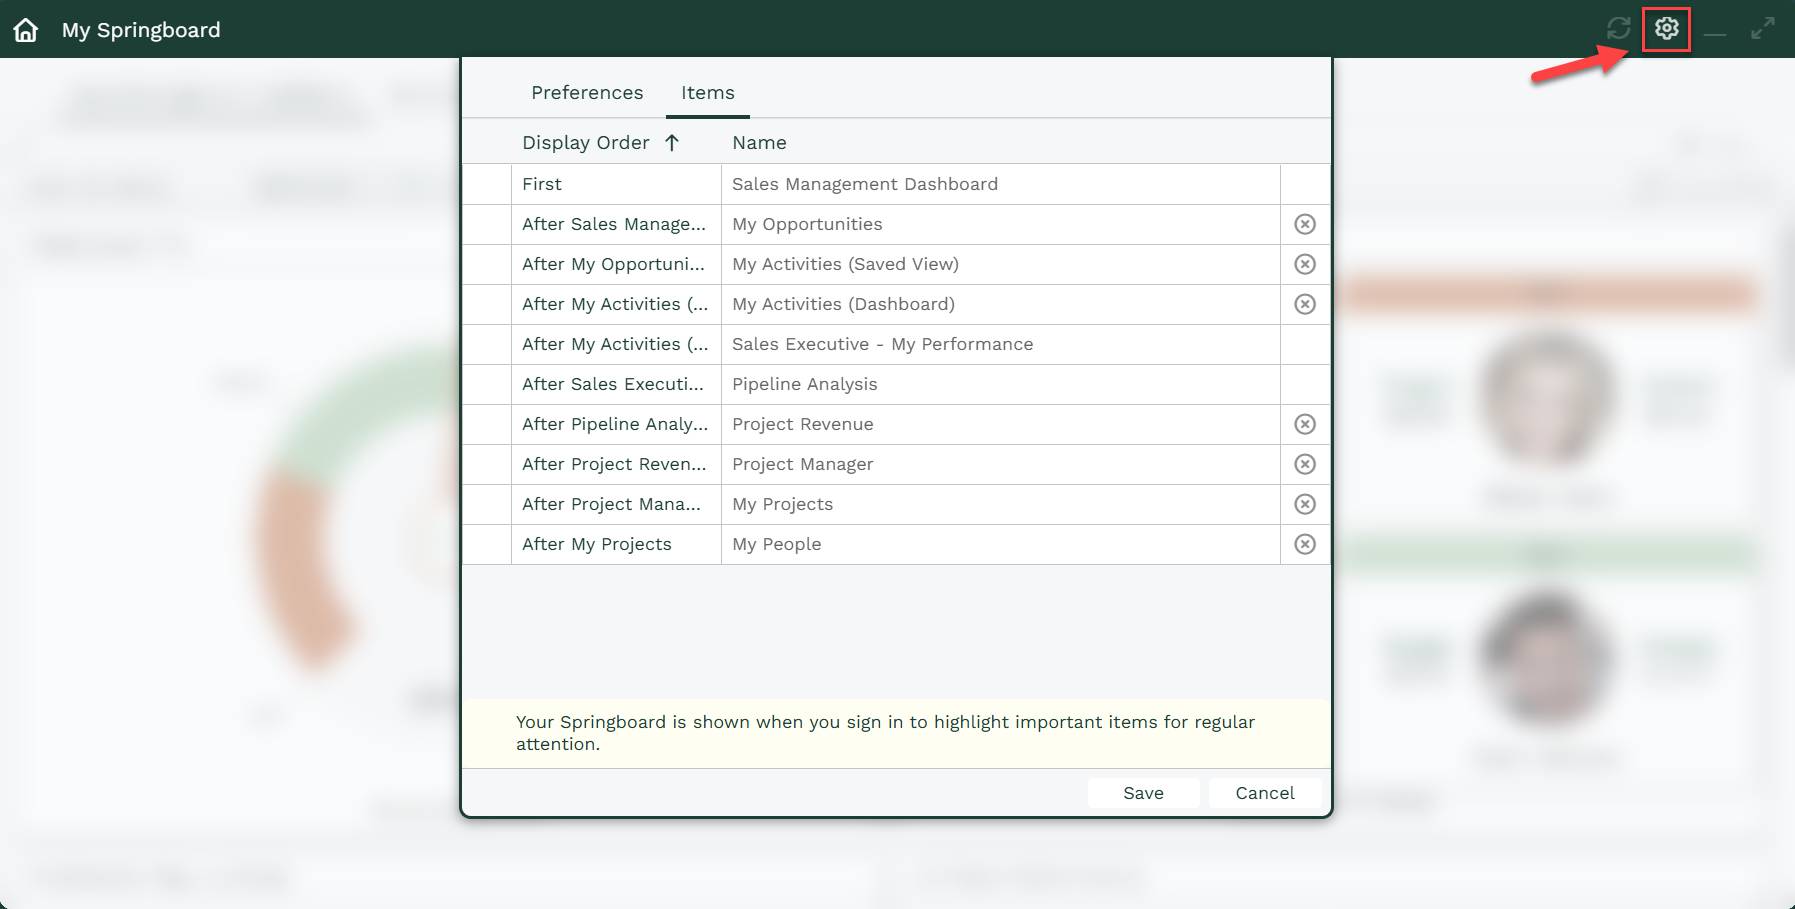
Springboard
A Springboard is a ‘home’ for your Dashboards. It uses tabs so you can switch between each Dashboard easily, which also helps keep the screen tidy. It will open when you sign in, and stays open, so you can refer back to it continuously throughout the day.
Managers and System Administrators can add Dashboards to multiple users’ Springboards, making it quick to roll them out. You can also add your own Dashboards to your Springboard, to suit how you work.
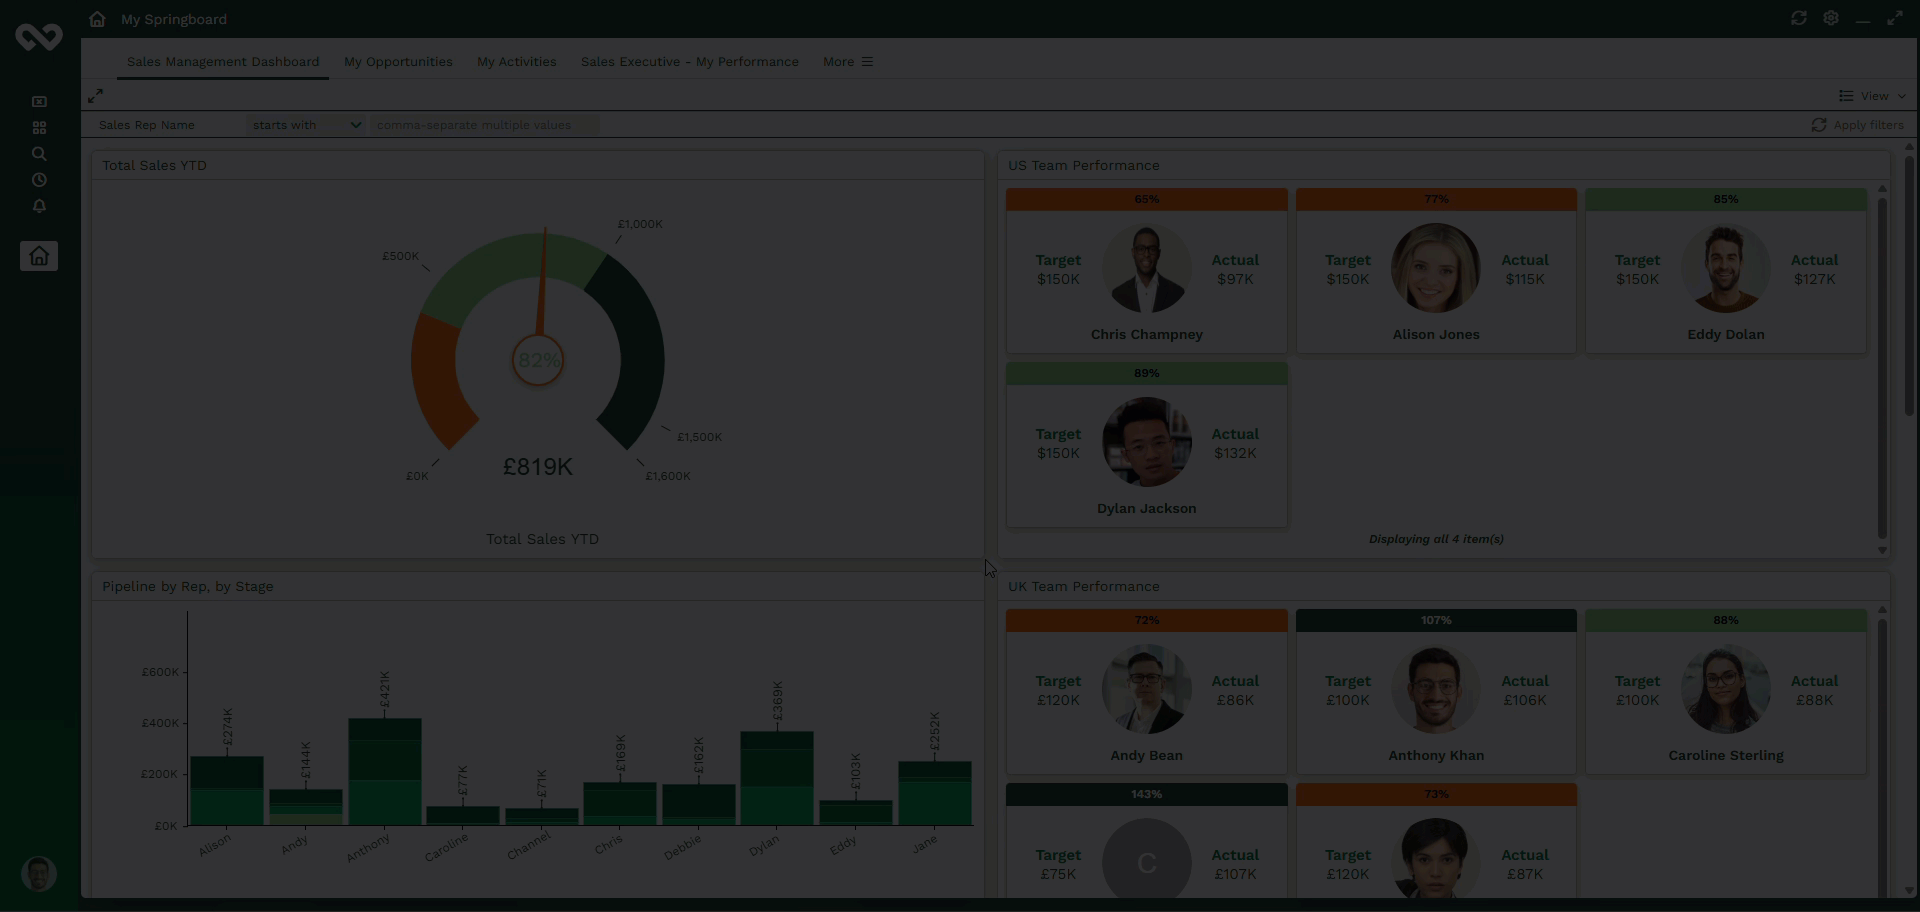
Below is an example Springboard from our demo environment, showing multiple Dashboards with Reports and Charts for Sales Managers, Sales Executives, and other roles.
Setting up your Springboard
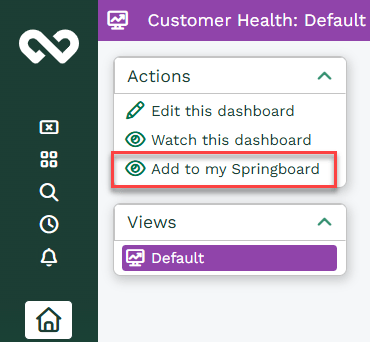
Users can add Dashboards to their Springboard by selecting ‘Add to My Springboard’ from the Dashboard menu. You can also add your preferred Landing page views for different records to a Dashboard.
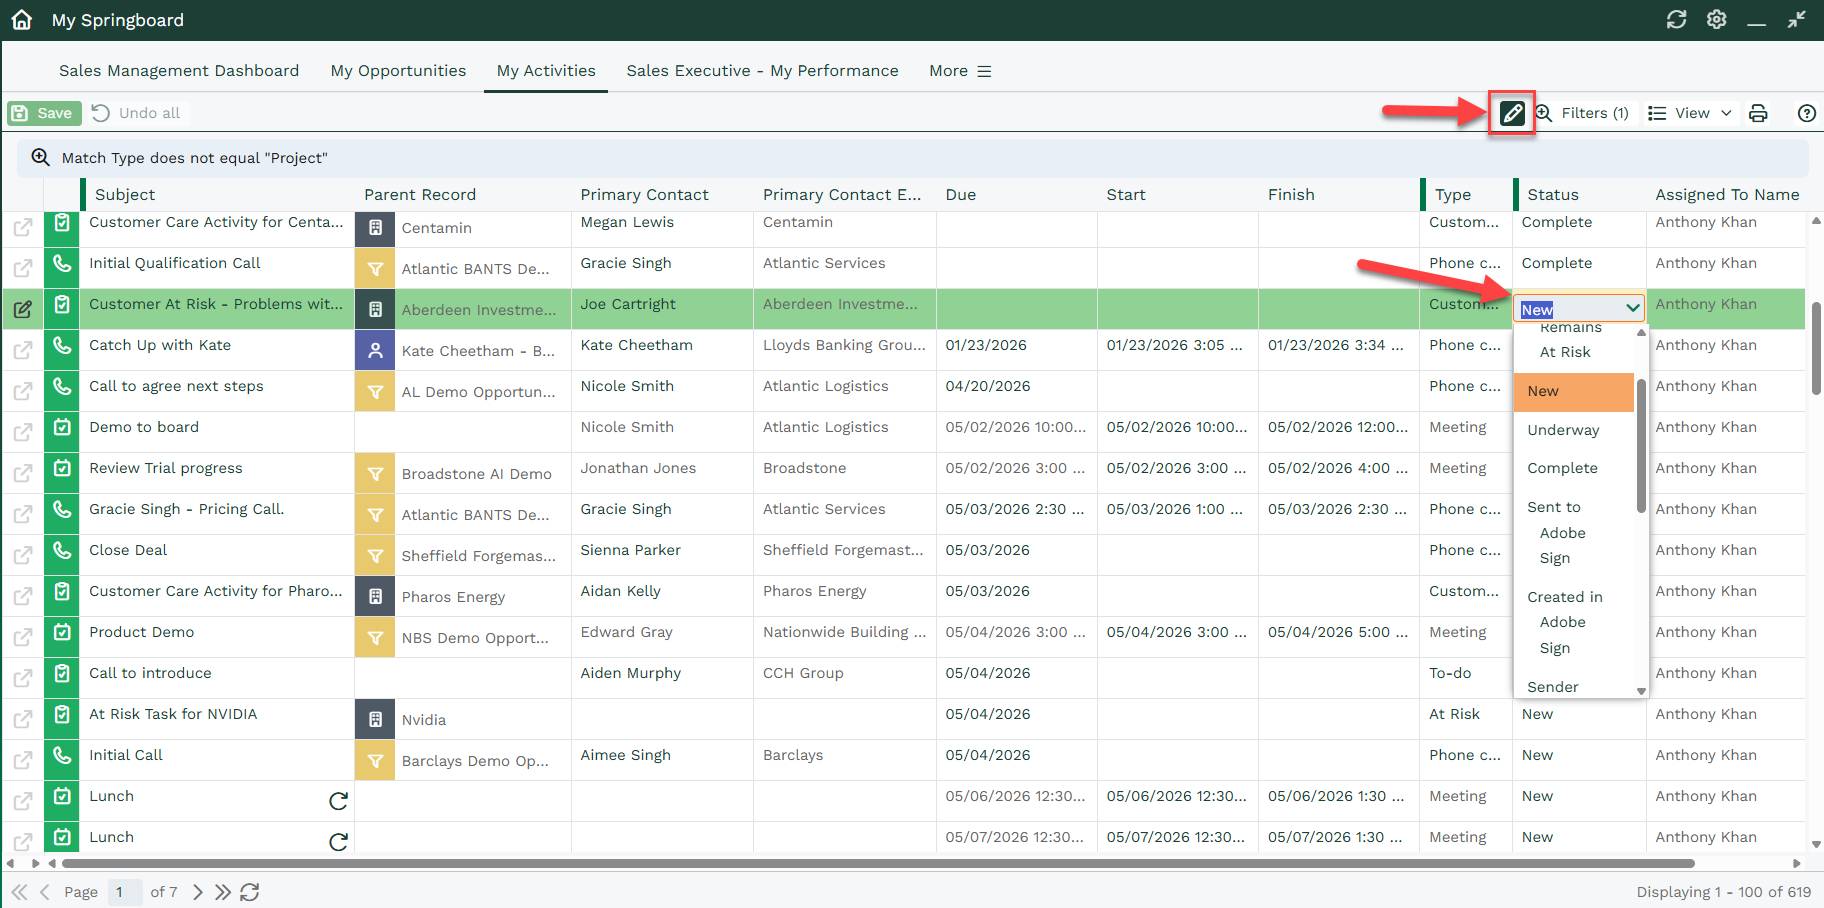
By default, your Springboard includes the ‘My Activities‘ landing page, shown as a Calendar view.
Note
Users must have both the 'Create' & 'Delete Springboard Items' Capabilities, as well as 'View Activities' for the default 'My Activities' view to be added to their Springboard. If either Capability is missing, the default view won’t be added and won’t be applied later, even if those capabilities are granted after.
Because these views are editable, you can make changes directly from your Springboard, rather than opening the Activity record separately, just to edit and save it.
Note
Each Landing Page view added to a Springboard must have a unique name. If you try adding a view with a name that’s already in use, you’ll see a message like the one shown below.

If a Landing Page view and a Dashboard share the same name but different data types, the data type is appended to the name to keep them distinct.

Springboard Preferences
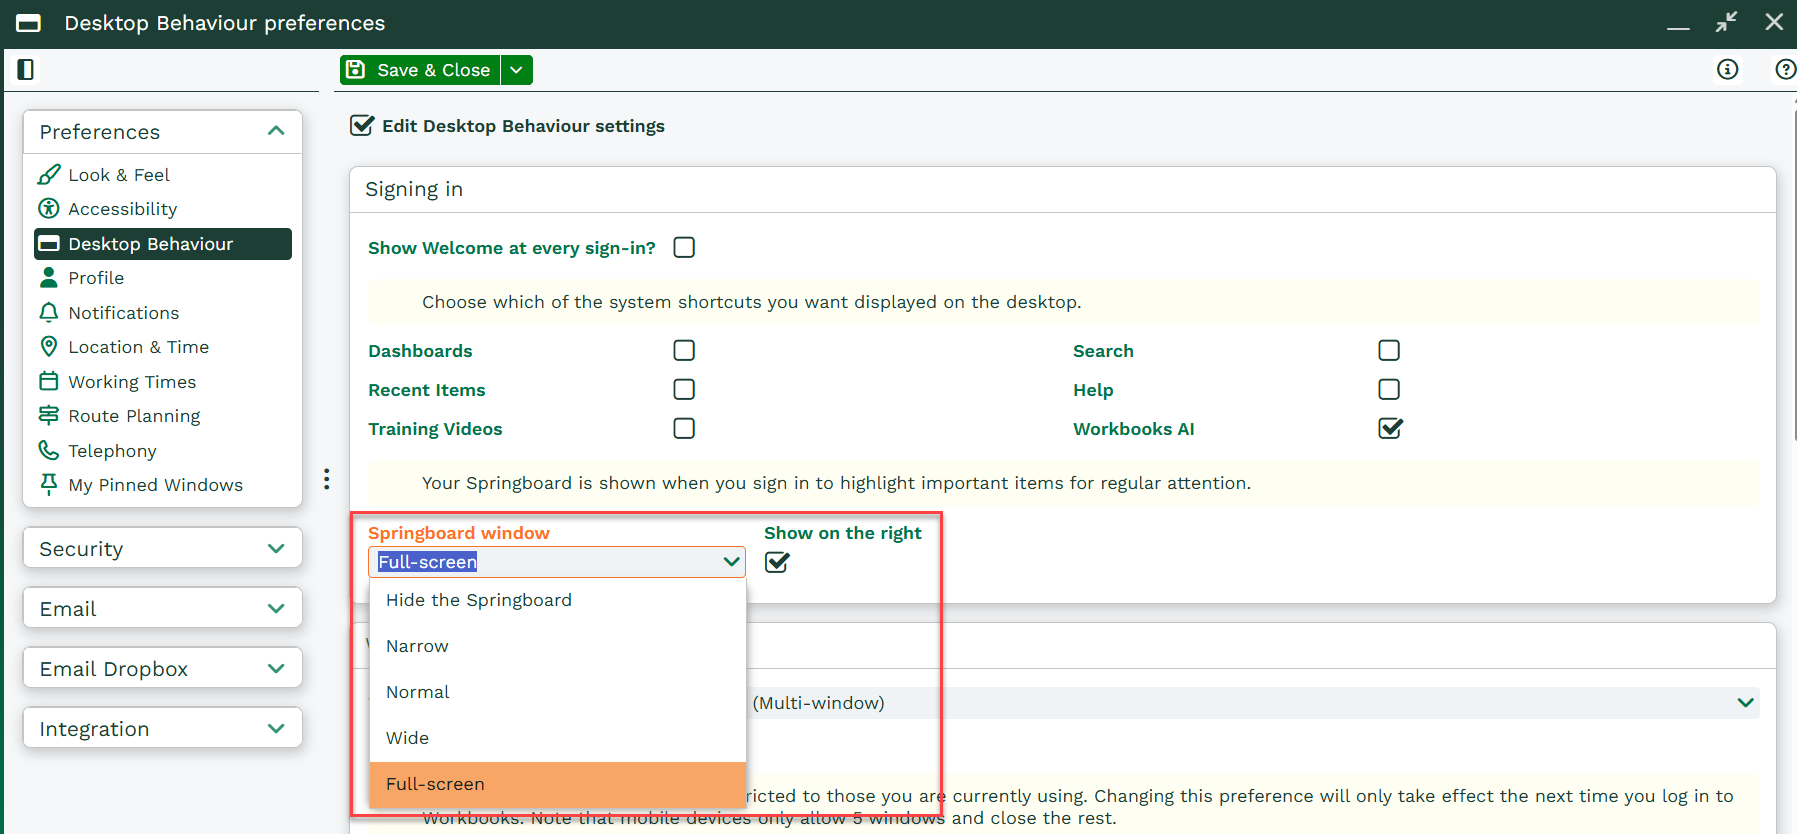
By default, the Springboard appears on the right-hand side of the screen when you sign in. You can change its position and size in Preferences, or hide it completely if you don’t need it.
You can snap the Springboard to the left or right of the screen, just like other records. If you open/snap another window, it will automatically fill the remaining space. When shown, it can’t be fully closed, only minimized. It’s designed to be the main place you return to throughout the day. This also applies when you close all other windows or use the ‘Close all’ in Manage Open Windows.
Similar to Reports and Dashboards, the Springboard refreshes automatically when new items are added.
You can use the cog icon in the top‑right corner to edit your Springboard. From here, you can choose which Reports are displayed and control the default screen position using your Preferences.
Managing your Organizations Springboard
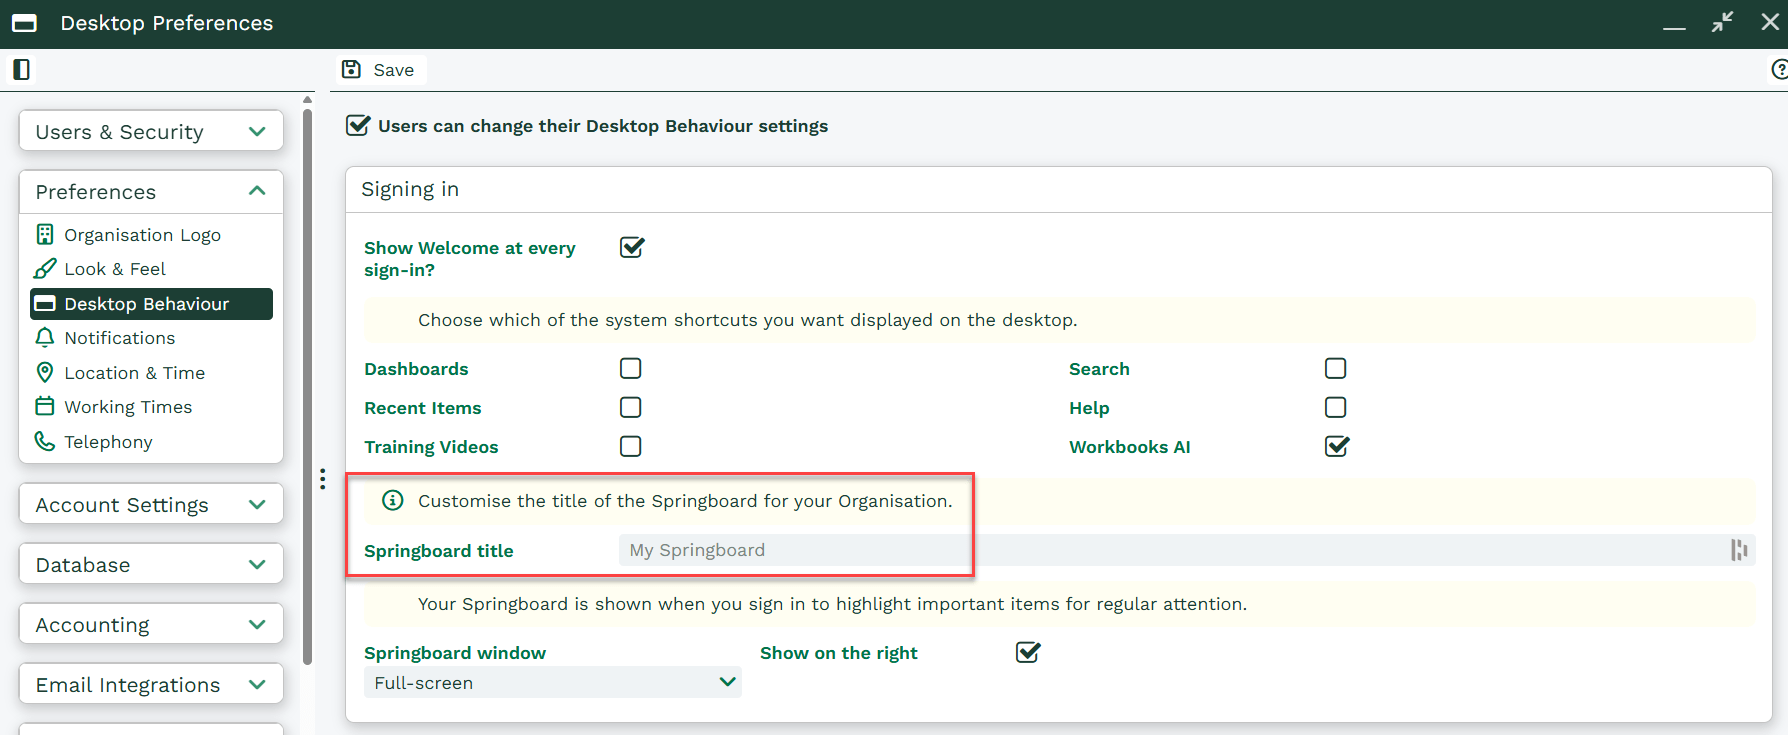
A System Administrator can change the Springboard title. Go to Start > Configuration > Preferences > Desktop Behavior and update the Springboard Title field as needed.
If left blank, the title defaults to ‘My Springboard’.
Springboards can be managed and rolled out centrally by a System Administrator, or by Users with the right capabilities. This is useful if you want a team working from the same set of reports. Once content is added to a User’s Springboard they can view it, even if they don’t have permission to open the specific record.
The Capabilities required for a User to manage their own Springboard are:
- Create Springboard items
- Modify Springboard items
- Delete Springboard items
- View Springboard
To be able to deploy items to other Users Springboards, you require the ‘Manage Springboards’ Capability.
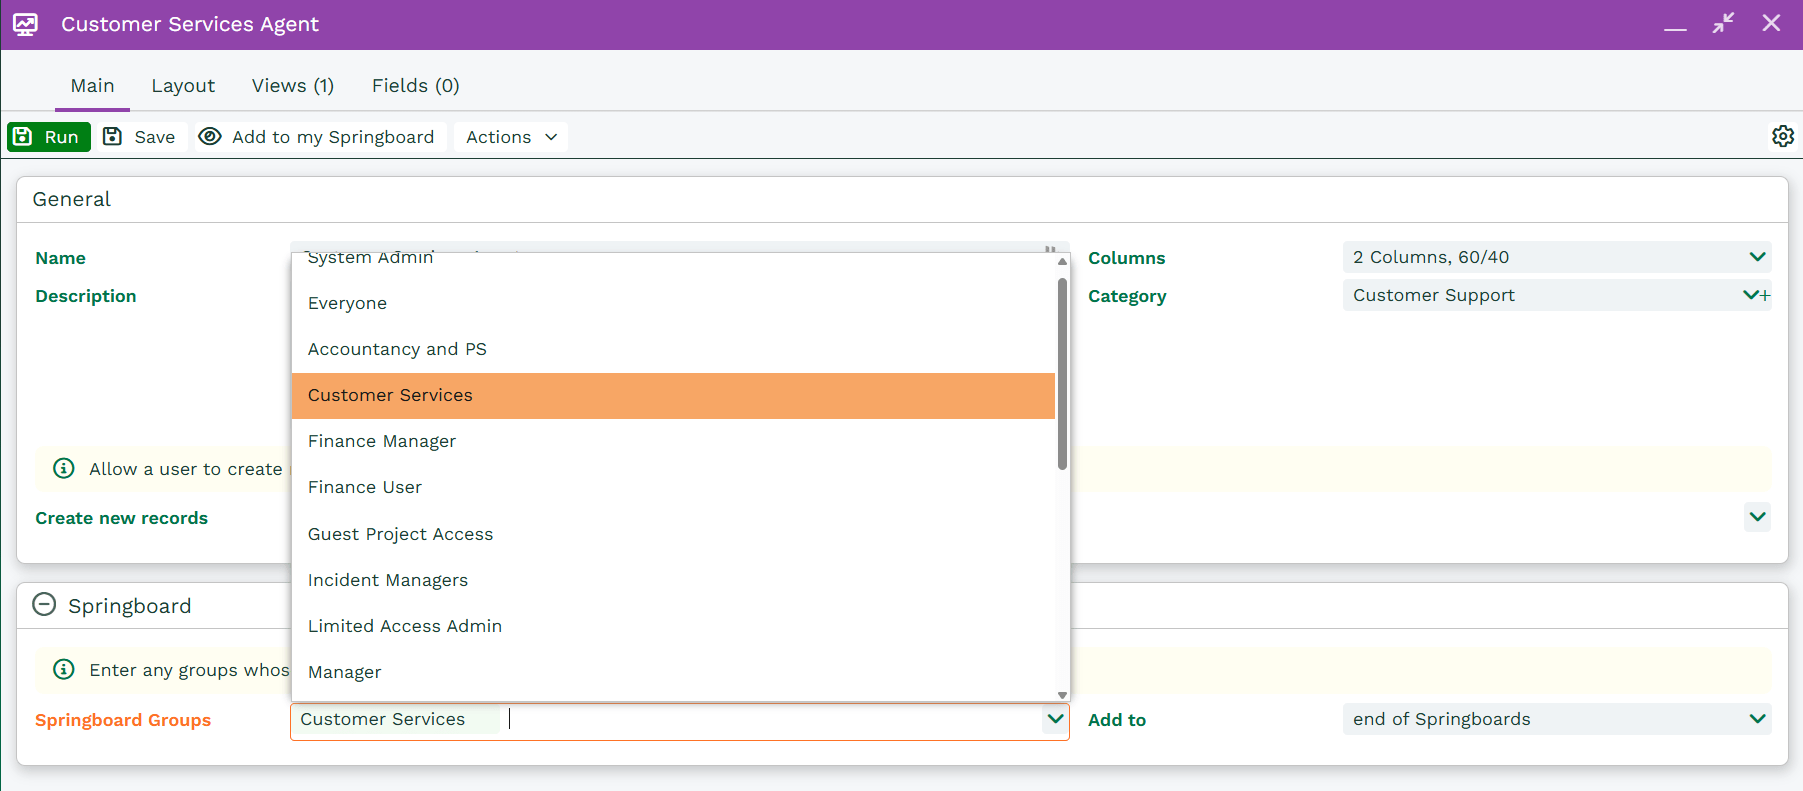
When editing a Dashboard, you can use the Springboard Groups dropdown to choose which Users to share it with. For example, a Support Manager could share a Case report with styling that highlights urgent or neglected Cases by selecting the Support Team user group. The report will then appear on their Springboards and be ready to use.
If you add a Dashboard with multiple views to your Springboard, you’ll see a Views button that lets you switch between them. Selecting a view opens it in a separate window.
Note
The maximum number of tabs you can add to Springboard is 100.