









On The Day Registration App
The Event Check In tab gives you a quick view of everyone registered for the event, including their details and attendance status.
To get started, open the Event record in Workbooks and select the Check In tab. From here, you can:
- View the list of attendees and their current status
- Mark attendees as Attended
- Add new attendees to the event
The sections below explain each area of the Event Check In Portal and how to manage attendee check-ins.
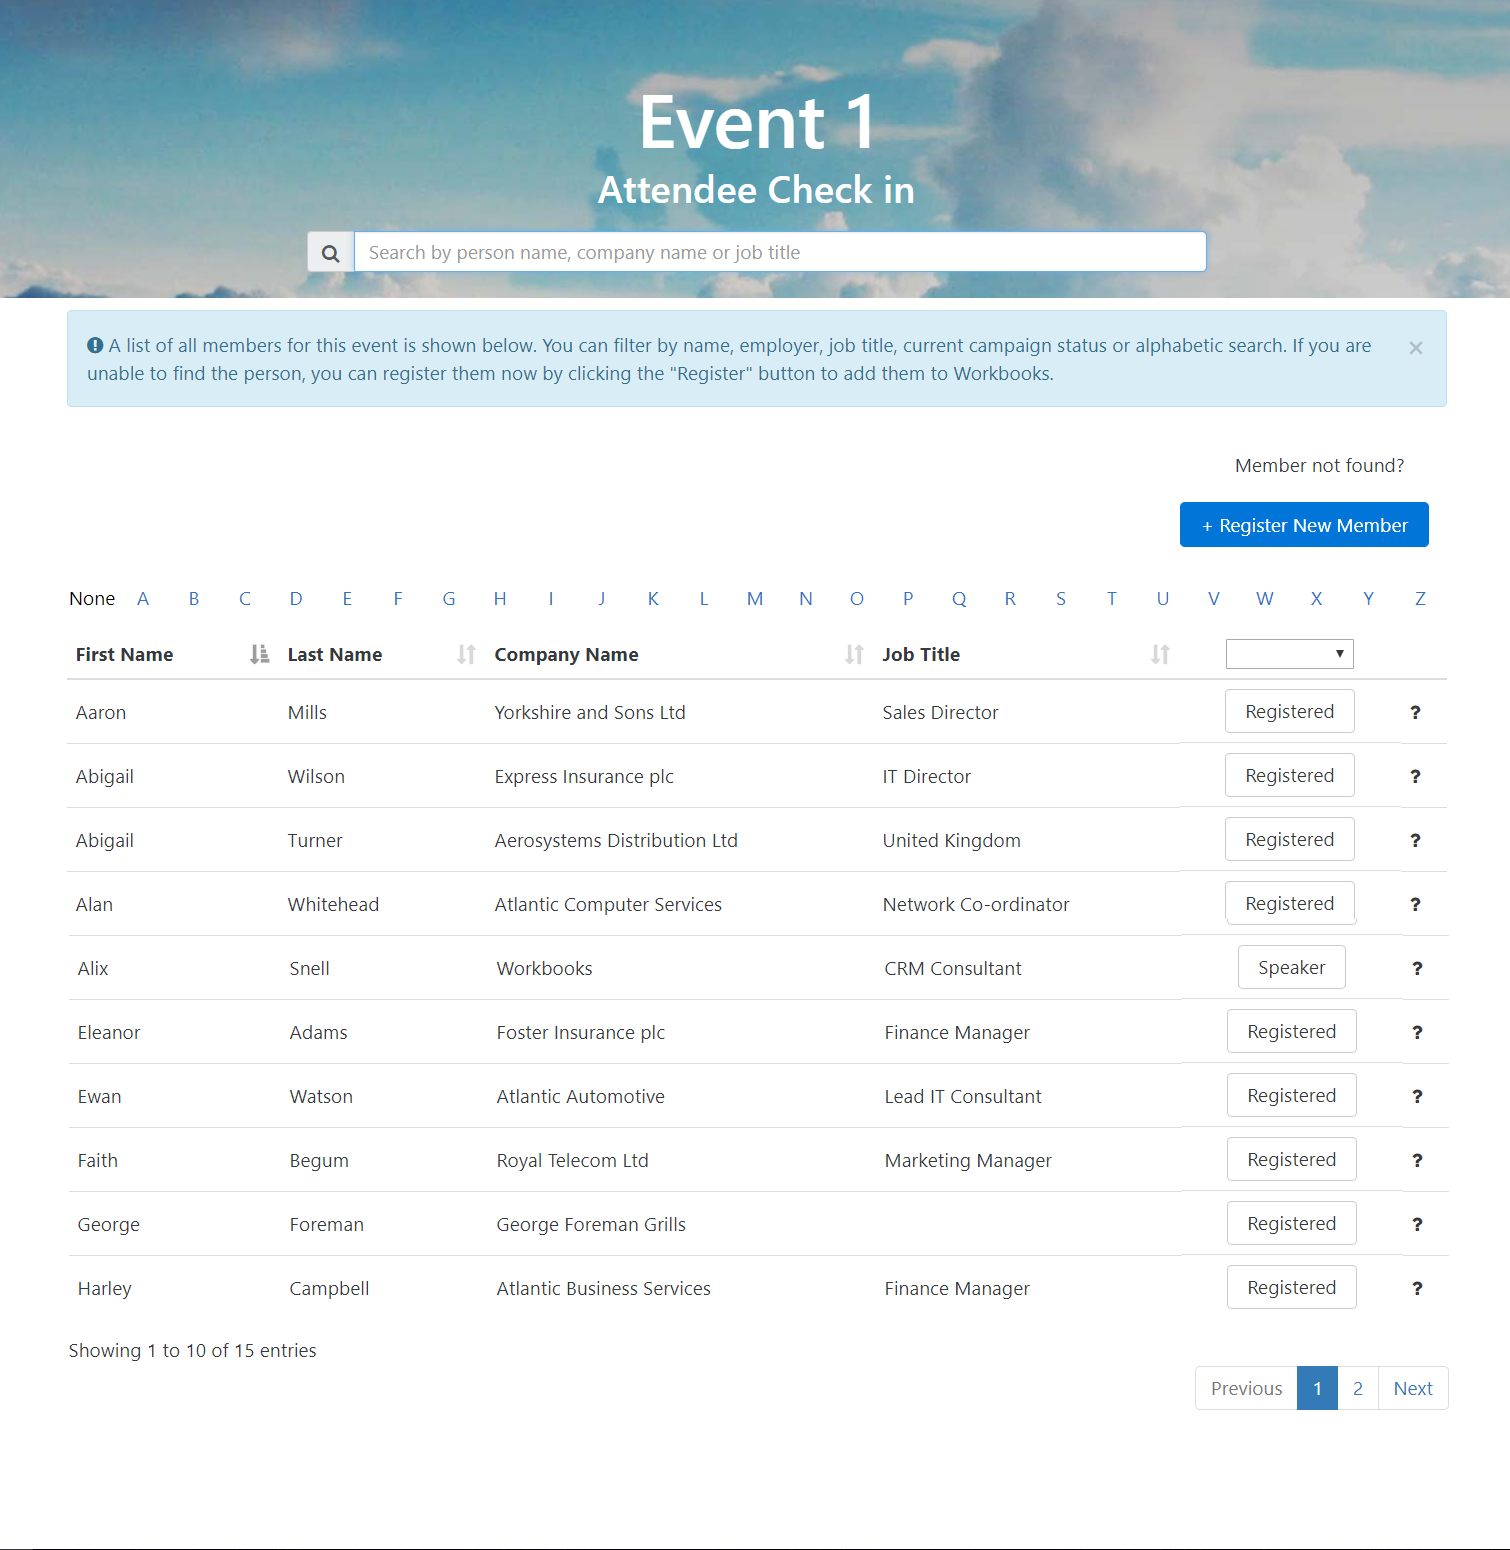
Finding an Attendee
There are several ways to find the attendee you want to check in. You can use one or more of these search and filter options at the same time to quickly narrow down the list. These options are:
Paging – lets you move through the attendee list 10 records at a time. Use the paging controls at the bottom of the page to navigate between pages and find the attendees you’re looking for.

Directory – Use the letters at the top of the page to jump straight to attendees whose name starts with the selected letter. This is a quick way to navigate large attendee lists.

Sorting – Click any column heading to sort the attendee list by that field. Click the same heading again to switch between ascending and descending order.

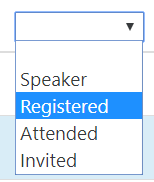
Filter by status – Use the dropdown above the Status column to show only attendees with a specific status. This is especially useful for larger events, where you may only want to see attendees who are currently Registered.
Search – Use the search bar at the top of the page to quickly find attendees. Results are filtered as you type and can match against the attendee’s name, company name, or job title.

Checking in an Attendee
Click the attendee status next to the person to mark them as Attended. While the update is being saved, you’ll see a loading spinner. Once complete, the attendee’s status will update in the portal and the icon will change from a question mark to a check mark.

Adding an Attendee
If the person you’re checking in isn’t listed, they may not have registered for the event. If your event doesn’t require advance registration, you can add them on the day. Simply click Add New Attendee and enter their details.
If the event has no ‘paid for’ tickets (ie it is a free event), then the following form will be displayed:
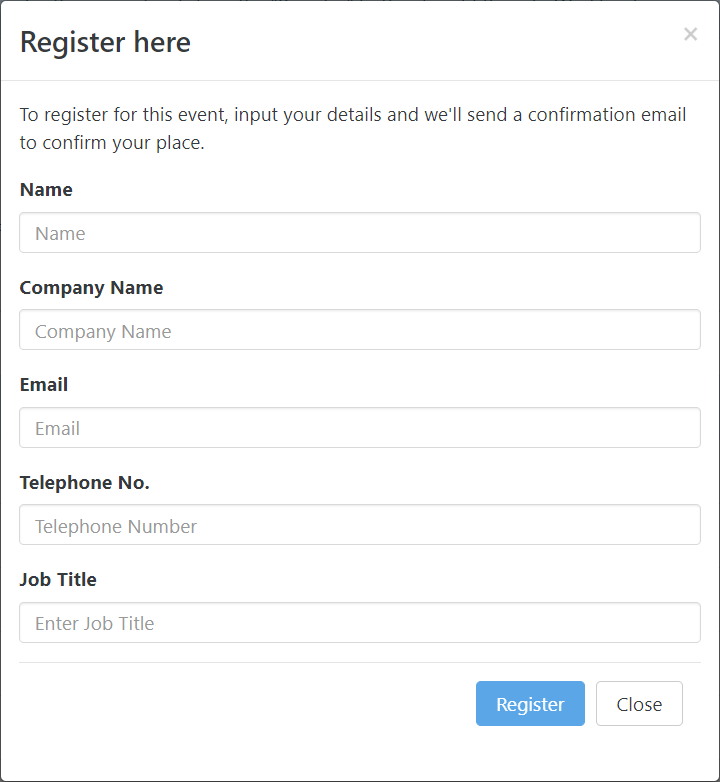
When you submit the form, the attendee will be added to the event and their status will automatically be set to Attended.
For paid events, ‘Add New Attendee’ opens the public event registration page. The attendee can enter their details and complete payment before being added to the event.