


Workbooks Scribe
Workbooks Scribe is an automated meeting assistant. It joins your online meetings, records and transcribes them, and then saves the recordings and transcript to the related Meeting record in Workbooks.
Scribe can join meetings on Microsoft Teams, Zoom, Google Meet and GoToMeeting. Once the transcript is on the Meeting record, you can run a Workbooks AI Agent over it, for example to summarize the meeting.
Adding Scribe to a Meeting
There are three ways to get Scribe into a meeting: from the Meeting record in Workbooks, from the Workbooks Outlook Add-in, or by inviting Scribe by email. The email option currently works for Microsoft Teams meetings only.
From a Meeting record
Open the Meeting record and click Scribe. You’ll find it alongside the other action buttons at the top of the record.

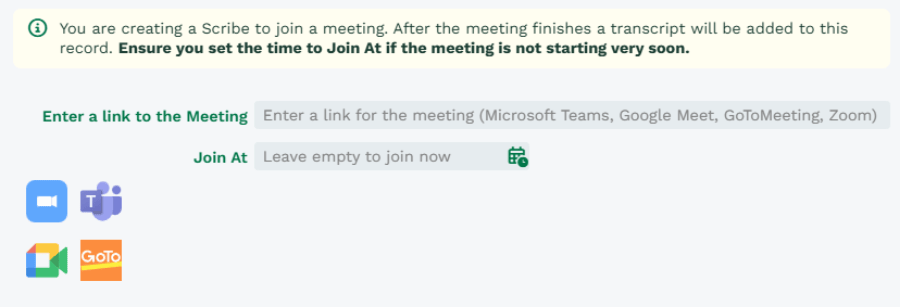
Then fill in the details:
- Enter a link to the Meeting: paste in the meeting link from Teams, Zoom, Google Meet or GoToMeeting.
- Join At: the date and time Scribe should join. Leave it empty for Scribe to join straight away. If the meeting isn’t starting very soon, make sure you set a time here.
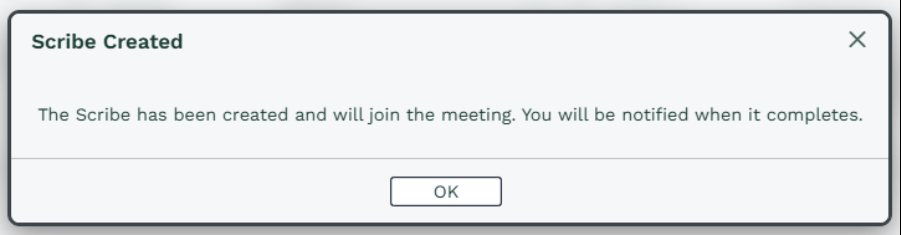
Once the Scribe has been created, you’ll see a confirmation that it will join the meeting and that you’ll be notified when it completes.
From the Workbooks Outlook Add-in
If you use the Workbooks Outlook Add-in, you can sync a meeting to Workbooks and add Scribe in one step. Open the Add-in on the meeting in Outlook and click Scribe & Save.
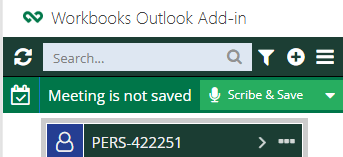
If you want to sync the meeting without adding Scribe, use the drop-down arrow on the button to save only.
Next, link the Meeting to the right record, such as an Opportunity, Project or Case, using Set as Parent. Where you’ll find it depends on how you got to the record:
- If you’ve opened the record in Details view, it’s at the top.
- If you’ve searched for the record, it’s at the bottom of the record’s card.
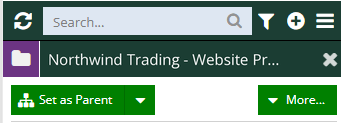
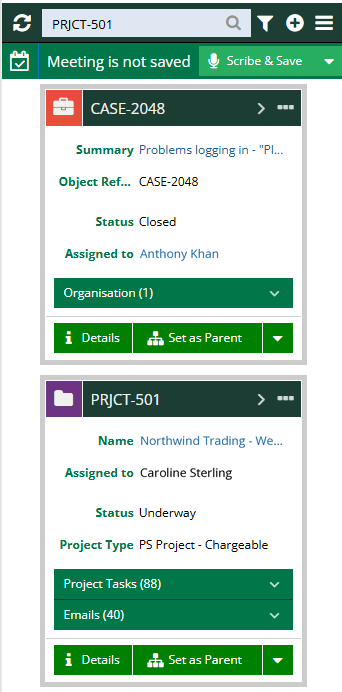
If you can’t get to the right record from the related items, search for it by its name or object reference instead. For more on using the Add-in with meetings, see Managing Meetings with the Mail Sync Add-in.
By inviting Scribe to a Teams Meeting
Each user has their own Scribe email address. You’ll find it under Start > Preferences > Email Dropbox > Scribe. Copy the Scribe Email Address and add it as an attendee on your Teams meeting invite, or forward an existing invite to it.
To make this quicker in future, you can save the address as a contact in Outlook and invite it like any other attendee.
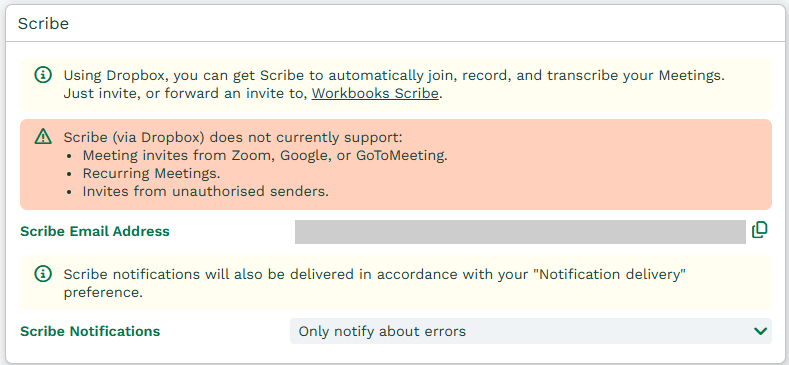
Inviting Scribe by email also creates a new Meeting record in Workbooks for the call. That record won’t have attendees, a description or a parent record set, so add these afterwards, particularly the parent record (for example the Opportunity or Organization) if you plan to run Agents on the transcript.
Scribe via Email Dropbox doesn’t currently support:
- Meeting invites from Zoom, Google or GoToMeeting. Use the Scribe button on the Meeting record for these instead.
- Recurring meetings.
- Invites from unauthorized senders.
You can choose which Scribe notifications you receive using the Scribe Notifications setting in the same section. These are delivered in line with your Notification delivery preference.
During the Meeting
Scribe joins the meeting at the time you set and waits in the lobby. In Teams, it appears as <your name>’s Workbooks Scribe. Teams may show it as Unverified, which is expected, so just click Admit.
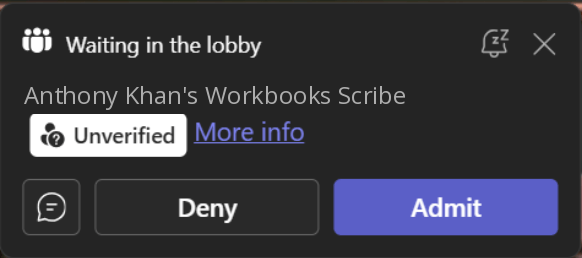
Once admitted, Scribe starts recording and transcribing automatically. It’s good practice to let the other attendees know the meeting is being recorded.
Scribe leaves the meeting once all the other attendees have left.
After the Meeting
When the transcript is ready, you’ll receive a Meeting transcription completed notification.

The Meeting record is then updated with:
- Audio recording and Video recording: links to the recordings of the meeting.
- Audio recording expiry and Video recording expiry: the date and time each link stops working. If you need to keep a recording, download it before then.
- Transcript: the full transcript of the meeting, with each line labeled by speaker name.


If you can’t see these fields, they may not be on your Meeting form layout yet. The information is still saved, but you’ll need to add the fields to the form to see it. See Getting Started with Workbooks AI and How to add a Field to a Form Layout? for details.
From here, make sure the Meeting has the right parent record, then run any summary or analysis Agents you use on the transcript. See Workbooks AI Agents for more information.