Adding a Dashboard as a Record Tab
Dashboards can be added as a Tab to the Form Layout for Records within Workbooks. This Custom Field type allows you to display an entire Dashboard within the Record and apply constraints to only show information specific to that record.
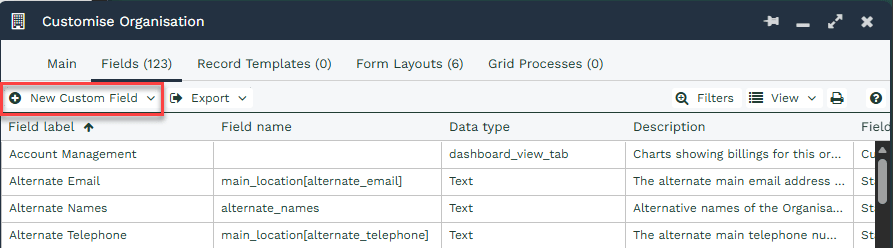
To create a Dashboard Tab you will need to go to Start > Configuration > Customisation > Record Types and select your chosen Record Type. Once this is done you will need to go to the Fields Tab and select the New Custom Field Button.
You will then be able to select Dashboard, this will then create a new Field for the Record and configure a number of settings in order you will need to configure the below settings.
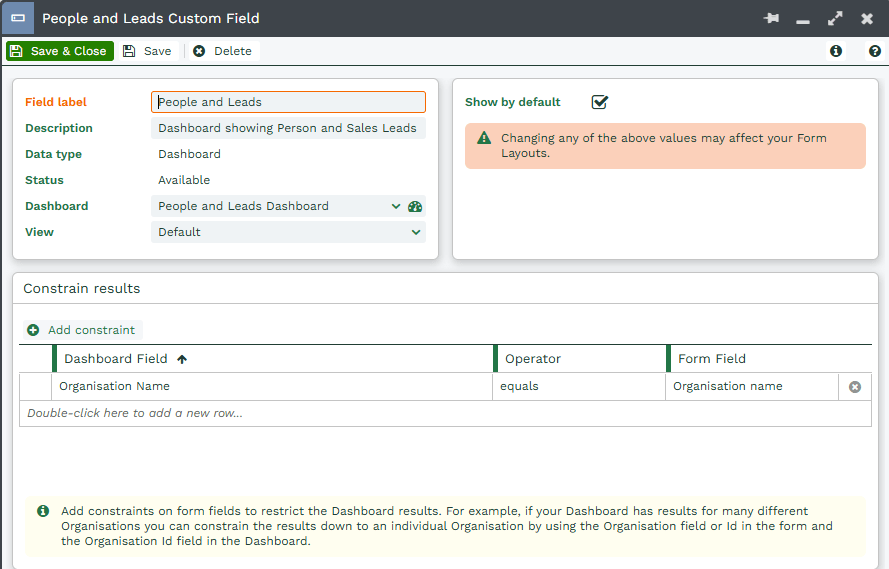
Field Label – The name of the Dashboard Tab as it will appear for the User.
Description – An optional summary that can be added to provide further detail on the Dashboard.
Dashboard – Select the Dashboard that you want to display within the Tab
View – From the Dashboard choose which Dashboard View will be used.
Like a Report Field it is then possible to constrain the Dashboard using information on the Record. In order to constrain your Results the Dashboard View must have at least one Dashboard Field configured.
Once you have configured the Dashboard Field you will be able to enable/disable this by selecting which Form Layout displays the Dashboard tab. By Default this will appear as the last tab but can be re-positioned as required like any other Tab.
Example of setting up a Dashboard Tab
This example demonstrates how to create a Dashboard Tab on an Organisation Record that is constrained by the Organisation Name.
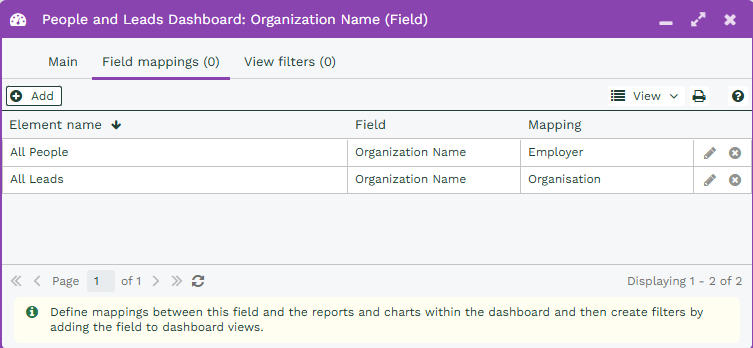
The Dashboard includes two reports:
- All People which includes the Employer Field on a Person
- All Leads which includes the Organisation Field on a Lead.
We have then created a Dashboard Field called “Organization Name” and have mapped these two Fields to the Dashboard Field. Once the Dashboard Field has been created we can now use it on the Dashboard Tab to and Constrain it to only show results specific to that Record.
Dashboard Tabs are a type of Field so in this example are created from Start > Configuration > Customisation > Record Types > Organisation > Fields, then use the New Custom Field button and select Dashboard.

This will then allow you to set up the Dashboard Tab on the Organisation Record.
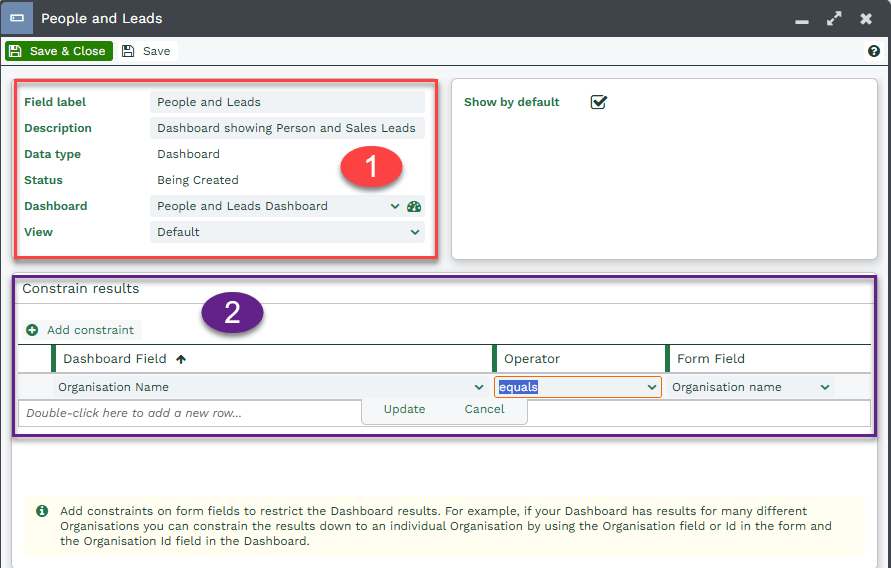
1. You will need to give the Dashboard a Field Label, which will appear as the Tab label and then select which Dashboard and View you will need to use.
2. You will now need to apply a Constraint to the Dashboard so that only the results related to each specific Organisation Record are displayed. In this example the Dashboard Field “Organization Name” which links through to the Employer on a Person and the Organisation on a Lead is equal to the Organisation name of the Record the Dashboard is running on.
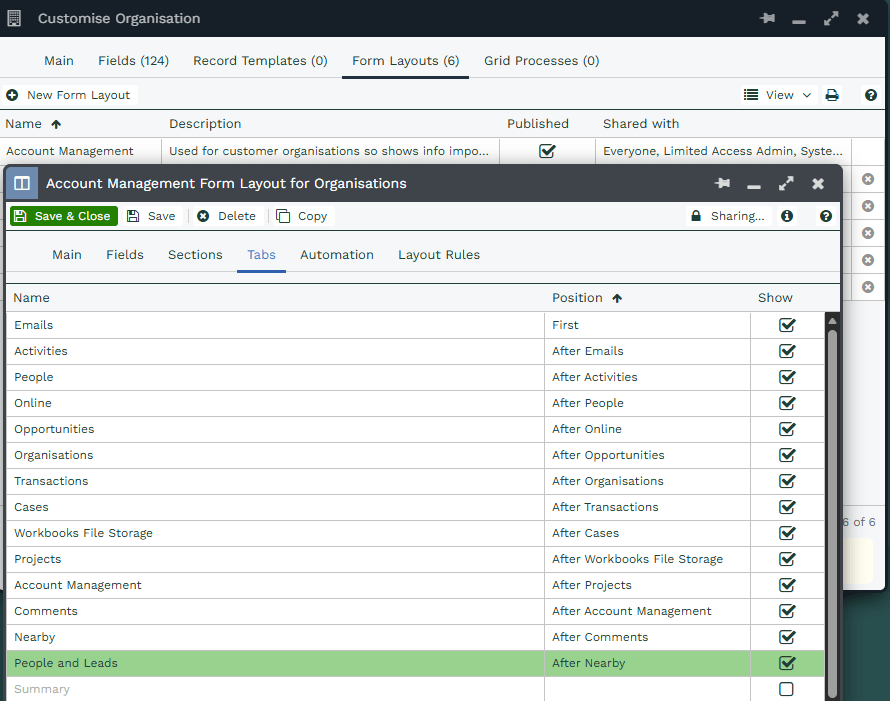
Once the Dashboard has been configured you will need to ensure that is is enabled and showing on the selected Form Layout on the Tabs tab.
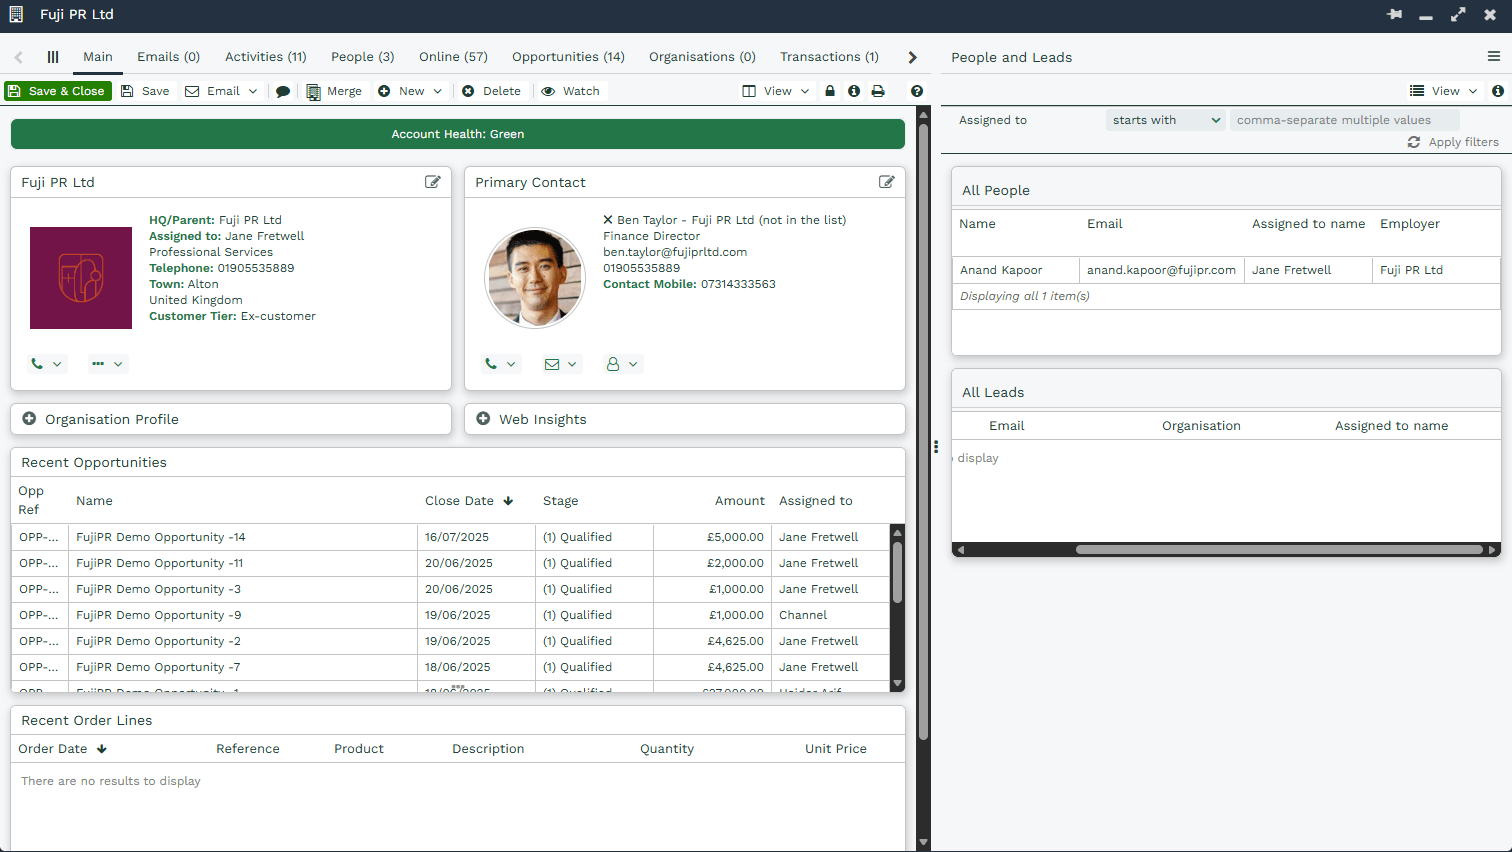
Now opening a Record you can see that there is a Tab called People & Leads, which is the Field Label given to our Dashboard and the Constraints have been applied so that only Leads and People with an association to this Organisation appear.