


API Data
An overview of what API Data is and what it can be used for, including how you can base Dynamic Picklists on this data to create a constrained picklists to have one value restricted by another.
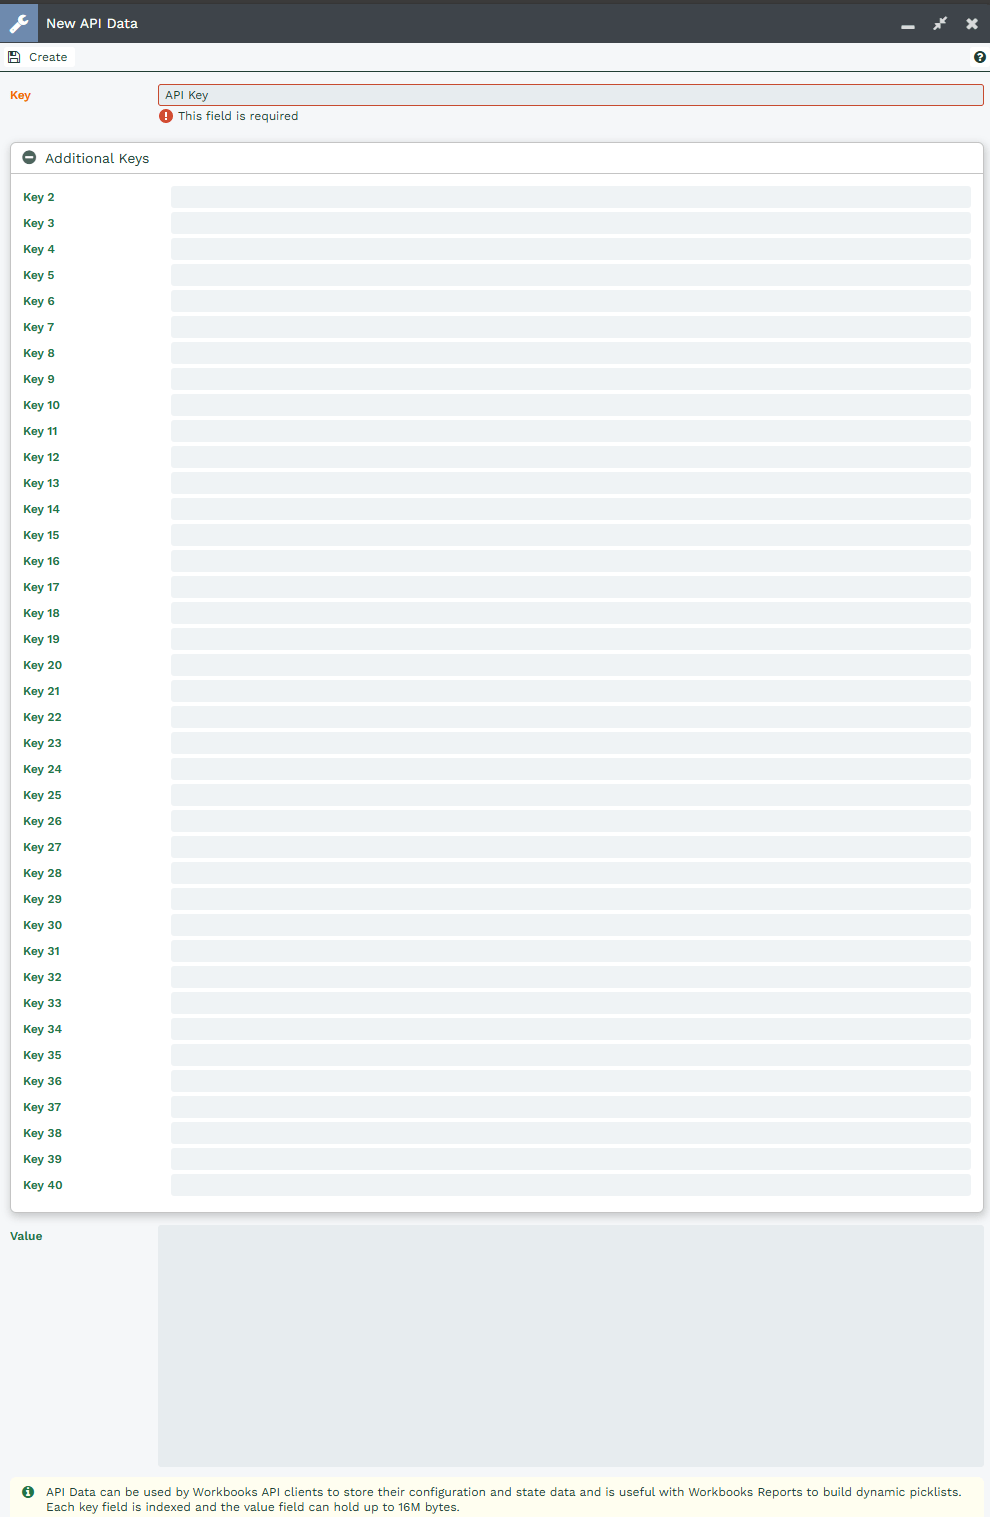
API Data offers a convenient place for you to store configuration and state data for your Workbooks Processes. To view API Data, go to Start > Configuration > Automation > API Data. API data has 40 ‘Key’ fields and a single ‘Value’ field. Each Key field is an indexed 255 character string, whilst the Value field can store up to 16MB.
If you have automation on your database, it may rely on stored API data to function, therefore it’s generally not advised to change the values unless you have good reason to.
Create Arbitrary Field Mappings Using API Data and Dynamic Picklists
You can also use API data for non-API related purposes, using Dynamic Picklists you can configure auto-populate field mappings based on arbitrary API data so that selecting a picklist value on a record will populate another field.
In this example we’ll show you how to create an Industry picklist on an Organisation record which populates a SIC code field on with the corresponding industry SIC code.
Importing the Industry Data
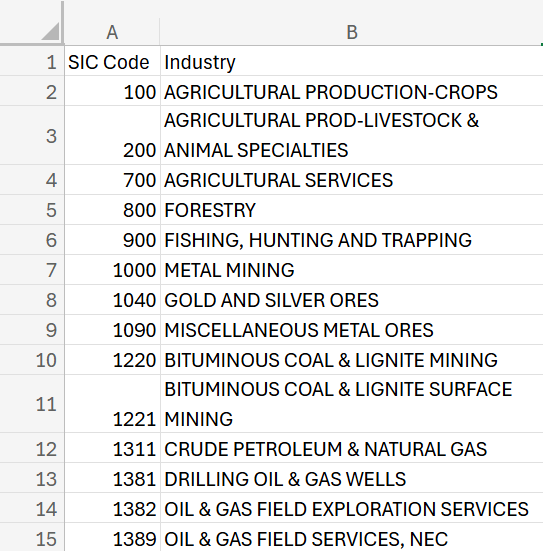
To begin, get your list of industries and SIC codes and save them as CSV.
Go to Import and choose an API Data Records Import.
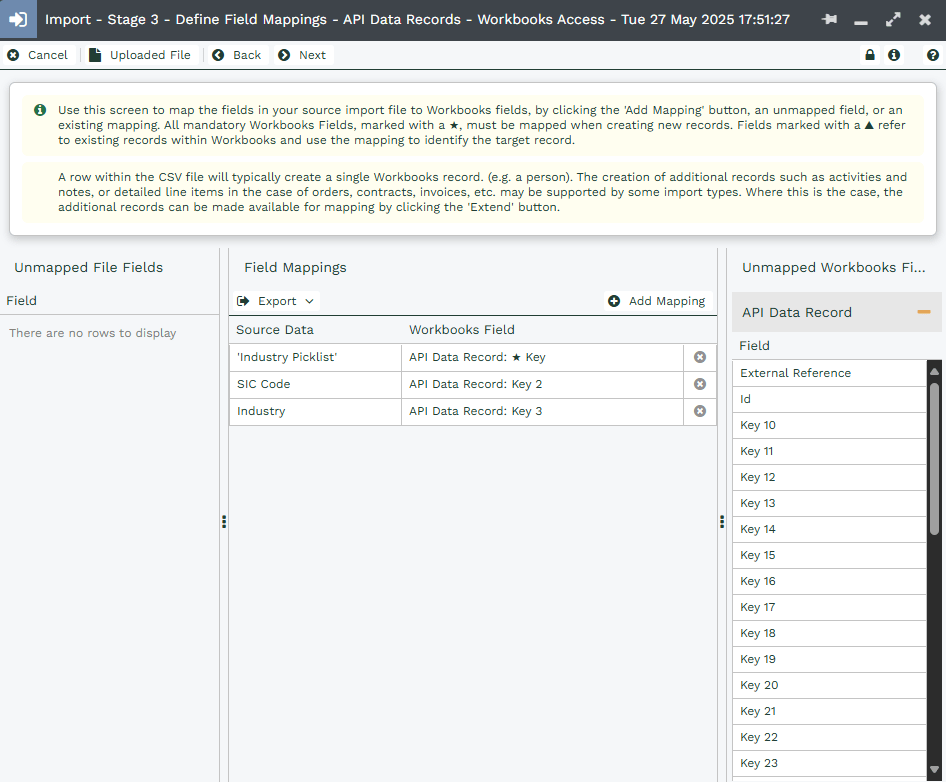
Upload your CSV file, and click next until you reach the Define Field Mappings stage. At the field mappings stage you’ll need to add the following 3 mappings:
- Fixed value mapping of ‘Industry Picklist’ to the API Data Record ‘Key’ field.
- ‘SIC Code’ to API Data Record ‘Key 2’.
- ‘Industry’ to API Data Record ‘Key 3’.
The fixed mapping is required as you’ll need to use this later when creating your report for the Dynamic Picklist so that your picklist only displays relevant values.
Click next to reach Stage 4, then select the Import Mode as ‘Only create new records’. Click next to reach the review screen, then Run the import and approve it once finished.
Creating the Report for the Dynamic Picklist
The next step is to create a Report to use as a basis for the Dynamic Picklist.
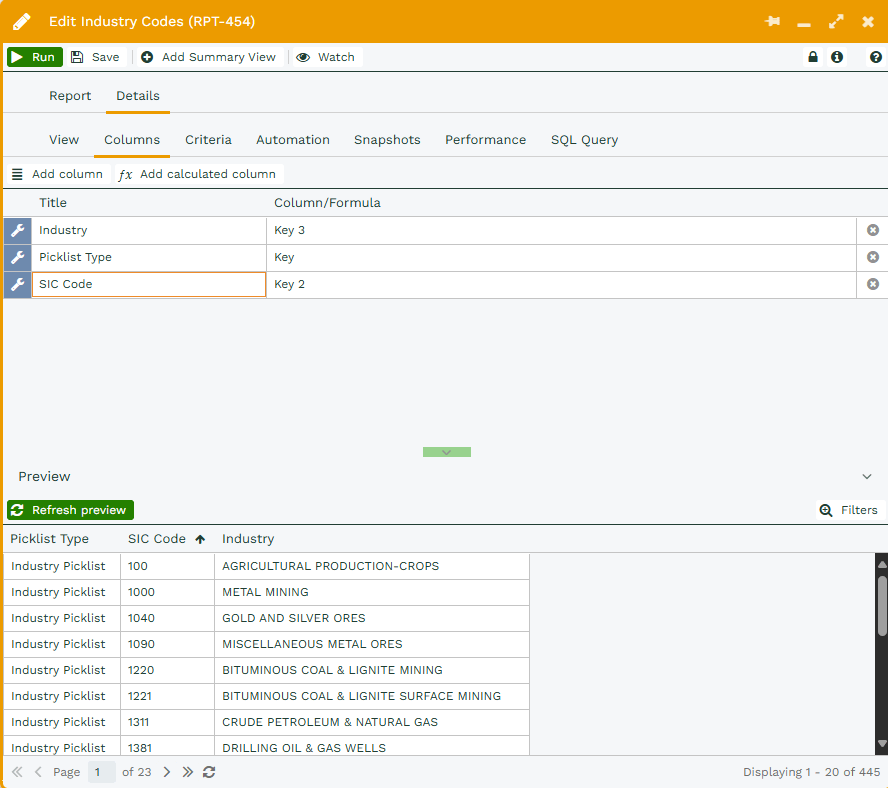
Create the report based on API Data and add columns for Key, Key 2 & Key 3, renaming them to Picklist Type, SIC Code and Industry respectively. Then add a criteria, key is ‘Industry Picklist’ to reduce the results to only display the Industry values in the API data, i.e., our set of picklist values.
Note
Don't forget to add a Criteria on Key column to say it starts with 'Industry Picklist', this is so that our report is performant and only limited API Data records show up in the drop-down menu on ORG records.
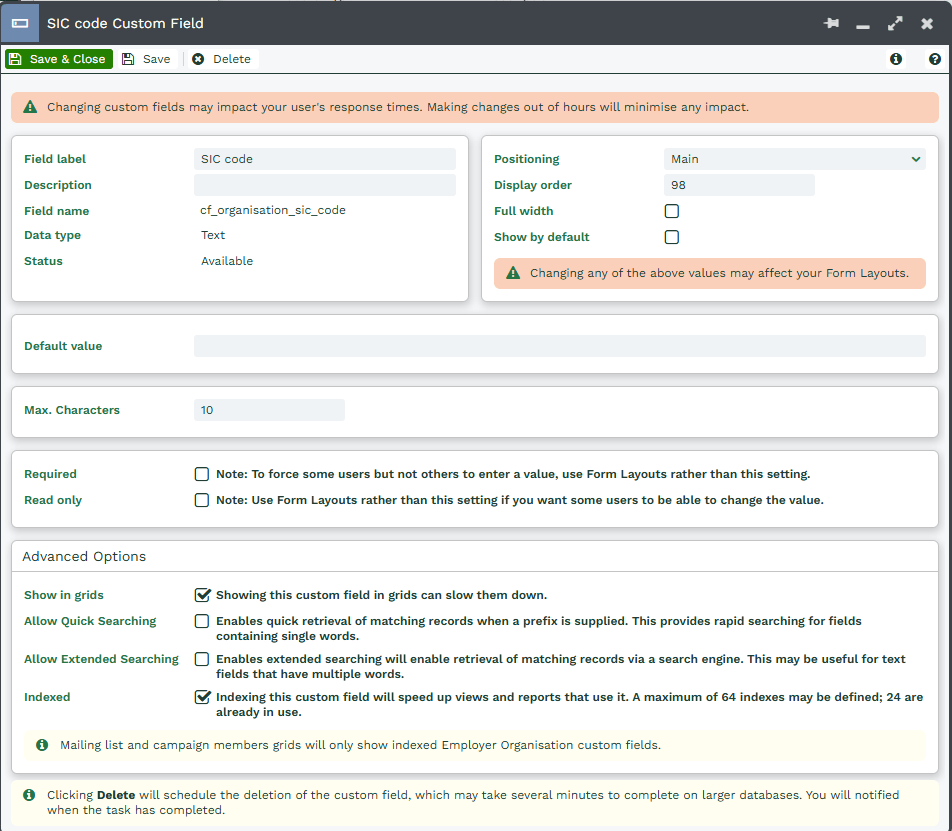
Go to Customise Organisation and create a custom field of type Text for SIC Code, (whilst actually an integer, this SIC Code custom field needs to be of type text because the API key field where the SIC code stored is of type text. For the mapping to work, both fields need to be of the same data type) you’ll need to create this first so that you can choose it as a field to map to when creating your Dynamic Picklist.
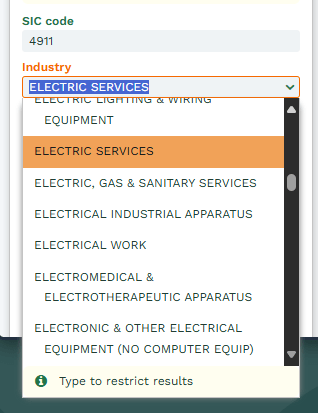
Now create a custom field of type Dynamic Picklist for the Industry Field and configure the auto-populate field mappings like so:
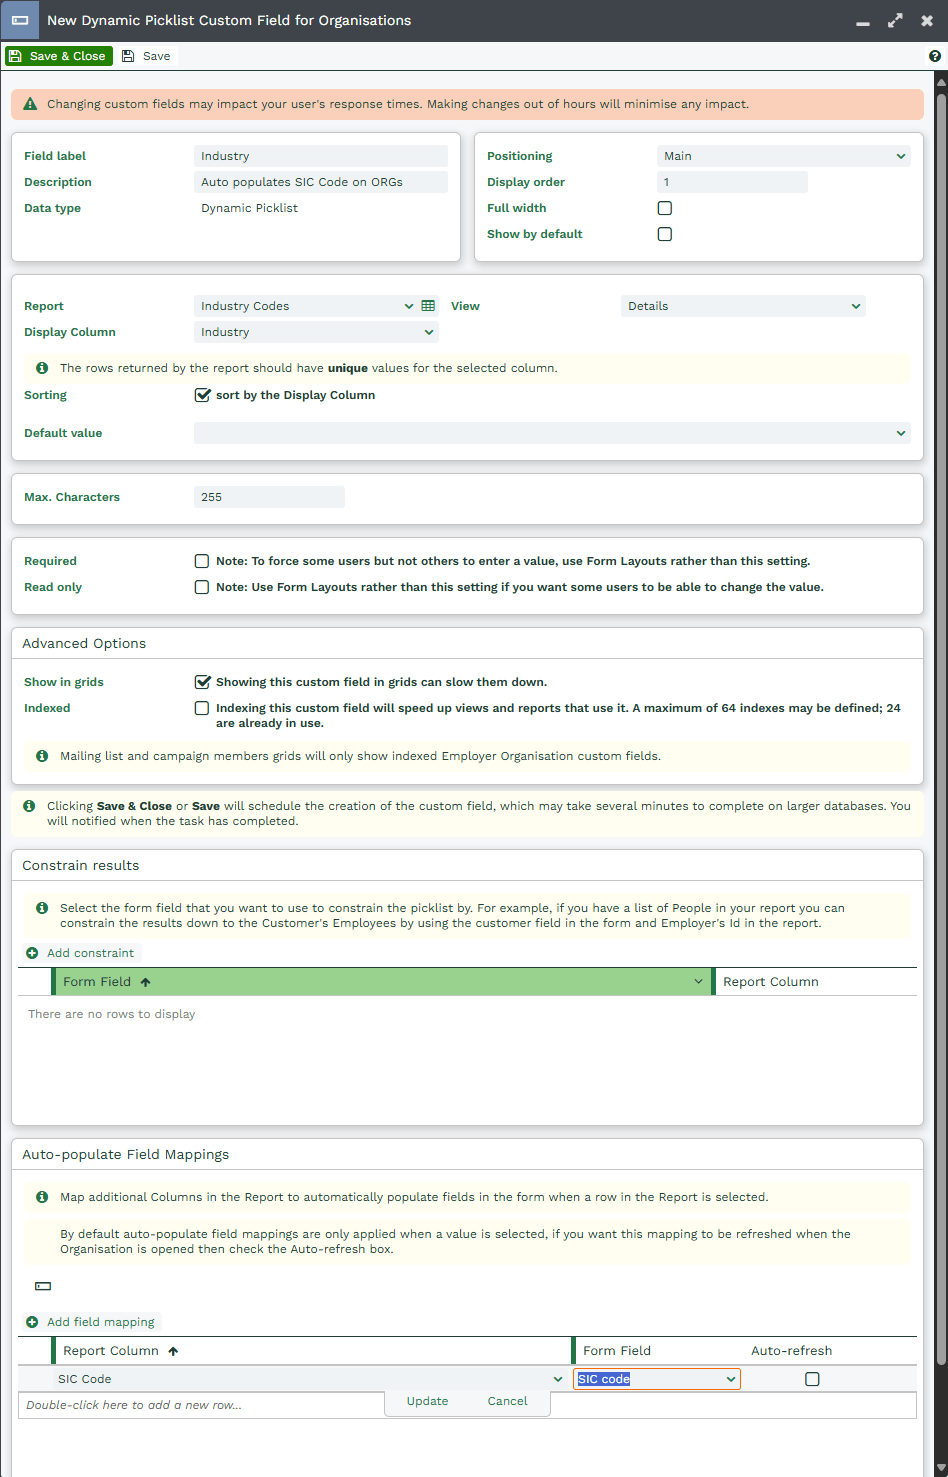
Which will give you the following picklist and auto-mapping:
Of course, remember to adjust your form layouts appropriately.