


Configuring Custom Party Relationships
How to create a relationship between a Third Party and your Own Organisation, a relationship between two Third Parties, or between two Own Organisations.
Configuring a Third Party to Own Organisation Relationship
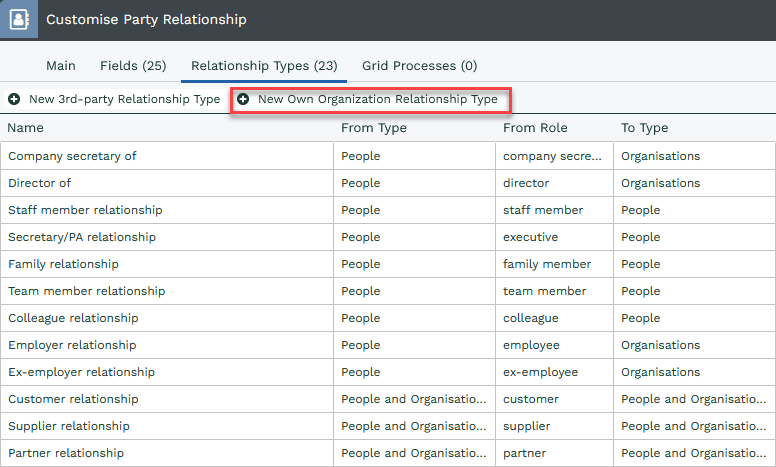
Workbooks allows you to create a relationship type between a Third Party and your Own Organisation. This is probably the most common type of relationship in Workbooks. To configure a Third Party to Own Organisation relationship, click Start > Configuration > Customisation > Record Types > Party Relationships > Relationship Types and then choose “New Own Organisation Relationship Type“:
From here, enter in the required information as described here which includes:
- Relationship Name.
- Description.
- Picklist Position.
- Party Type – The record types that the relationship will be available for (see above).
- Role (noun) – The Plural Role (used in reporting) and Phrase (displayed in grid views) will be auto-populated.
- Can create new relationships? – Tick both check-boxes.
Configuring a Third Party to Third Party Relationship
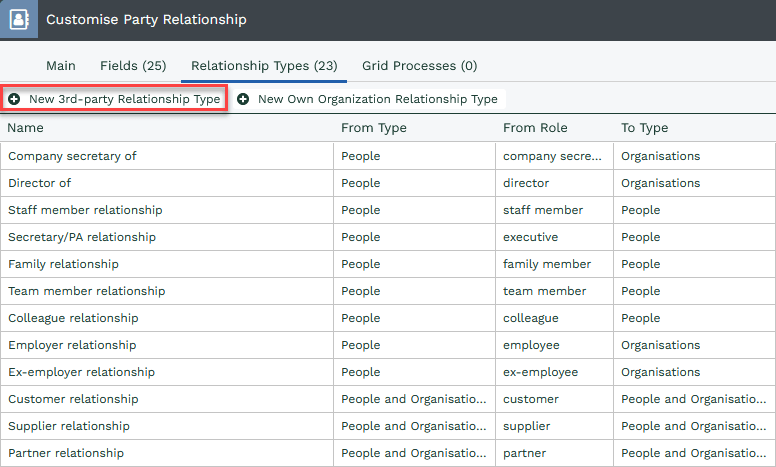
Workbooks allows you to create a relationship type between two Third Parties. To configure a Third Party to Third Party relationship, click Start > Configuration > Customisation > Record Types > Party Relationships > Relationship Types and then choose “New 3rd Party Relationship Type“:
From here, enter in the required information as described in section one which includes:
- Relationship Name.
- Description.
- Picklist Position.
- Party Type – The record types that the relationship will be available for (see above).
- Role (noun) – The Plural Role (used in reporting) and Phrase (displayed in grid views) will be auto-populated.
- Can create new relationships? – Tick both check-boxes.
Configuring an Own Organisation to Own Organisation Relationship
Workbooks also allows you to create a relationship type between two Own Organisations. This isn’t something that many customers wish to do but we offer the ability to do so if your business requires this functionality. To configure an Own Organisation to Own Organisation relationship, click Start > Configuration > Customisation > Record Types > Party Relationships > Relationship Types and then choose “New Own Organisation Relationship Type“.
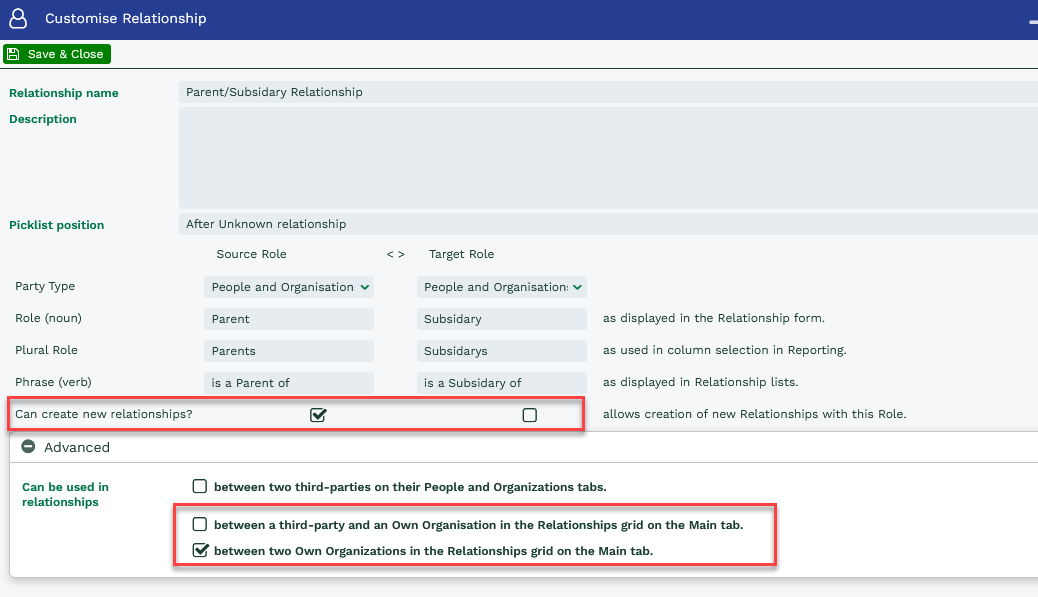
There a few specific settings required here, but the setup is mostly the same as setting up an Own Organisation to Third Party relationship.
- Un-tick the “Can create new relationships” checkbox for the target role.
- Under “Advanced”, un-tick option 2 and select option 3 instead.
- Click “Save & Close”.
Tip
NOTE: This relationship will then be available from an Own Organisation only.