Customising the WESS Add-In
How it works
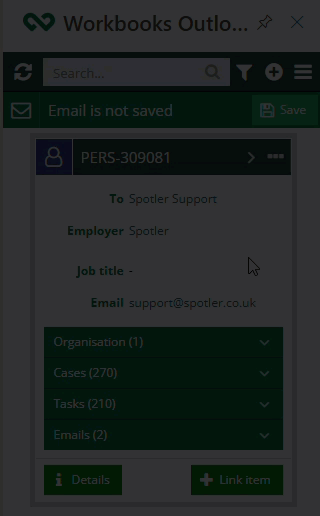
By default, the Workbooks Outlook Add-in displays several standard fields on the ‘Basic View’ such as a Person’s Name, Employer and Email Address, with more information found on the ‘Detailed View’. System Admins can control what fields are displayed on both the Basic and Detailed View by creating new Profiles and applying them to specific Users or User Groups.
Note
There is no support for multi-select picklists.
Creating and editing new Add-in Profiles
Go to Configuration > Email Integrations > Exchange Sync > Configuration. The configuration screen will open where you will see the list of Organisations configured within your Exchange Sync database. You will see multiple if you have more than one configured.
Once you select the Organisation you want to amend the Profile for, navigate to ‘Profiles’ and you will see a ‘Default’ Profile which acts as the default setting for the Outlook Add-in. This cannot be edited.
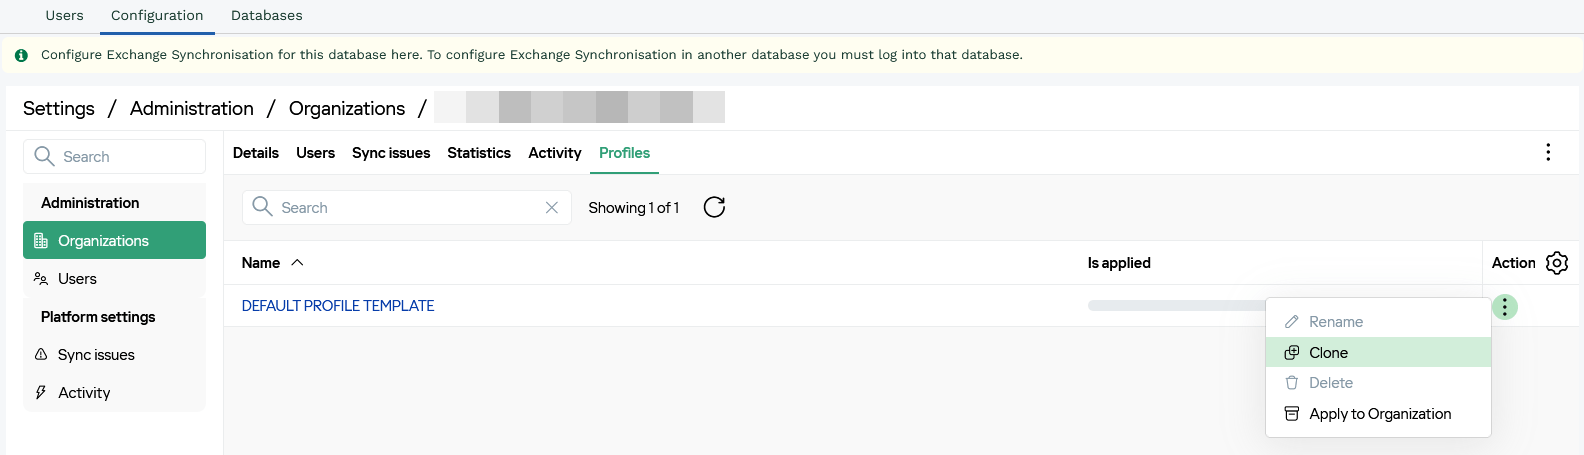
To create a new Add-in Profile, you must copy an existing Profile which can be done in two ways:
1. Click on the three dots at the far right of the Profile, select ‘Clone’ (as shown in the screenshot above) and give it a name. Once you have done this, it will appear in the list of available Profiles where you’ll be able to open it and amend the Records / Fields available within the Profile.
2. Alternatively, you can click on the Profile you wish to ‘Clone’ and select the three dots at the top right > Select Clone. (As shown below)
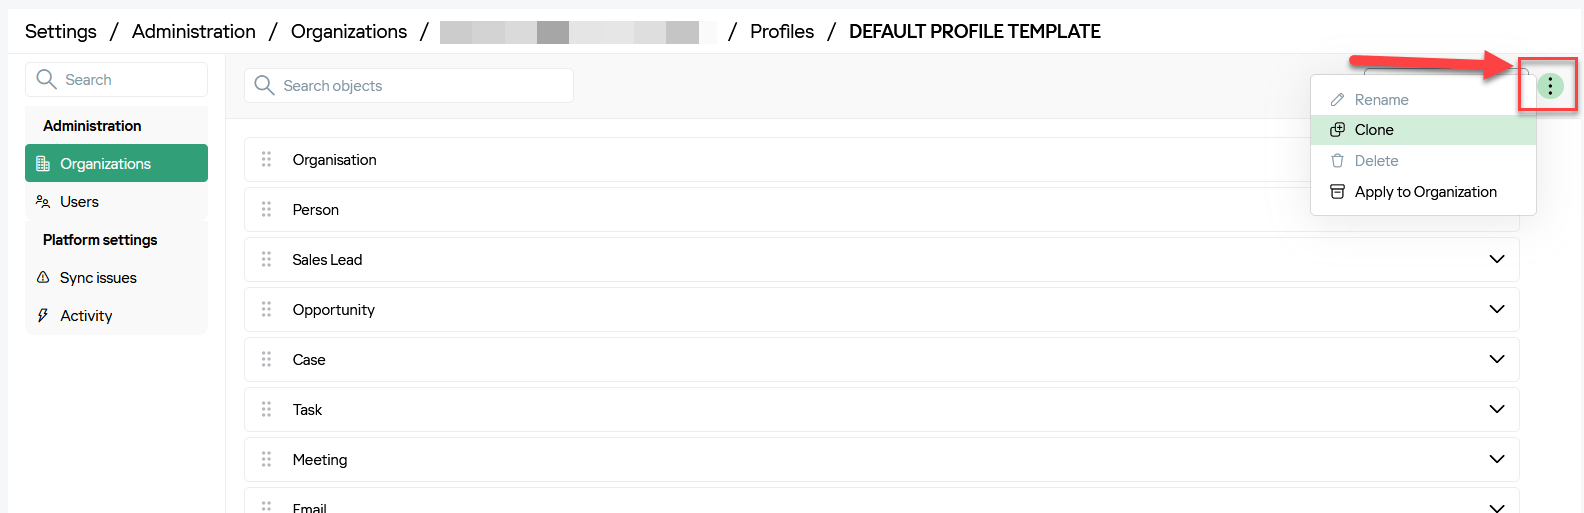
When you open a new Profile, the ‘Profile Configuration Screen’ will appear:
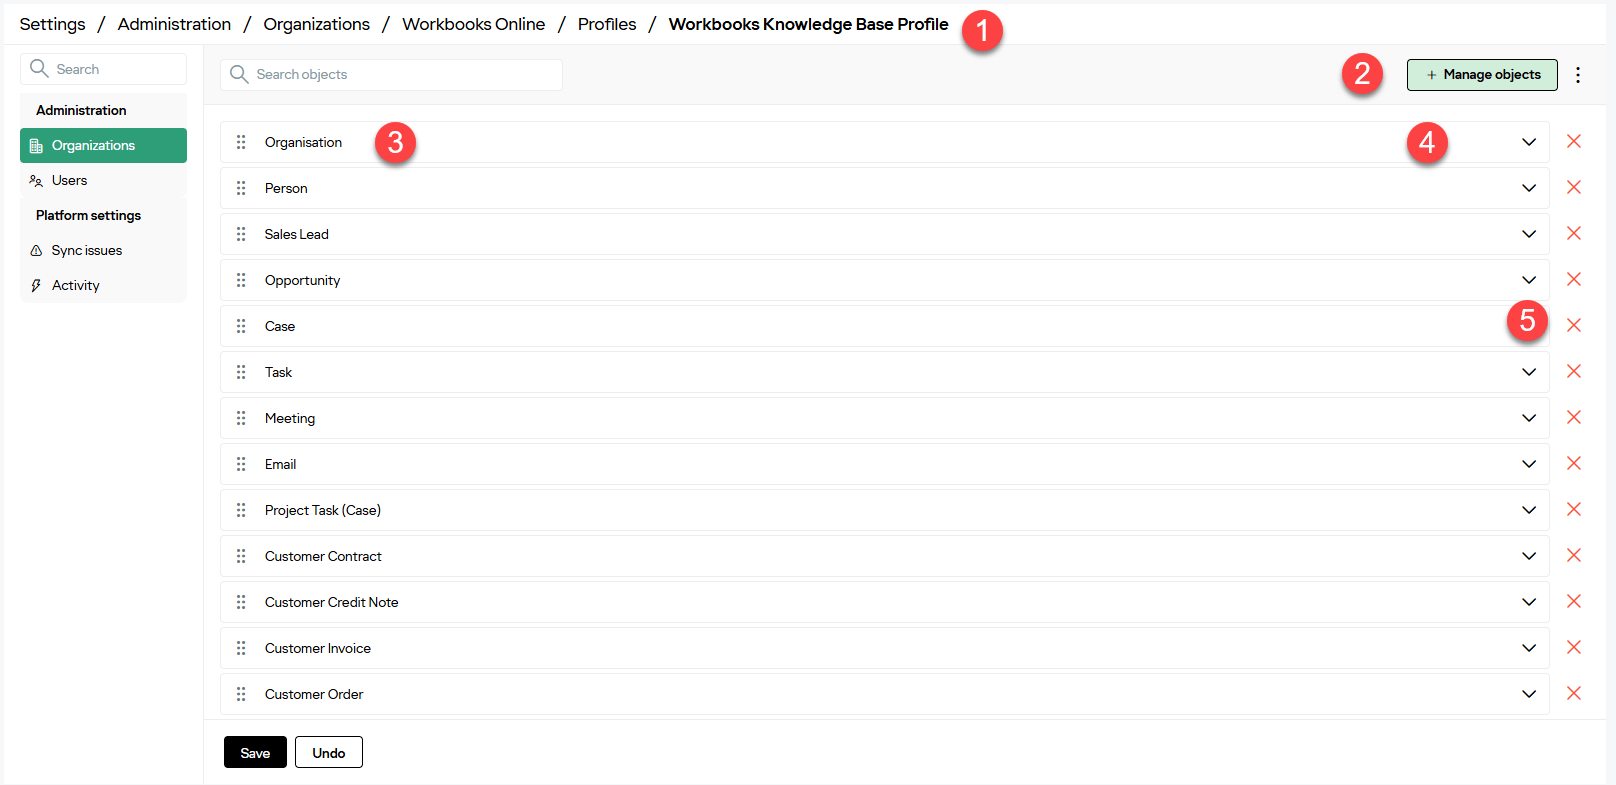
1. The name of the Outlook Add-in Profile.
2. Manage Objects – This is where you can select Checkboxes for each record type that is viewable directly in the Outlook Add-in. These can be toggled on or off depending on if you want that record type to be viewable in this Profile. Person, Meeting and Email are greyed out as these cannot be turned off.
3. Individual rows for each record type that have been selected to appear in this Profile. (Anything missing or anything you want to remove can be toggled off in the Manage Objects window.
4. Dropdown arrows – Once expanded is where you can add / remove fields within that Record type.
5. X at the end of each row allows you to remove the Record type from the Add-In Profile.
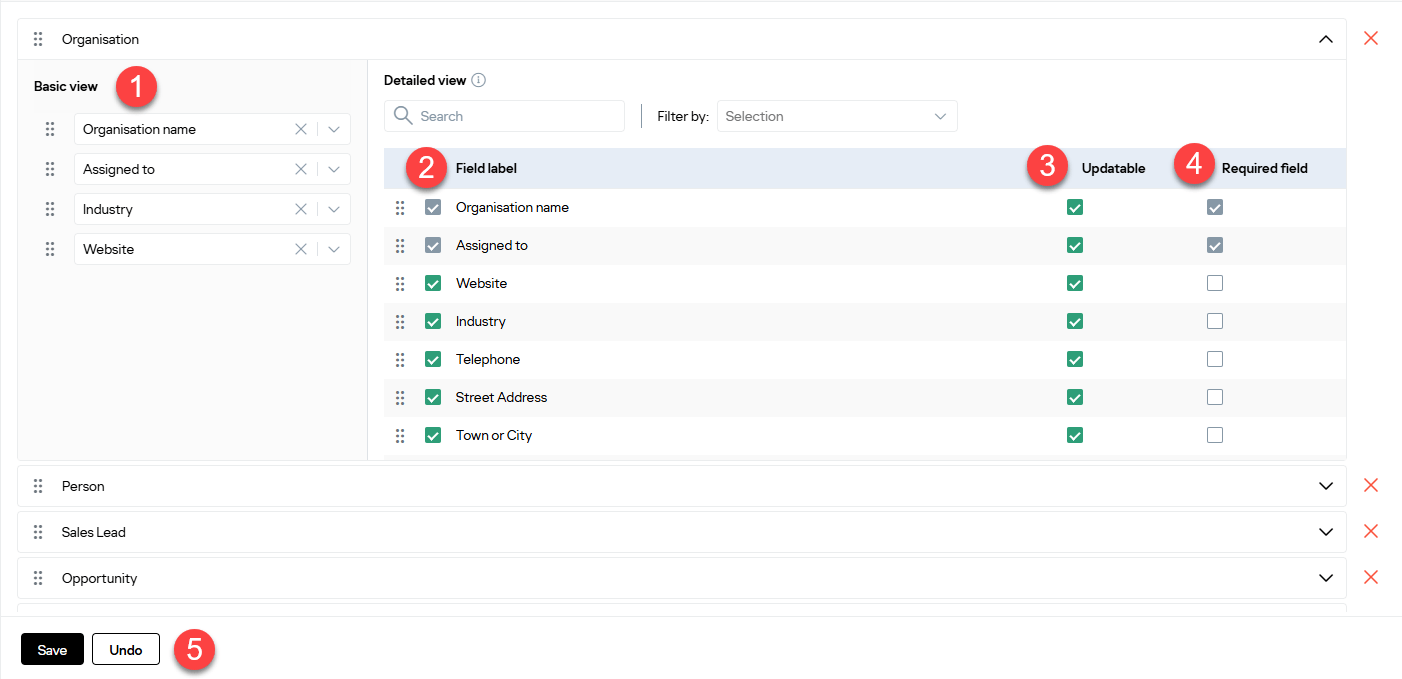
When you select a dropdown to amend the fields available within a Record type, you will see the above layout:
1. Basic View – This is the view / Fields that you will see in the Add-In once a record is recognised. Once you click the ‘Details’ button on the Add-In is when you will see the additional fields that have been added.
2. Is the list of Fields available on that Record type. Here you can toggle which fields you want to be used in the Outlook Add-In Profile.
3. Updatable is where you can determine if the fields can be updated or not.
4. Required is where you can determine if something has to be completed when creating or updating Records via the Outlook Add-In. These will be indicated with a line on the left of the Field similar to within Workbooks. Any Fields that are ‘Required’ at Field level, cannot be removed from the Outlook Add-In Profile and these check boxes will be greyed out.
5. Make sure you Save any changes or you can Undo them if you make a mistake.
Applying Add-in Profiles to Users
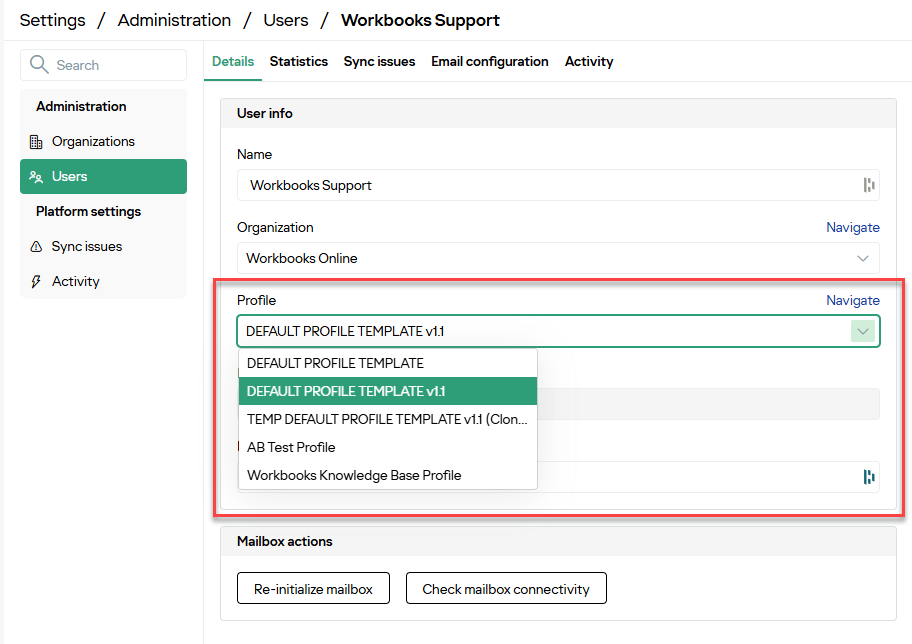
You can set the Default Profile the Outlook Add-in will use on a per-User basis, within the configured Organisation or by applying to all Users within the Organisation.
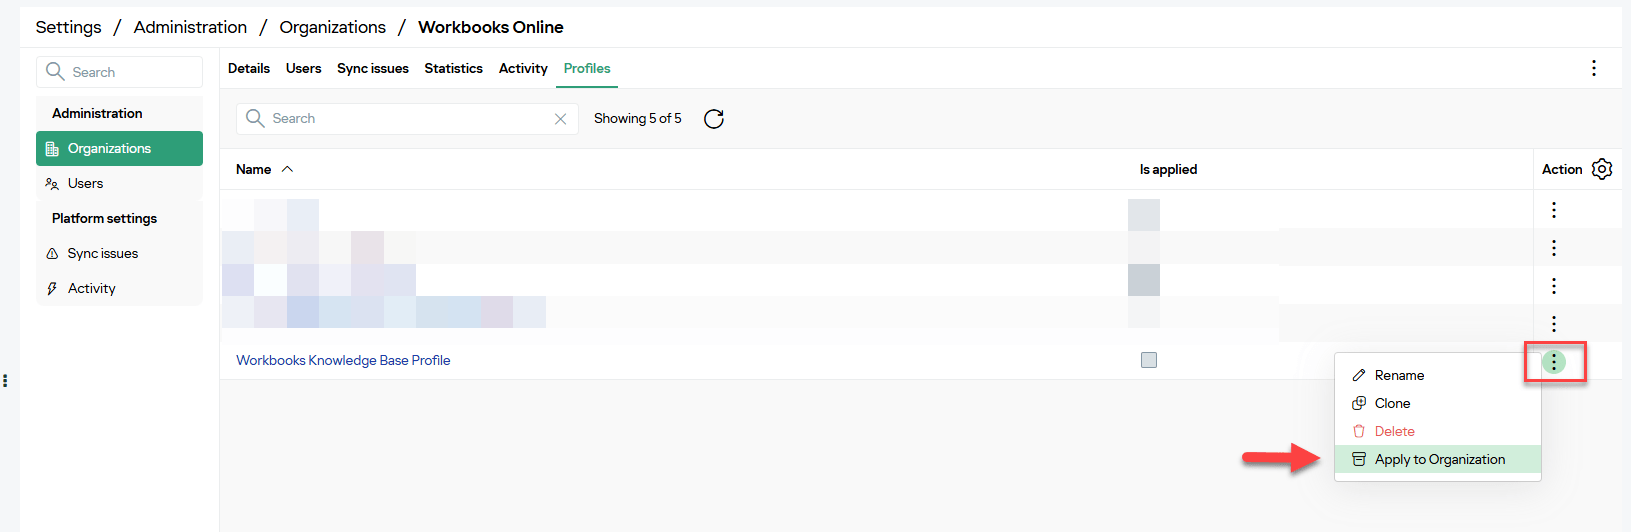
To apply a Profile to all Users within the configured Organisation, go to Start > Configuration > Email Integrations > Exchange Sync > Configuration > Organisation > Profiles > Click the three dots to the right of the Profile row > Apply to Organisation.
To set the Profile individually, go to Start > Configuration > Email Integrations > Exchange Sync > Configuration > Users. Select the User, and choose the Profile in the ‘Profile’ dropdown.