Deploying the Word Add-in
The MS Add-in can be centrally deployed and controlled by an Office 365 Administrator or users will be prompted to install the add-in when word documents are downloaded from Workbooks.
Word Add-in System Requirements
Note: Due to this being a MS Add-in we are restricted to which versions this can be made available in.
The Word Add-in is compatible with the following MS Word Versions:
• Office 365 for Windows
• Office 365 for Mac
Note: The Word Add-In is not compatible with Cloud-based versions.
Deployment to Office 365
The Word Add-in can be installed for all your users or specific groups of users using the Office 365 Admin Centre.
Note: You must be an Admin User on your Office 365 account to be able to do this. The Office 365 interface changes often; the images and setting names below may not exactly match.
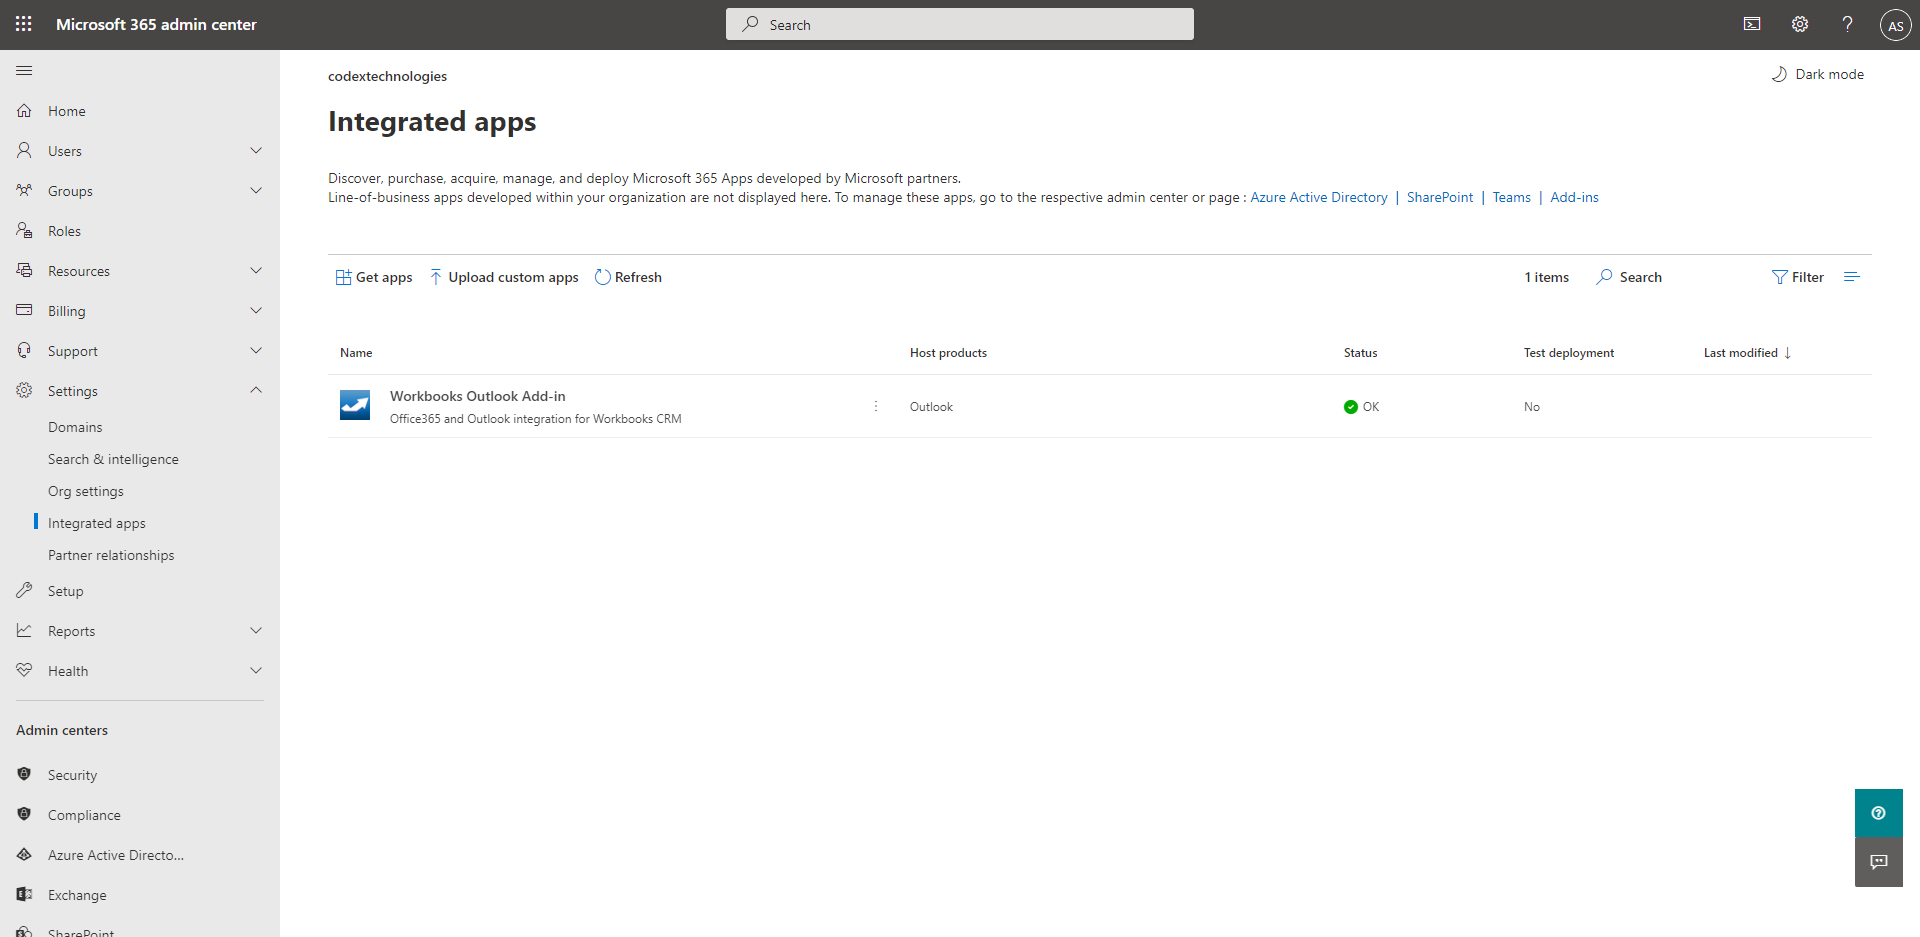
To deploy the Add-in, log in to the Office 365 Admin Centre as an Administrator. Click on Show all to expand the options in the left-hand menu, then go to Settings > Integrated apps.
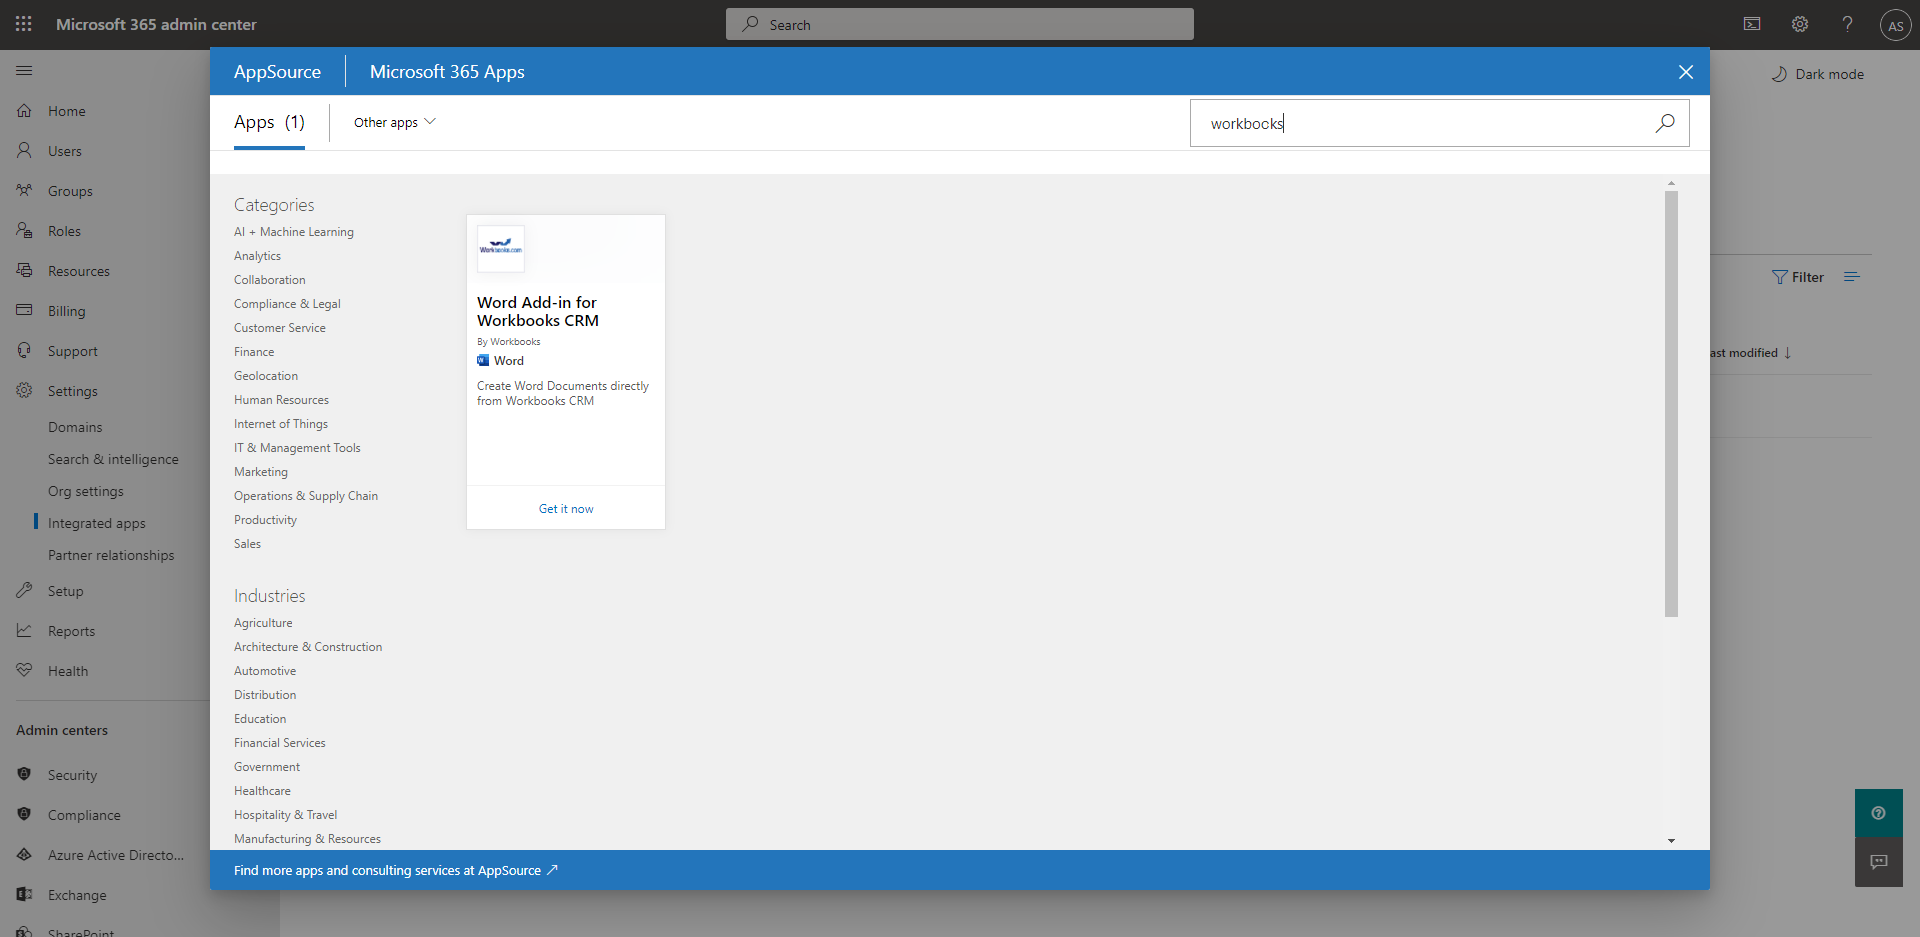
From here select the Get apps button to be taken to the App Store. Search for “Workbooks” and click Get it now on ‘Word Add-in for Workbooks CRM”.
This will open a new window that will take you through the deployment step-by-step. The first step asks you to specify which users the App will be deployed to.
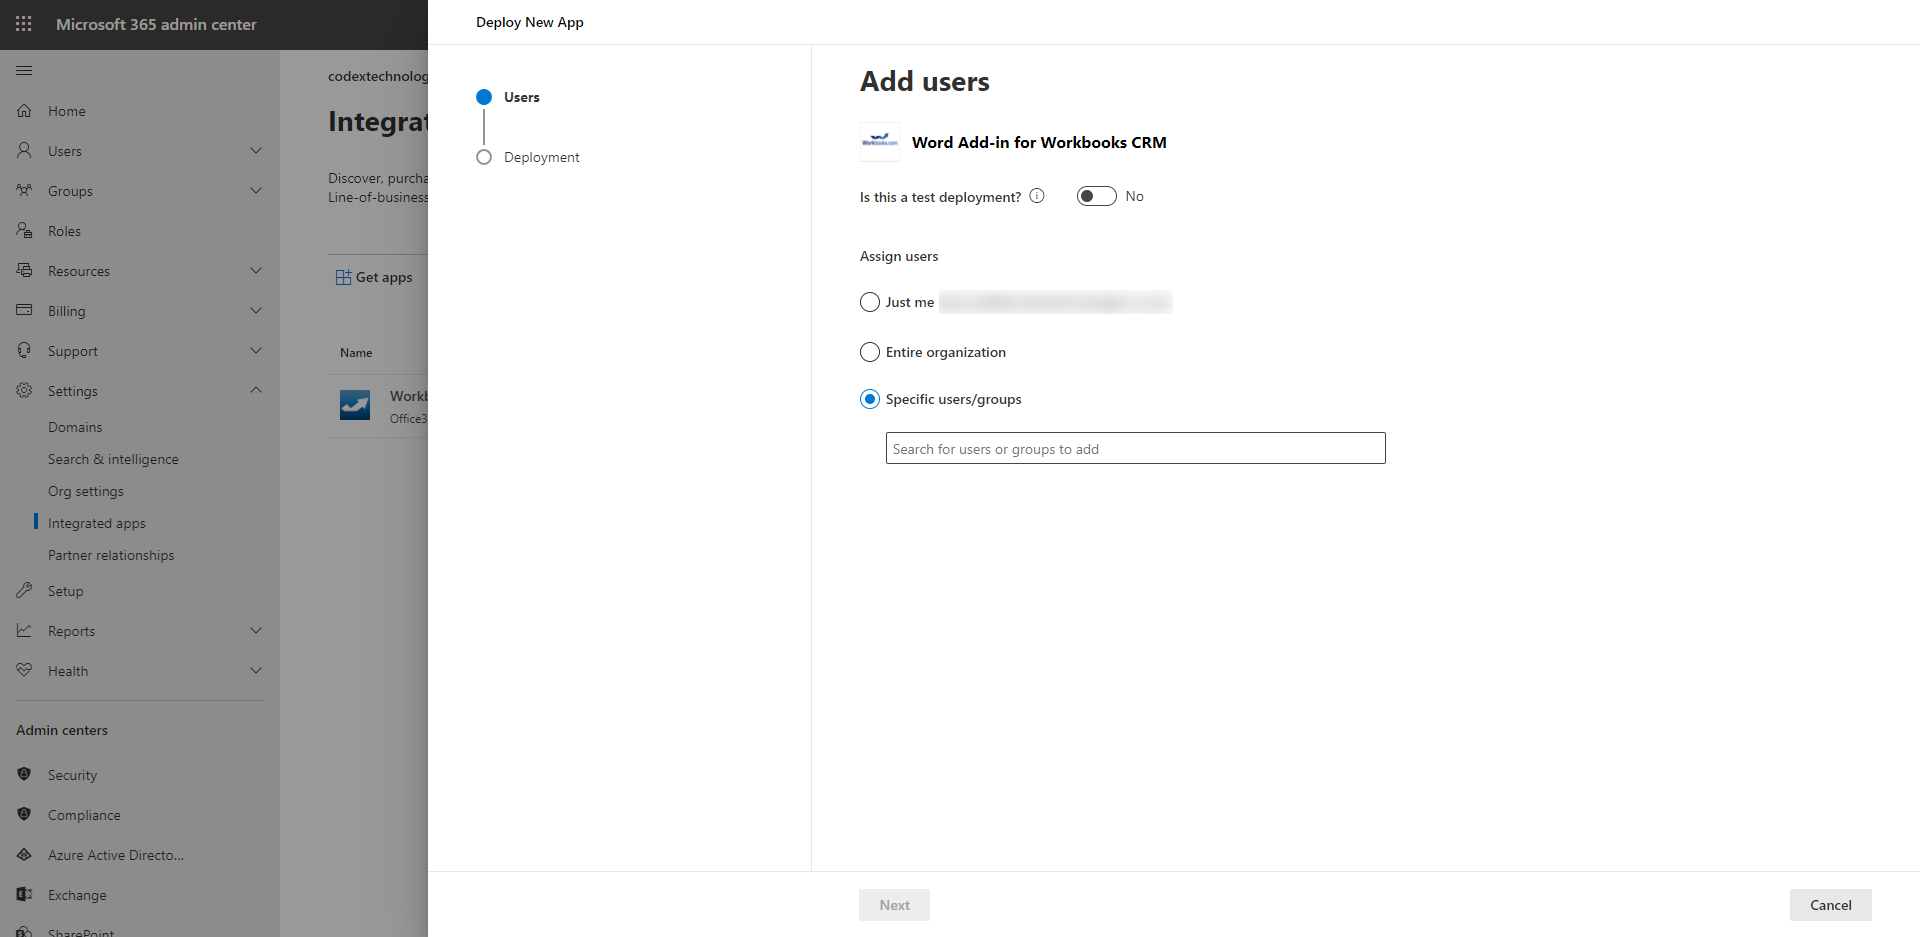
Note: You can only assign the Add-in to users with an active Office 365 Licence. Shared mailboxes cannot have this functionality enabled.
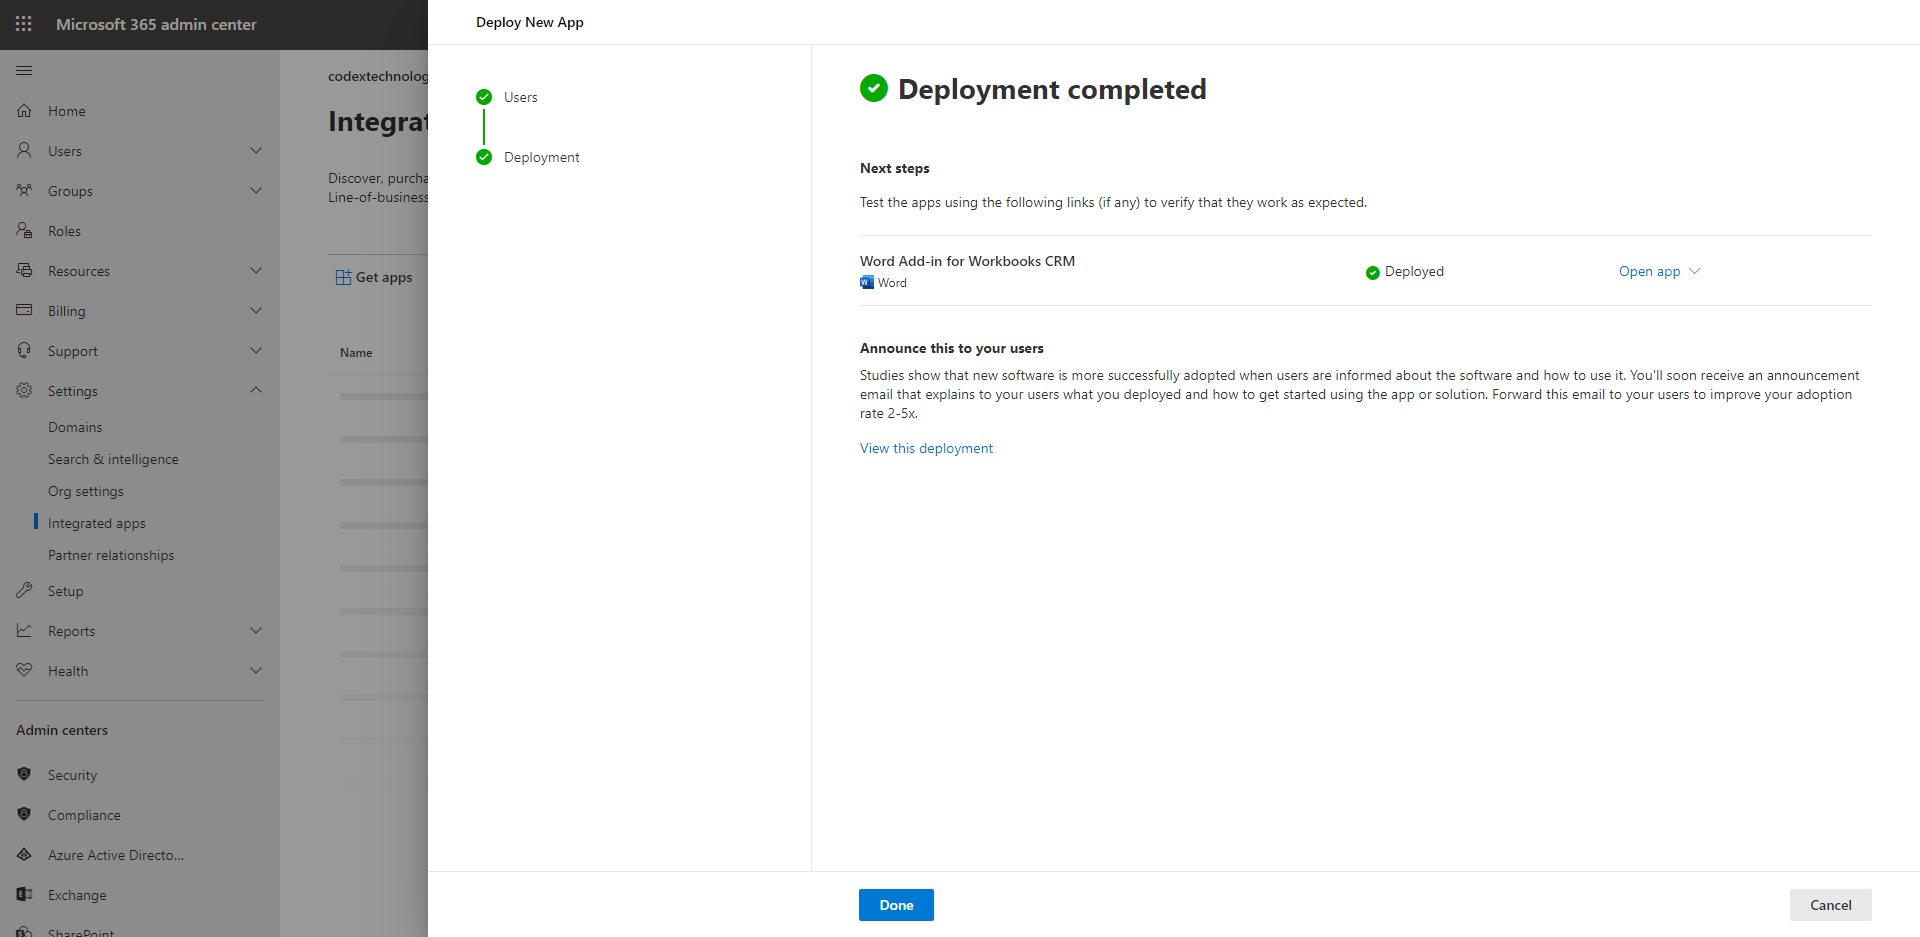
The next couple of steps will ask you to review the App permissions and confirm the users that the App will be deployed to, until you get to the final Deployment complete screen.
The deployment of the Add-in may take a few minutes to complete and Office will notify you once the installation is complete. Users need to restart Word in order to see the Word Add-in appear in their instance.
Note: It can take up to 12 hours for the Add-in to appear in a user’s Word and it must be restarted. If after 12 hours the Add-in is still not available, please ask a Support Contact to raise a Case to Workbooks Support for further investigation.
Once Complete and Users have restarted MS Word they will now see a Workbooks Icon appear in the top right-hand corner of the screen in the Home Bar.

Selecting this button expands the sidebar and allows users to start using the Add-in as needed.