Introduction to Email
Workbooks enables you to send emails directly to your business contacts and record these emails against the relevant records so that you have a history of your communication. You can:
- Send emails from any Workbooks record (that has an email address).
- Format emails using the HTML Editor.
- Send emails in bulk.
- Set up new email accounts so that outbound emails appear to be sent from an ‘alias’ address.
- Create reusable Email Templates and ‘merge’ values from records, saving you time and allowing you to standardise what’s sent out.
- Store emails sent and received via Microsoft Outlook using the Workbooks Exchange Server Sync.
- Store emails sent and received via your email client using the Workbooks Dropbox.
- Send email via the Workbooks server or via your own SMTP server. We recommend that you send email from your own SMTP server. Click here for information on how to set up an Email Account.
- Set up one or more Email Signatures.
Users of the free edition cannot send emails via the Workbooks server and must set up their own server to handle outbound email.
Default Font and Formatting
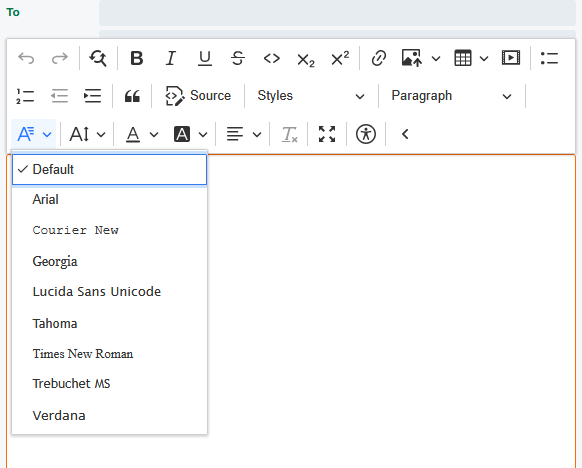
When you type in rich text fields for emails without choosing a font or size, your text is in the “Default” font and “Default” size.
What “Default” means
- The “Default” setting means no font or size is applied to the text.
- In the editor, text with “Default” font and size will display using your theme’s font and size (for example, Work Sans in the Green theme, or Open Sans in the Clean theme).
- When you send an email, the text is sent without a font or size set. The recipient’s email client will display it in their own default font and size.
- This approach improves accessibility, because recipients will see text in a font and size they have chosen to be legible for them.
Choosing a font or size
- You can still explicitly choose a font family (e.g. Arial, Times New Roman) or size. If you do, that choice is preserved when the email is sent and received.
- If you want the most accessible option, use the “Default” font and “Default” size.
- If you need branding consistency (for example in signatures or templates), choose a specific font.


Updating older content
- Improving accessibility: Select all the text and set font and size back to “Default”.
- Improving branding: Select all the text and apply your chosen font family (we recommend leaving font size set to “Default” for accessibility).
Older snippets, templates, and signatures may still contain Arial 9pt, because this used to be applied automatically. These items may look different now that Arial 9pt is no longer forced.