Form Layouts
An introduction to customising Form Layouts so you can change the appearance of Workbooks records to only show information relevant to your business.
Tip
Custom Form Layouts control what the Users see on a form but remember this does not prevent access to the fields that aren’t displayed on the form – these can still be accessed within Landing Pages and Reports.
To facilitate adoption and the ongoing use of Workbooks, it’s important that the data shown on records and the order in which it’s presented is correctly customised to suit your business, your terminology, and your processes.
Customising Form Layouts gives you a great degree of flexibility to change the appearance of Workbooks records and share the appropriate views with the right groups of Users at the relevant points in your workflow.
For example, you might set up a version of a Customer Order for your Sales Team, but a different one with more accounting information on it for your Finance team. Alternatively, you may have multiple versions of an Organisation record – perhaps the Marketing team see profiling and email preference information, but the Customer Support team see information regarding products and contract dates.
In addition, you can set up rules that control which Form Layout is invoked. For example, you might want Organisation records defined as Head Offices to include fields about the overall business (when it was created, their turnover, etc), but Organisations defined as local branches to show different fields.
Forms consist of a number of Sections and Sub-Sections, and you can specify which section your fields appear in as well as the order in which they are displayed.
In addition, when customising an existing Form Layout or creating a new one, you can:
- create new Sections and control the position of these and any existing Sections.
- set up Card Sections that display data in a space-saving, read-only format.
- choose to display/hide Fields.
- make Fields, mandatory, read-only and set default values. These behaviours will only apply to the specific Form to which you’ve applied the controls.
- add Information Messages relating to aspects of the form, and position them on the form layout.
- show information from related records in read-only format, using Reference Fields.
- add information messages to provide guidance to users on what type of data they should add or when.
- control the options that show in the Date Picker on date fields.
- control within editable grids, what columns are shown, hidden or excluded, the order in which they appear and the default values for each.
- customise what tabs are displayed, and in what order.
- customise which fields are displayed by default in a tab and how they are displayed (for example, as cards, calendars or maps).
- define a set of Process Buttons (in the Automation tab) to allow you to automate common processes.
- set the default height and width of the window when opening a record with that Form Layout applied to it.
Once you’ve set up a new Form Layout you can publish the view and share it with other Users and/or User Groups.
The Form Layout menu can be reached by going to Start > Configuration > Customisation > [select the record type you wish to edit} > Form Layouts.
Note
If you’re happy with the default layout but need somewhere to capture some extra data you can simply create Custom Fields rather than creating Custom Form Layouts.
Custom Form Layouts are based on existing standard Form Layouts and include any Custom Fields you’ve created (along with their related Picklists, where appropriate).
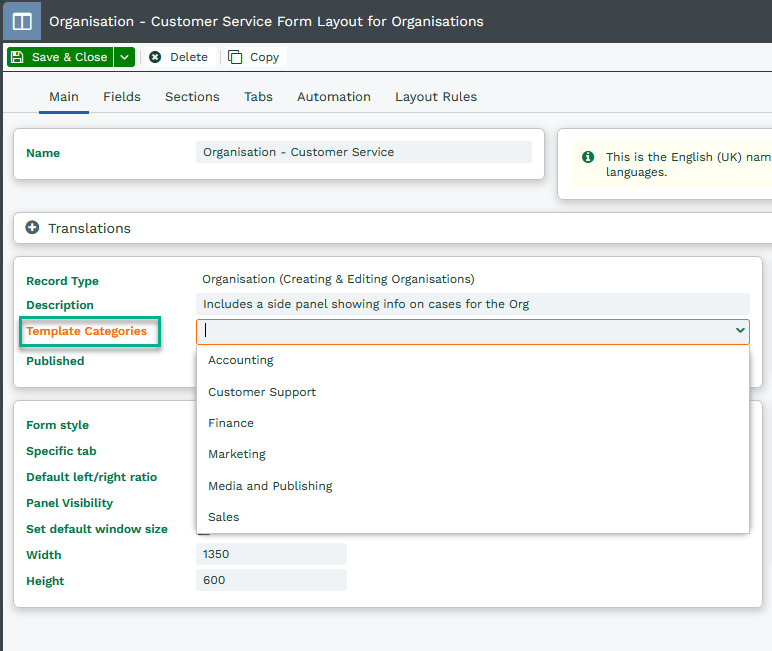
When using Form Layouts, you can categorise them to ensure that only relevantly categorised email/PDF templates appear when dealing with the specific record type. Information of how to do so can be found in the screenshot below.
Note
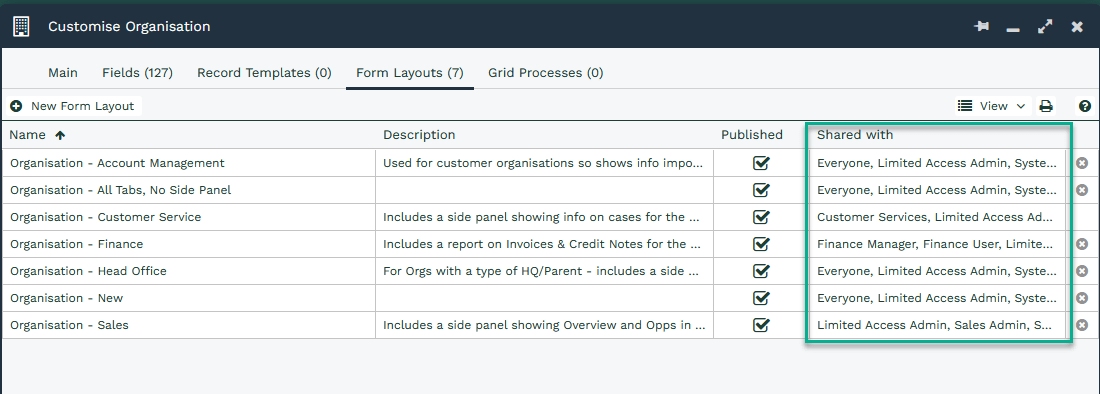
Make the ‘Shared with’ column visible in the Form Layouts tab of the Customise Record window to give visibility of which groups and Users a Form Layout has been shared with.
Date Picker on date fields
When selecting a date, users often want to set it to a date relative to today. For example, a Sales Person might want to quickly set a follow-up call for a week’s time or a Finance user might want to set the payment due date to be, say, 15 days from now. To make this easier and quicker to do, you can use the Date Picker. Users can still set dates by clicking on a date in the calendar but they also have the added option of choosing a date relative to today, which can be a date in the future or in the past.
Relative dates have already been set up on Activities for the Due Date, Completed date, Reminder Date and Next Due fields but you can modify the options available if you want a different selection from the ones we’ve set up. In addition, if you want to use the date picker elsewhere in the system you can modify the date field on the form layout, as described below.
To amend the selection available on Activities or to set this up on other date fields, you need to navigate to the relevant Record Type and Form Layout, and open the Date field that you want to amend. The Date Picker is controlled by the “Relative Date Options” field.
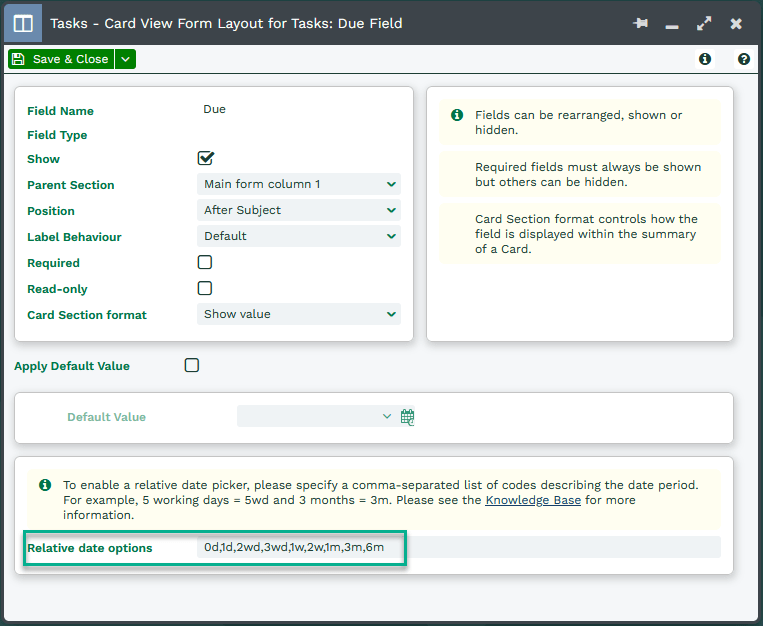
The values you can add are for Days, Weekdays, Weeks and Months. It’s important to enter the values in lowercase. You can add dates in the future or ones in the past. For example:
Day format: 1d, 2d, 3d
Working day format: 1wd, 2wd, 3wd
Week format: 1w, 2w, 3w
Month format: 1m, 2m, 3m
For past dates you just need to add a minus sign (-) to the start of the format e.g. -1d, -1w, -1m
A few examples of this are below:
| Value | How it appears |
|---|---|
| 0d | Today |
| 1d | Tomorrow |
| -1d | Yesterday |
| 3d | In 3 days |
| -3d | 3 days ago |
| 3wd | In 3 week days |
| 2w | In 2 weeks |
| -2w | 2 weeks ago |
| 6m | In 6 months |
Information Messages
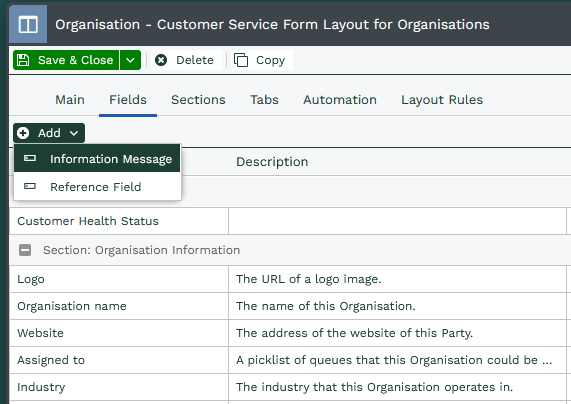
Information Message fields allow you to display relevant and useful information next to the fields. To add an Information Message field, click the button highlighted below within the Fields tab.
The field can contain up to 255 characters and can include a hyperlink.
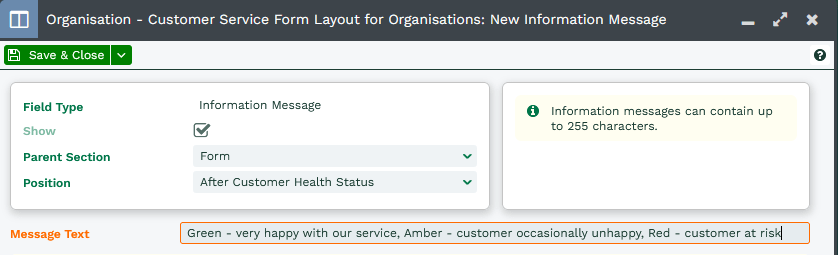
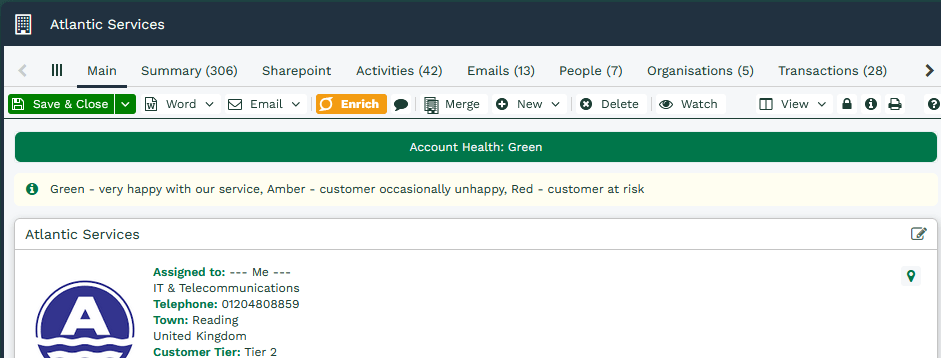
The example below shows how Information Messages can be used to make it easier for users to know what fields represent and how they should be used.
It is possible to add hyperlinks into the Information Message using the format: <a href=”URL”>text</a>. For example:
<a href=”www.workbooks.com/knowledge_base”>Knowledge Base</a>
This would display the words ‘Knowledge Base’ which would hyperlink to the URL that is between the double quote marks.
Form Layouts for Marketing Campaign Members, Event Attendees, Mailshot Members and Mailing List Members
To edit the Fields and Form Layouts of Event Attendees or Marketing Campaign Members, you do this from the Mailing List Members Record Type. However, you would often need different fields to be visible on Event Attendees than you would want on a Campaign Member. Therefore, if you want to have different layouts for each of the different Record Types, you need to create multiple Form Layout with Form Layout Rules on the ‘Member Type’ field (this field is only visible in Form Layout Rules). The Member Type can equal:
- Marketing Campaign
- Mailing List
- Event
- Mailshot
Form Layouts for Events and Sessions
Events and Event Session Form Layouts are both controlled through Form Layouts of Events. To create different Form Layouts for Events, you will need a Form Layout Rule on the ‘Parent Event’ field, i.e. for a Form Layout to show for Sessions only, apply a Form Layout Rule of ‘Parent Event is not blank’.
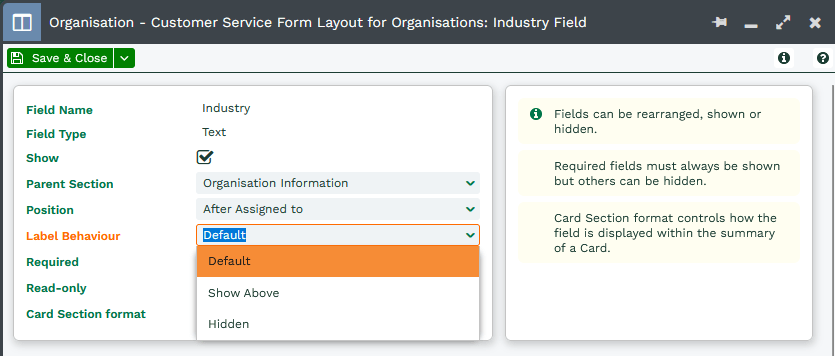
Label Behaviour
On the form layout, for each field you can specify where you want to position the field label, depending on your requirements. ‘Default’ will position it on the left of the field, unless there isn’t enough space, in which case it will show above. ‘Shown Above’ will show the label above every time, and ‘Hidden’ will hide the label entirely.