


Setting up your Users
How to set up new users, including what information is required, assigning them to an Own Organisation, adding to user groups and controlling which database(s) they access.
This page covers how to create and set up a new User account including how to set up their User Groups, Capabilities and Permissions.
You can find more information on User Management, including what to do when a User leaves, by watching the recording of our our drop-in clinic which you can find here.
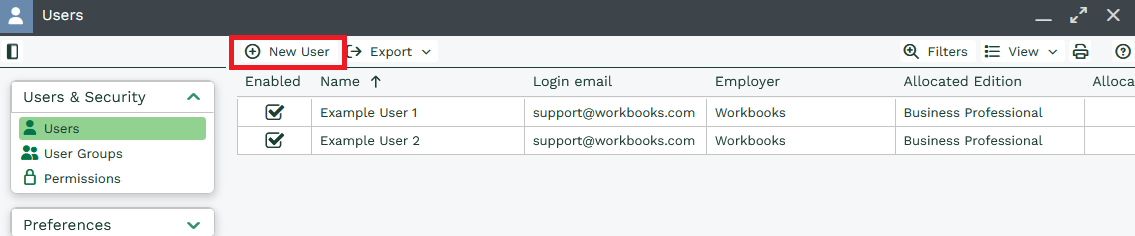
First, go to Start > Configuration > Users & Security > Users, to bring up the User Landing Page. This will show you all of your current Users. To create a new User, click the New User button at the top of the page.
This will open up a User record. Start on the Main Tab of the User Record, which is where you enter the basic information for that User, such as:
- Full Name (1)
- Login Email (2)
- Password (3)
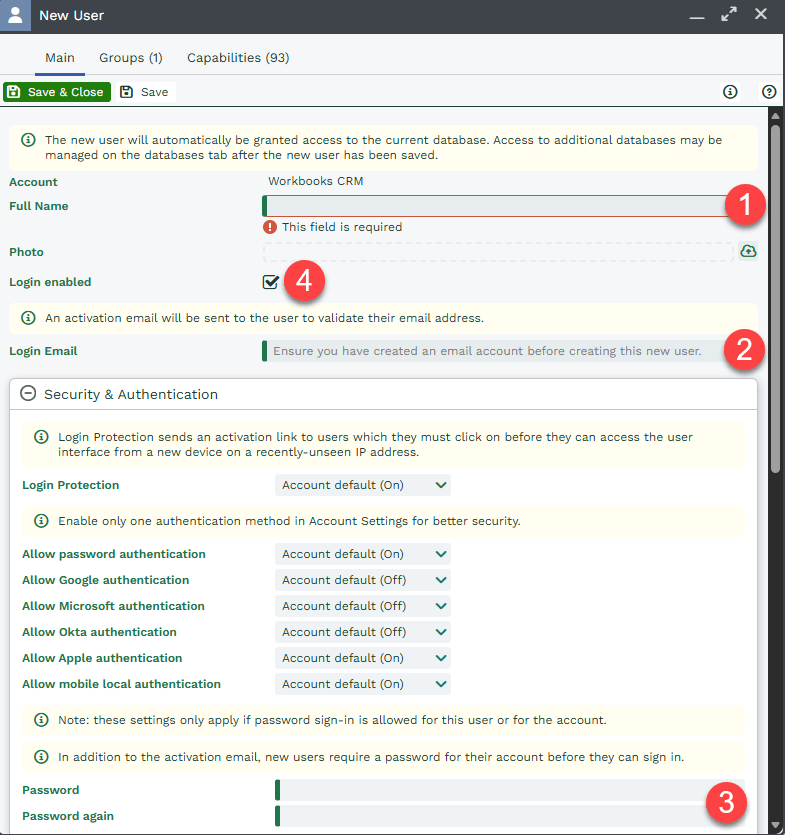
You are also able to upload a Photo which will then appear in the User’s start menu, any record sections which include profile pictures, and reports.
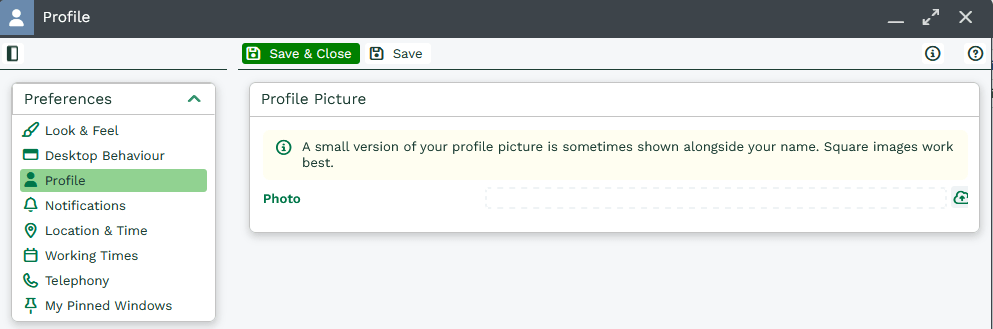
This can also be modified by the User via their preferences Start > Preferences > Profile:
NOTE: Where possible we recommend linking Workbooks to Azure to provision new users, this will mean you won’t need to add individual users in Workbooks. If they are part of your azure directory they will be provisioned with a Workbooks user account. Click here to find out how.
Login Email (2)
This is not only the email address that is used to log in, but also the email address that the activation email is sent to, so ensure it corresponds to an active Mailbox to which the User has access.
The email address must be unique and not have been used before, so if it has been used elsewhere, perhaps on a trial account, you’ll get an error message preventing you from creating the new User. Contact Support if you need help resolving this.
When setting up a new User, we recommend ensuring they have an email account configured within Workbooks so they can use the email functionality immediately. Please click here to see how to set up an email account in Workbooks.
NOTE: If you save the User record but the login email was entered incorrectly, the activation email will not be sent to you. The User record will need to be deleted and recreated again, so please check the login email for spelling mistakes before saving.
Password (3)
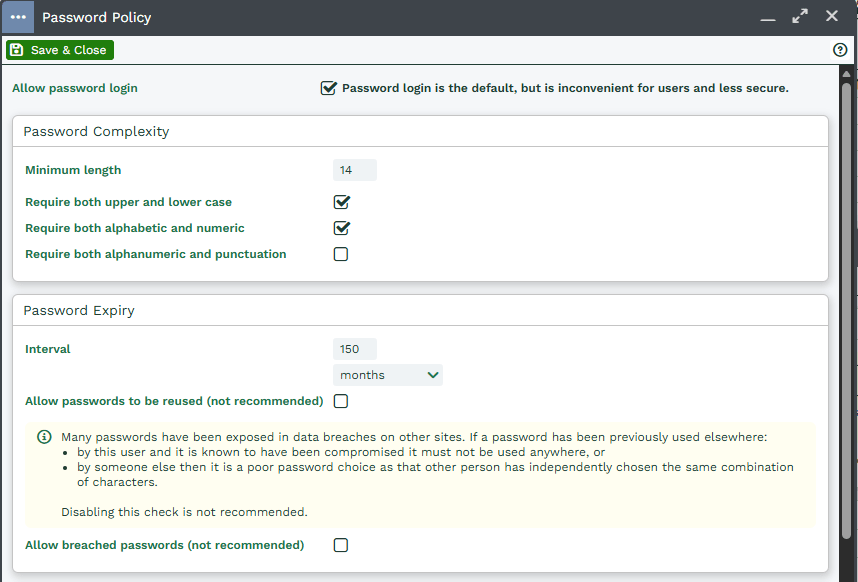
For security reasons, the activation email sent to new Users does not include their password. You need to supply that separately. You can control how a password is formatted within Start > Configuration > Account Settings > Authentication > Password Policy.
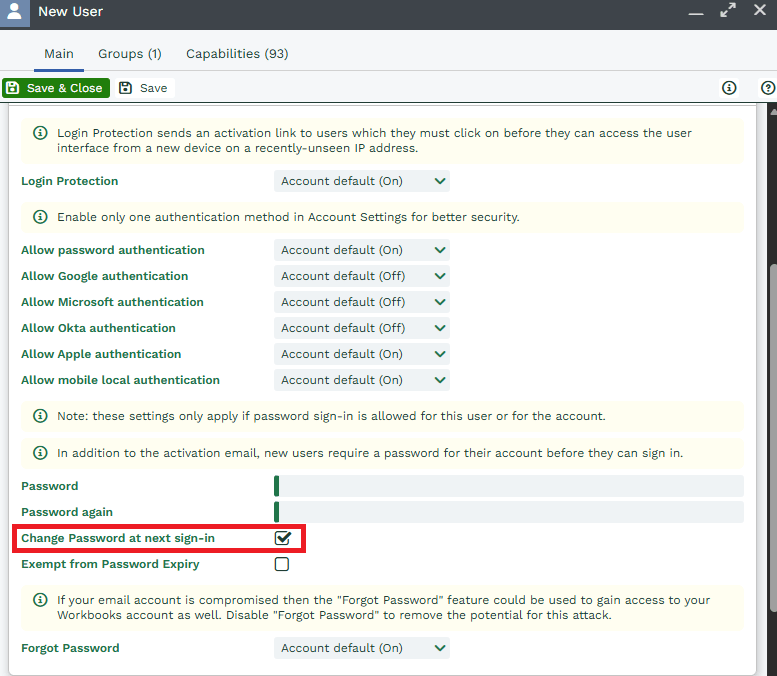
By default, the “Change at next login” box will be checked, this means that you can give your New User a temporary password to access Workbooks the first time, and then they will be prompted to change the Password to their own.
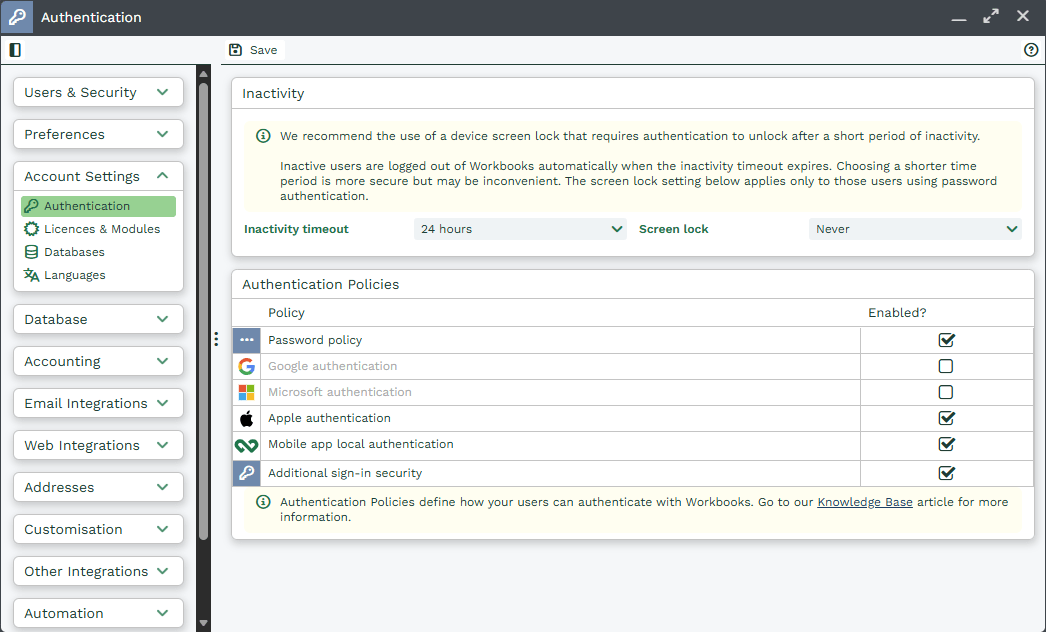
This Security & Authentication section of the user record determines what methods of authentication are available. The account defaults are also controlled via Start > Configuration > Account Settings > Authentication:
NOTE: You can prevent individual Users from having to change their password frequently (depending on your Password Policy) by checking the ‘Exempt from Password Expiry’ box. We do not recommend this for users logging in via the desktop but it can be helpful for API client Users.
If a User forgets their password, they can use the forgotten password option as long as this hasn’t been disabled (at either the account or user level). System Administrators can reset a password by opening the relevant User record and clicking the Change Password button at the top of the screen. This opens a dialogue box where the System Administrator must enter the new password they’re setting up for the User twice and then enter their own password too. Remember, this doesn’t send the password to the user, you will still have to communicate that securely outside of Workbooks.
Login enabled (4)
This checkbox will be ticked by default, which triggers an activation email to be send to the User when you click save. If you don’t want an email to be sent, remove the tick, but remember to return to the record to tick the checkbox later so that the User can validate their details, and login to Workbooks. If a User leaves your organisation disable their login by removing the tick from this box.
Language and Region
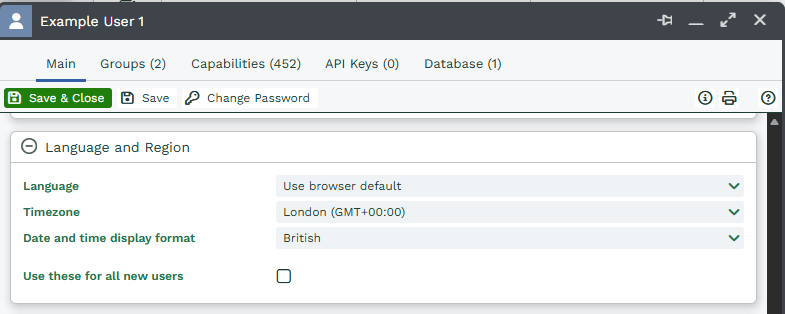
Now enter their Language and Time settings; if all of your Users are going to be in the same Timezone and working in the same language you can tick the “Use these for all new users” box allowing you to skip this step in the future.
The User can change these later if necessary, within their Preferences.
Licence
At the bottom of the User record, use the dropdown picklist next to Allocated Edition to select the edition you want this User to have. You will also need to select the Allocated Extensions that they will be using such as the Mail Sync and Event Management.
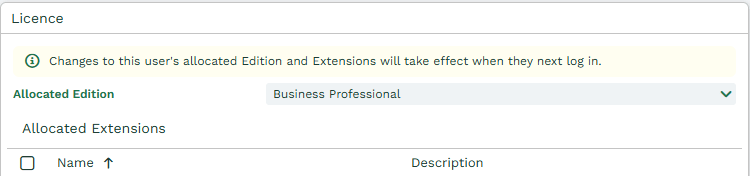
NOTE: If you upgrade any licences from the CRM to the Business edition but do not immediately allocate your new licences, Users will see a warning message when logging in saying that the licences must be reallocated (by the System Administrator). This message will appear for a 2-week period after the expiry of the original licences. Until this reallocation has taken place, the Users will still have access to their original CRM licence. At the end of the 2-week period, if the licences have not been reallocated, the Users will no longer be able to login.
More details on how to manage user licences more effectively, and keeping within the allocated limits, can be found in Licences & Modules.
Own Organisation
If you have only one Own Organisation then the User will be automatically assigned to their record, if however you have multiple Own Organisations you will need to assign an Own Organisation.
Assigning Users to an Own Organisation enables them to create transaction documents for those Organisations, as well as creating Customer and Supplier agreements, as long as they have the appropriate Capability.
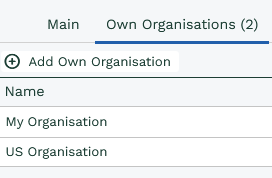
NOTE: Users assigned to just one Own Organisation will not be aware of any other Own Organisations and will only have permission to use the tax codes and currencies of their Own Organisation.
Groups
When you create a new user, they will be automatically added to the Everyone group. This gives them the base capabilities assigned to that group.
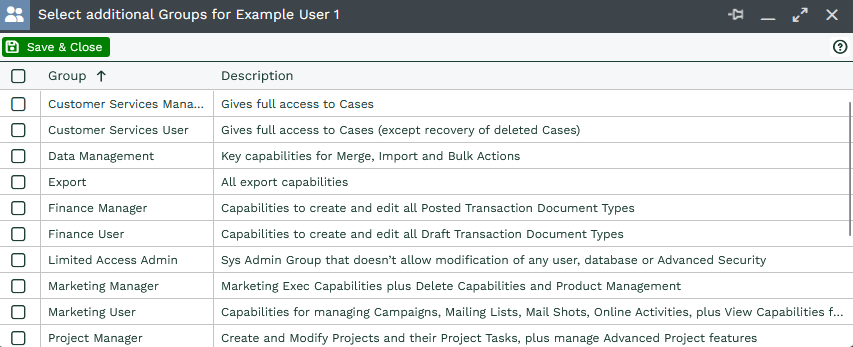
Workbooks comes with several pre-configured User Groups that cover a range of job roles. Adding a user to additional groups increases the number of capabilities they have.
You can do this using the Add Group button at the top of the Groups tab.

Select the relevant groups using the checkboxes, then click Save & Close.
Once the groups have been added, go to the Capabilities tab and check that the user can do everything they need to — and nothing they shouldn’t. This page can be filtered on if you’re looking to check for specific Capabilities.
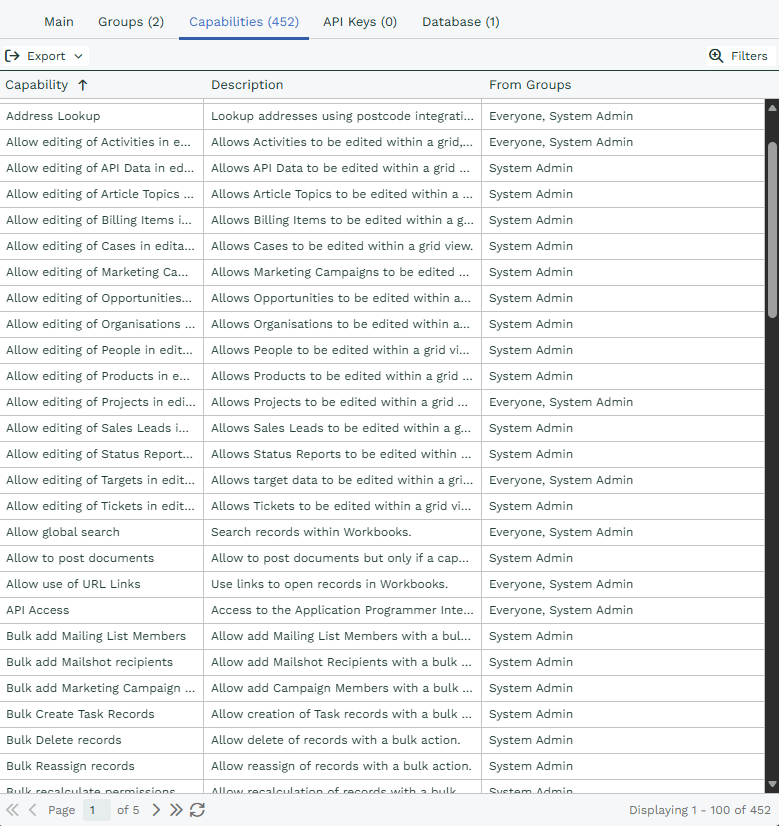
If any required capabilities are missing, they can’t be added individually and must instead be assigned via User Groups.
NOTE: Capabilities can be contained within multiple User Groups – removing a User from a User Group will not necessarily remove the Capabilities if the Capability is contained within one of the other User Groups that the User is a member of. It’s always worth checking on a User level as to whether someone has a specific Capability.
System Admins
To make a User a System Admin, they must be added to the ‘System Admin’ User Group. This will give them every available capability, full access to all records and record types, as well as permissions to change anything, including Configuration. We recommend limiting the number of System Admins per account in line with the principle of least privilege.