





Scheduled Bulk Actions
Scheduled Bulk Actions allows you to configure a schedule(hourly, daily, or monthly) for all the actions you can perform via the Bulk Action button on Landing Pages and Report Views. Each time it runs, it applies the same action to the records returned by the choosen Landing Page or Report View.
When should I use a Scheduled Bulk Action?
Common use cases include:
- Automatically updating records on a regular basis
- Running repeatable clean‑up or maintenance tasks
- Applying consistent updates to records that meet changing criteria
- Reducing the need for manual intervention and human error
If you currently find yourself running the same Bulk Action repeatedly, scheduling it can save time and ensure consistency.
Creating a Scheduled Bulk Action
1. Start by applying Filters on a Landing Page or a Report View

2. After applying the Filter ensure you have the correct Target Records showing

3. Click “Bulk Actions”

4. Select the Bulk Action as per your preference/use-case. For our example we will use the Bulk Action to create “At Risk” Tasks

5. Next, fill the Task record you would like the Bulk Action to generate and click “Run on a Schedule”

6. Click “Yes”

7. Give your Scheduled Bulk Action a Name, ensure the correct Bulk Action, Record Type and View is selected

8. Configure the Schedule as per your preference/use-case

9. Finally click “Save & Close”

Note – notifications will be sent as per the User’s notification settings within their Preferences.
Managing your Scheduled Bulk Action.
Once the Scheduled Bulk Action is set up, new Tabs and Buttons will become available to help you manage the Bulk Action.
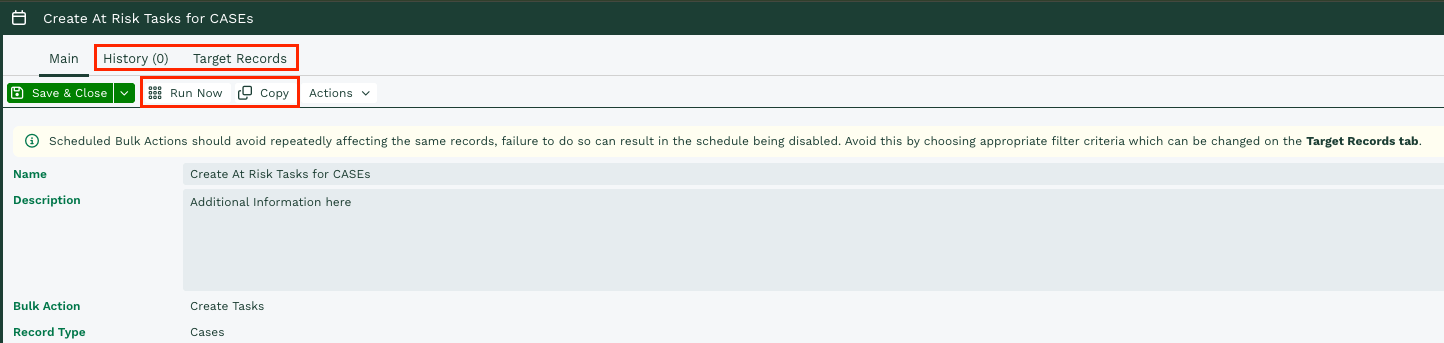
History – This shows you all of the previous Bulk Actions that have been run allowing you to review failed Bulk Actions easily.
Target Records – Displays a sample of the records that will be affected the next time the Bulk Action runs. You can apply and save filters here to make the action more precise. For example a Scheduled Bulk Action that runs daily may only need to run on Records that were updated today and hence will show the records to be updated today.
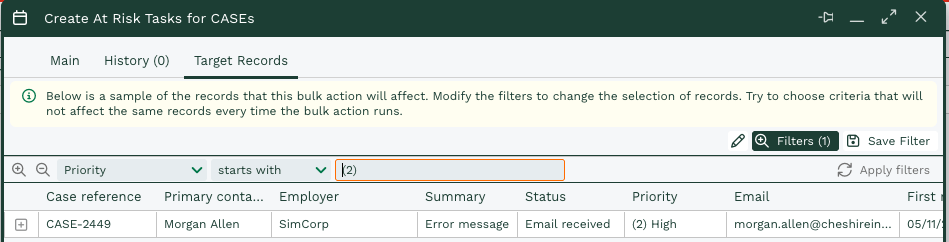
Note – running the same bulk action on the same records may cause the Bulk Action to fail and become disabled, so filters like this should be added wherever possible.
Run Now – Selecting this button will run the Bulk Action now rather than waiting for the next time that is is scheduled.
Edit Bulk Action – Editing the Bulk Action allows you to change the values that the Bulk Action will be performing. Selecting this button will open a new dialogue box within the Bulk Action so that you can change the Fields that are updated and the values that are used.
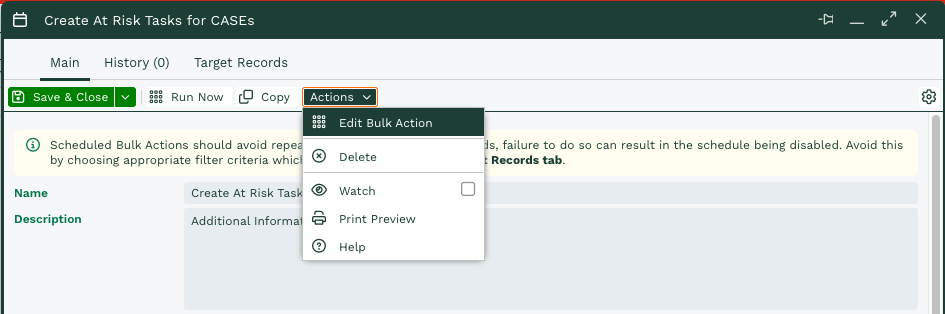
Note – you are unable to use this to change the type of Bulk Action that is run. If you originally chose to update Records you will not be able to use this button to then Reassign the Records. Also the Record Type can’t be changed at this stage meaning if the Scheduled Bulk Action was set to create At Risk Tasks for Cases, it can’t be updated to create At Risk Tasks for Organizations.
Copy – Copying the Bulk Action creates a new identical Scheduled Bulk Action. This can be used if you have a similar Bulk Action that needs to be performed on a different interval, rather than creating a Scheduled Bulk Action from Scratch.
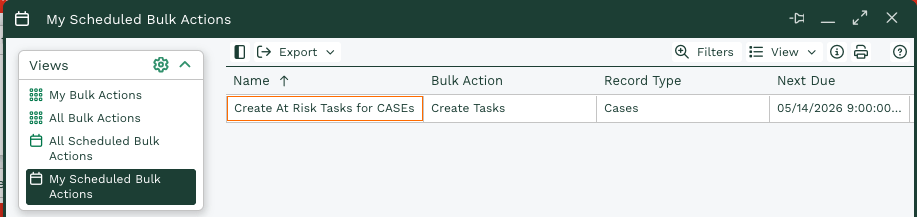
Once you have Saved and Closed your Bulk Actions you can go back and review these from the Bulk Action Landing Page (Start > Bulk Changes >Bulk Actions), where you can review “My Scheduled Bulk Actions” and “All Scheduled Bulk Actions”