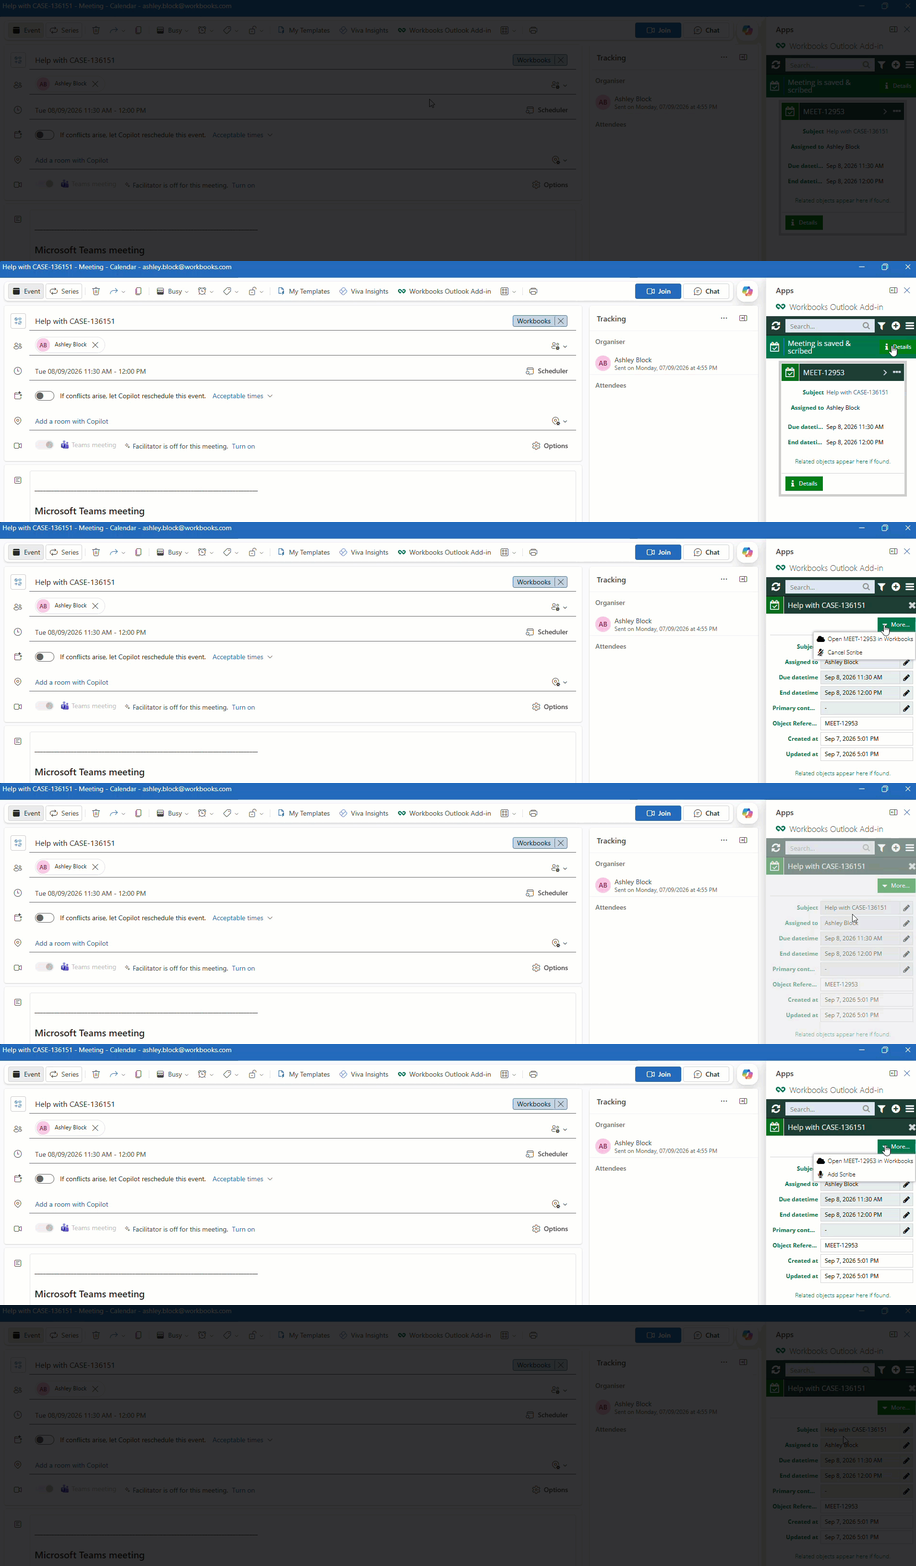






Managing Meetings with the Mail Sync Add-in
How to set a Parent record
Setting Parent records helps Workbooks understand the primary record a meeting relates to. This is particularly useful when working with Opportunities, Cases, and other records where meeting activity forms part of the overall history.
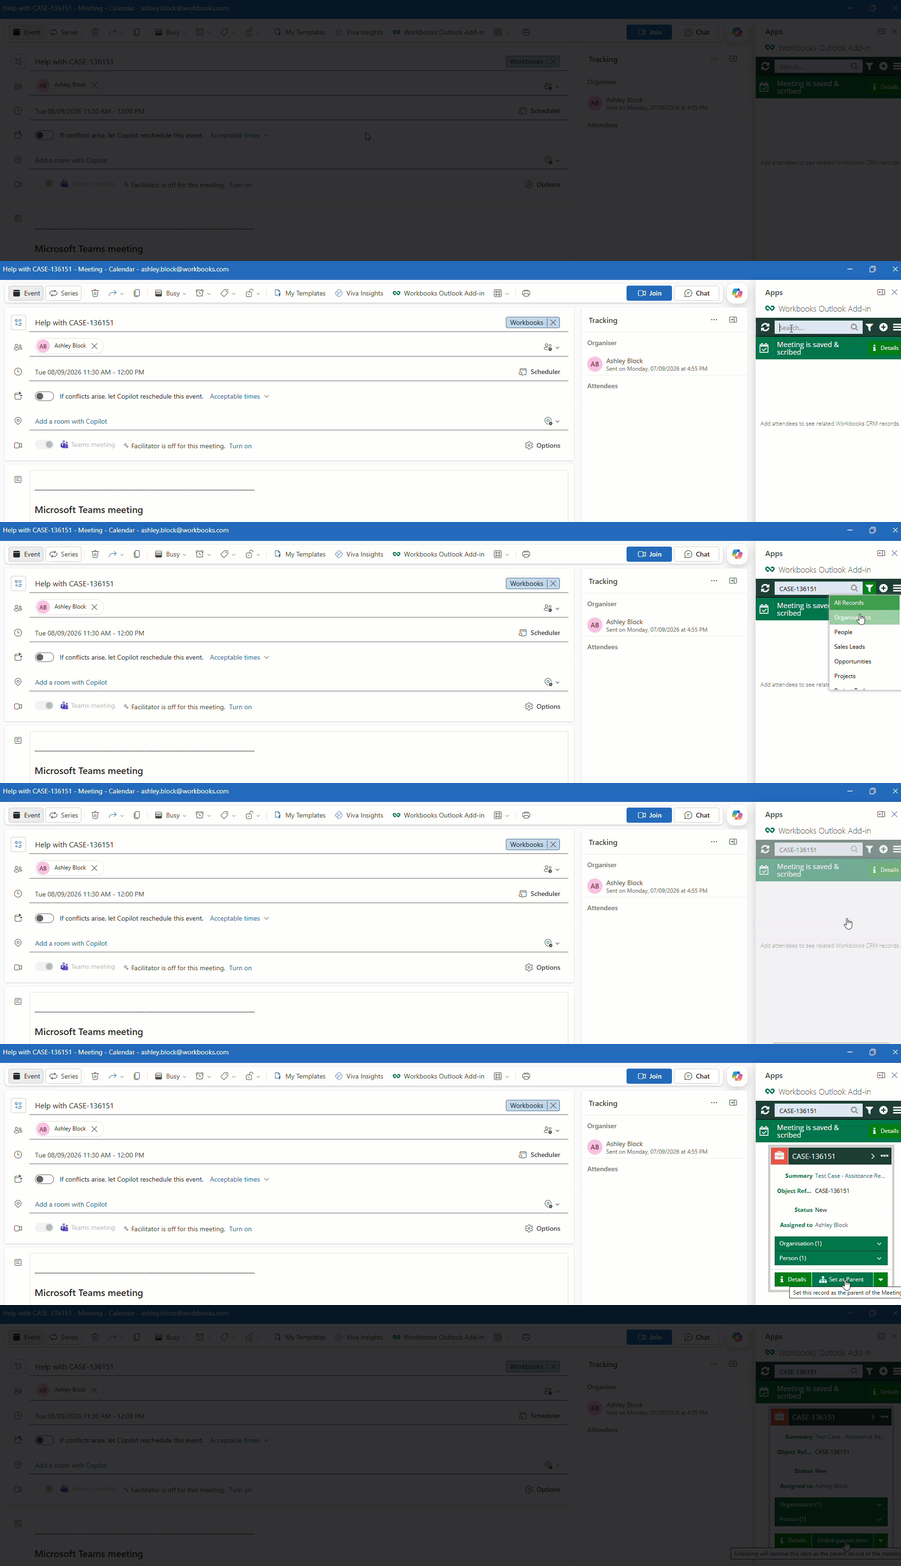
- Open or create a meeting in Outlook
- Open the Workbooks Mail Sync Add-in
- Search for the record you want to relate the meeting to
- Select ‘Set as Parent’
- Save the meeting
When you set a parent record:
- The selected record becomes the meeting’s parent record in Workbooks
- The meeting remains linked to any other related records you’ve linked it to
- The parent record is shown clearly within the Add-in when you reopen the meeting
- The Mail Sync process runs automatically after the meeting is saved which will sync the meeting into Workbooks.
Changing the parent record
You can change the parent record at any time via the Mail Sync Add-in. If you change the parent record, the new record will be displayed as the parent, and the previous parent record will be displayed as a linked record.
This means you won’t lose the connection to the previously selected record when changing the parent.
Invite Scribe AI to a meeting
Scribe AI can be added to a meeting directly from the Mail Sync Add-in when creating or updating the meeting. Instead of saving the meeting and configuring Scribe separately, you can do both in a single step.
Note
To use this feature, you must have the Mail Sync extension and Workbooks AI. If you don't and would like more information, please contact your account manager.
How to invite Scribe AI
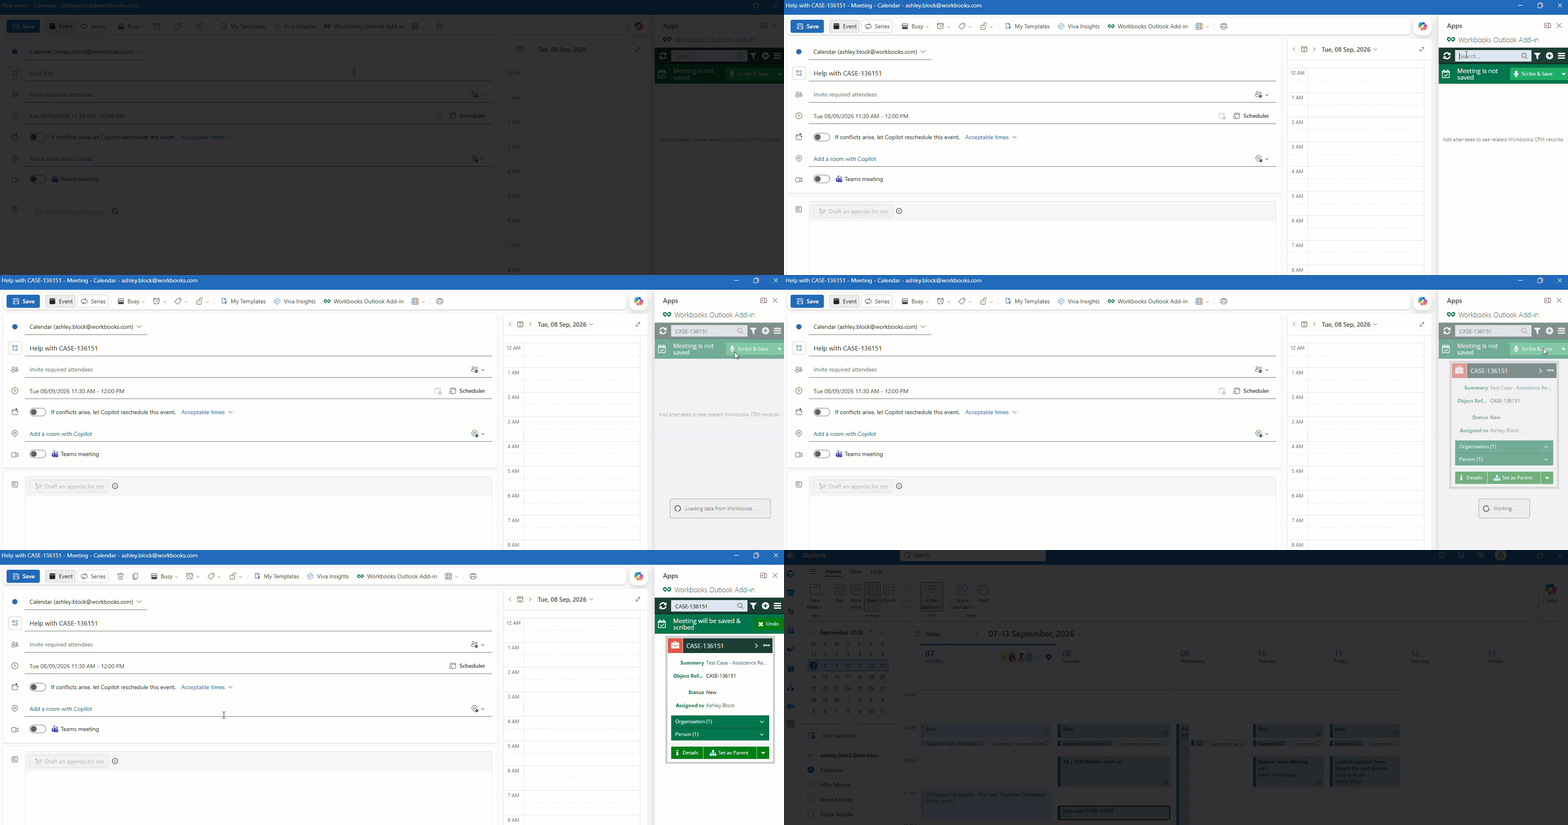
- Create or open a meeting in Outlook
- Open the Workbooks Mail Sync Add-in
- Identify your desired record by searching the object reference in the Add-in
- Click the ‘Scribe and Save’ button in the Add-in
- Complete the meeting form and click send
How to identify meetings scheduled for Scribe
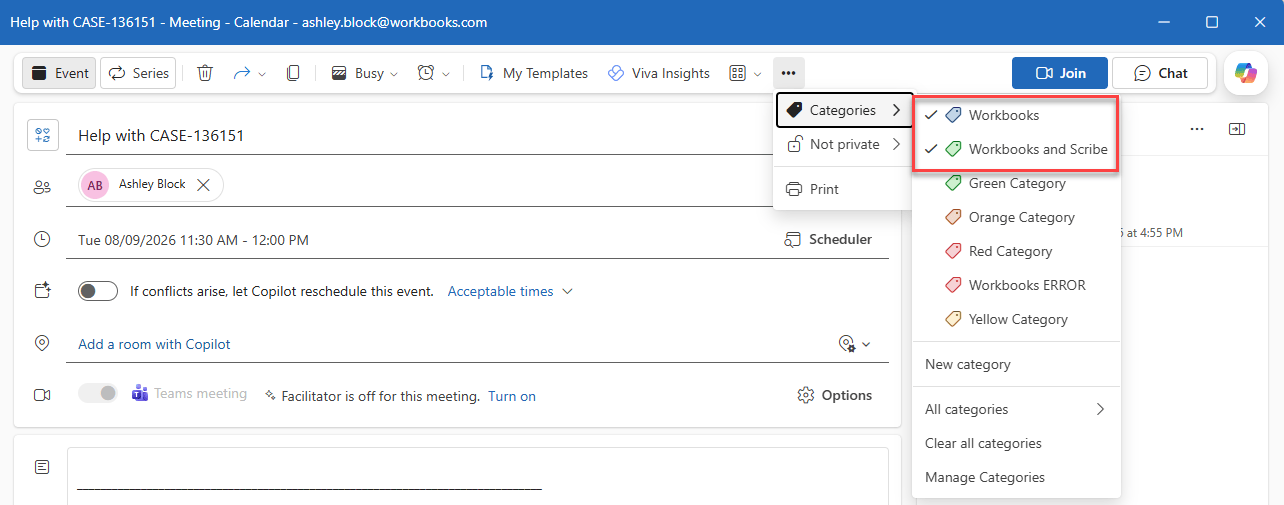
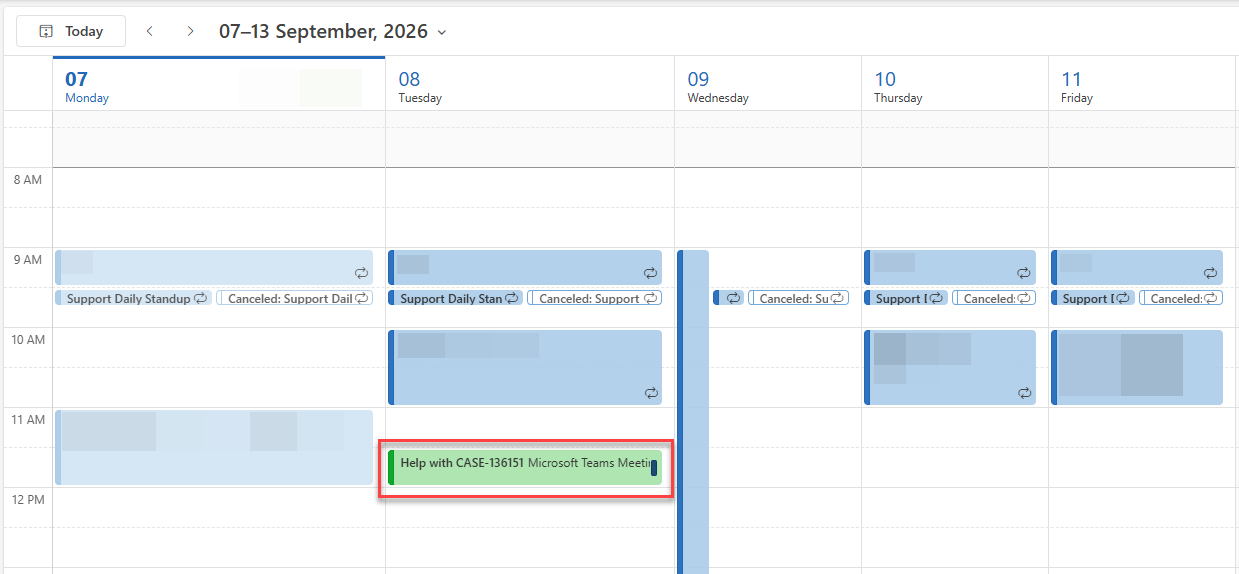
When a meeting has been set up using ‘Scribe and Save’, the meeting will be categorized with the standard ‘Workbooks’ category as well as a ‘Workbooks and Scribe’ category.
In the Outlook calendar, a meeting with Scribe invited (or contains the Workbooks and Scribe category) appears in green, making it easy to identify meetings that have Scribe invited.
Note
Important: The Workbooks and Scribe category is used as a visual indicator only. Manually adding the category to a meeting does not invite Scribe AI.
Canceling Scribe
If you’ve invited Scribe to a meeting and later decide it isn’t required, you can cancel it from the meeting ‘Details’ button within the Add-in.
If want to re-add Scribe, you can do so by opening the meeting again, click ‘Details’ > More > Add Scribe.