Creating a New Snapshot
Creating a new Snapshot can be done in one of two ways:
1. From the Reporting Landing Page.
Navigate to Start > Reporting. Under Actions on the left is an option for a ‘New Report Snapshot‘.

2. From a Report
Open the Report you wish to begin making Snapshots of. Navigate to ‘Edit this Report‘ and then the ‘Snapshots‘ tab. From here click ‘New Snapshot‘.

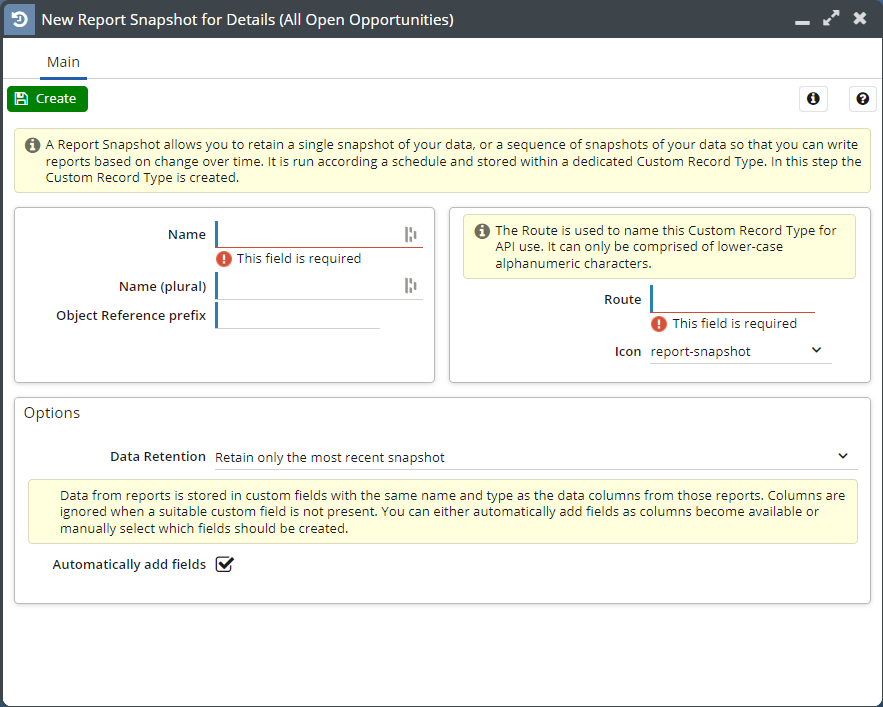
Within the resulting new Snapshot window, you are presented with a number of fields and options. The fields here relate to the new custom record type being created to store the Report Snapshot data so fill accordingly.

- Name – the name of your Snapshot custom record type. It is recommended to keep the name of your Snapshot to a minimal length for performance and storage reasons.
- Name (plural) – the collective name for multiple of your record type.
- Object Reference prefix – the short prefix given at the start of the record reference (think ‘OPP-‘, ‘CASE-‘, etc.)
- Route – the name given to the Custom Record Type for API use.
- Icon – the small icon that symbolises the record type. Try to choose one that is different to the others in use but that still makes sense.
- Data Retention – the period for which the Snapshot will be kept. The default of ‘Retain only the most recent snapshot’ is the most performant but is not always the right choice. If you want a store of data to build up over time, look to other options here. Snapshots can be kept indefinitely but this is not recommended. Consider your available storage allocation before choosing longer periods.
- Automatically add fields – when checked, all fields from the Report will be automatically added to the custom record. On creation this will be all fields so untick this box if there are fields in your Report that you do not want to be included in the Snapshot.
Once you’re happy with the values you’ve selected, ensure you press ‘Create’ at the top of the window.
Tip
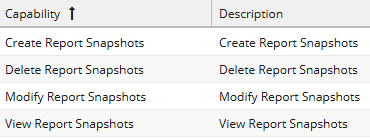
Note: Please create a user group with the four following capabilities to enable your users to have the ability to Snapshot Report.

