


Emailing Scheduled Reports
Workbooks allows Users to define a schedule on which Reports and Charts are run and emailed to one or more recipients. The recipient doesn’t have to be a Workbooks User so it is a great way to share data held within Workbooks. For example, weekly sales reports can be sent to a manager every Monday morning, thus allowing them to review the previous week’s sales and plan for coming week.
A single report, or a combination of reports and charts, can be sent in the same email. These can be sent within the email body or attached to the Email itself. If your report does not contain any data at a time it is due to be sent, rather than receive a blank email you can prevent the Email from being sent.
This is not designed to be used as a way to export large volumes of data from Workbooks on a schedule.
Note
For scheduled emails to work, the sender of the email MUST have at least Read permissions for the Reports being generated. In addition, to use this functionality, the user must have the following capabilities: View Scheduled Email Reports, and Modify Scheduled Email Reports.
Setting up a Scheduled Email
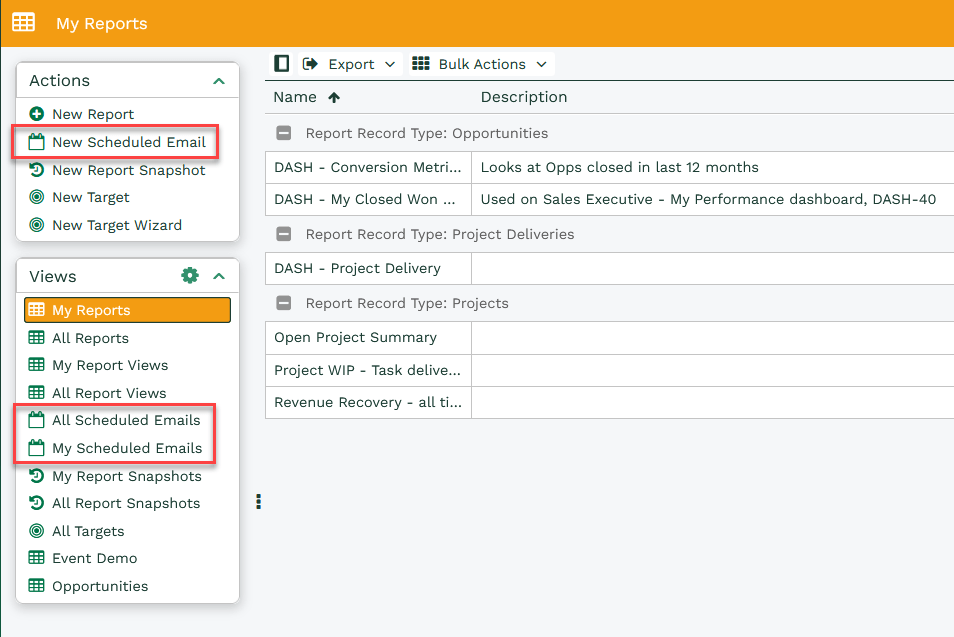
To access a Scheduled Email go to Start > Reporting where you can either create a New Scheduled Email or select My Scheduled Emails or All Scheduled Emails if you want to edit an existing one.
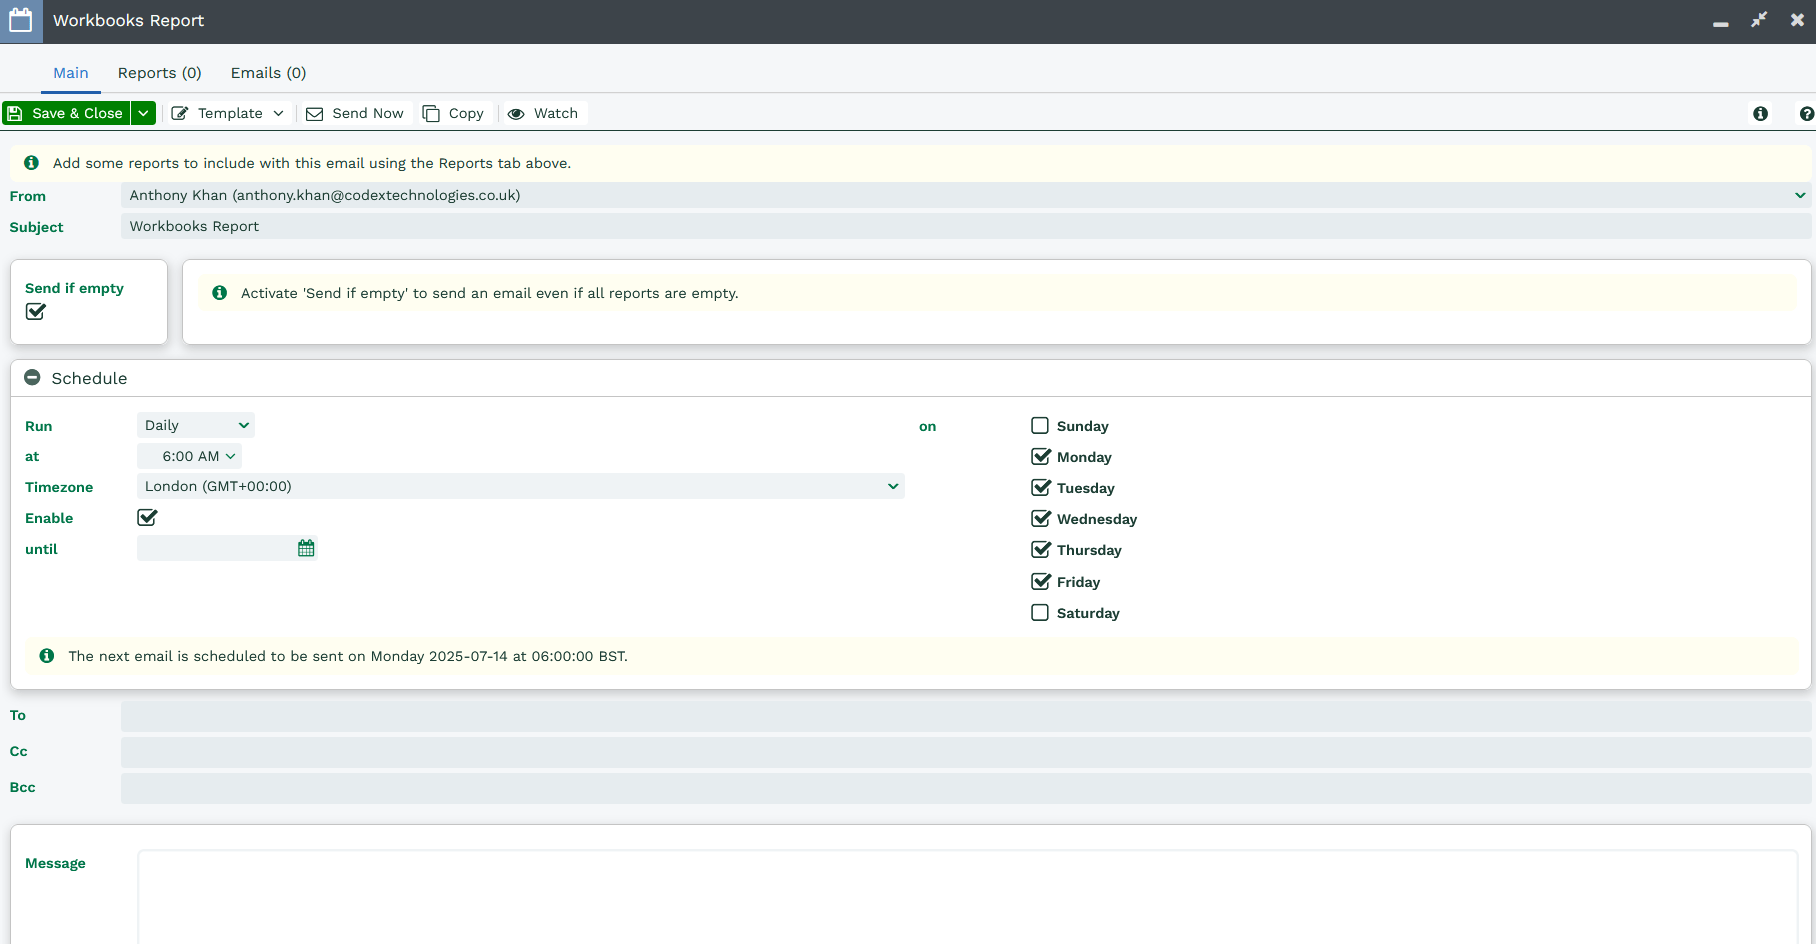
Selecting a New Scheduled Email will open a new Window where you can configure your Scheduled Email.
Note
Workbooks will fail to send the email if you attach a report that takes too long to load or contains too many rows. Please ask Support if you need more detail.
Main Tab
From – Here you can set who you want the email to be sent from. The options available in this list will be determined by the Email Accounts that are made available to you within the database. For example a system admin will likely have a much larger selection of Email Accounts to choose from than a standard user.
Subject – This will default to “Workbooks Report” but can be overwritten and will be used as the Email Subject when it is sent out.
Send if empty – If all of the Reports are empty the email will only be sent if this is set to true. We recommend changing this to false so that Users do not receive emails needlessly.
Schedule – Here you can select whether your Email is generated Hourly, Daily or Monthly. Depending on the frequency the recurrence settings will change accordingly to allow you to better configure when this email is sent.
Enable – Once you are happy with how the Scheduled Email is configured, select Enable and the Email will be scheduled to send.
To – Enter the email addresses of those you would like to address the Email to, they do not need to be Workbooks Users or have a Person or Lead Record within your Database.
CC / BCC – Similarly to the To Field here you can include additional recipients to receive this Scheduled Email.
Message – Here add in any text that you will require within your Email this may be an overview of what the Reports show or just a simple one line. You do not need to worry about adding in the Reports to the message as this will be done automatically.
Note
Email Templates can be applied by using the Apply Template button along the Toolbar.
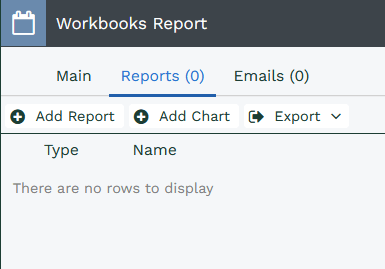
Reports Tab
From this Tab you can add your chosen Charts or Reports to the Scheduled Email. This is done by selecting the Add Report or Add Chart button.
Adding a Report
Selecting Add Report will create a new Window where you can configure your chosen Report and configure how you would like it to be displayed in the Scheduled Email.
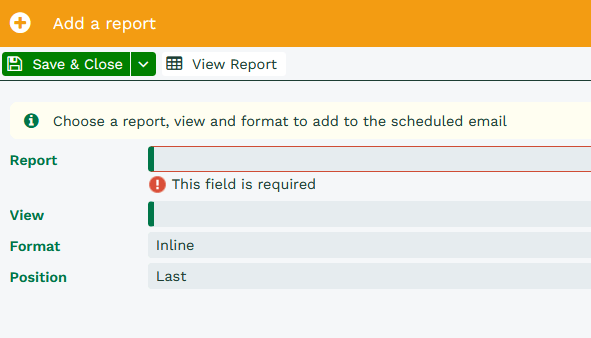
Report – Select the Report by name that you would like to add to the Scheduled Email
View – Select the View from that Report that you would like to include in the Scheduled Email.
Format – Here you can choose from inline, where the Report will appear within the body of the email. Alternatively you can select Excel Spreadsheet (XLSX) or Comma Separated Values file (CSV) if you want to attach the Report to the email instead.
Tip
The XLS file format is used instead of XLSX because it is compatible with older versions of Excel, but will cause you to see an 'incompatible' message in newer versions of Excel. However, it will not open in Excel Online; if using Excel Online, use the CSV option.
Position – Select where this Report will appear in the email. By Default this is set to Last so that if it is an Inline Report all of the text in the message Field will appear above it.
Note
Inline Reports are generated by the User that owns the Scheduled Email and as such you will only see a number of Rows, which is specified by their Preferences. This means that if the User generating the Report has their Preference set to only seeing 20 Rows on a page and the Report contains 25 rows only the first 20 rows will be sent in the Email.
Add a Chart
Selecting Add Chart will create a new Window where you can configure your chosen Report and Chart View to be displayed in the Scheduled Email.
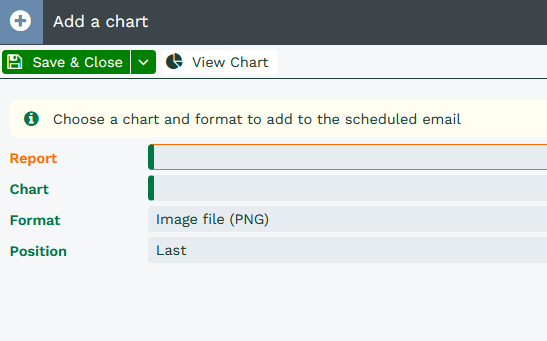
Report – Select the Report by name that you would like to add to the Scheduled Email, this list will be limited to include only Reports that have at least one View charted.
Chart – Select the Chart from that Report that you would like to include in the Scheduled Email.
Format – Here you can choose the file type that you would like to generate from either Image file (PNG) or Scalable Vector Graphics file (SVG). Position – Select where this Chart will appear in the email, by Default this is set to Last so the text in the message Field will appear above it.
Note
Charts can only be included in the body of the Scheduled Email, they cannot be attached like Reports.
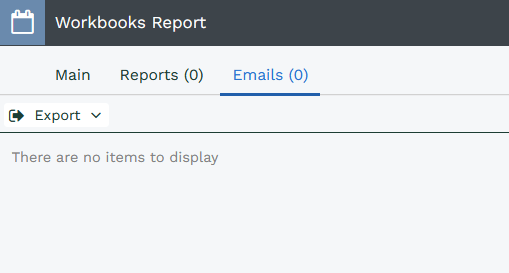
Emails Tab
The Emails Tab stores every Email generated by the Scheduled Email. You may want to access this in case you want to review a historic Email that you are unable to locate in your inbox or if you want to ensure that a Email went out on schedule.
Note
Emails can be sent immediately by using the Send Now button on the Main Tab.
Send Scheduled Email as if Reports were Run by Recipient
Note
A database setting needs to be enabled to use this funcionality. Please contact Workbooks Support to enable it.
You may choose to configure and send a Scheduled Email to specific teams or individuals, delivering content that is tailored to each recipient. For example, you may want to send a daily Scheduled Email to each User each morning, to outline their assigned Tasks for that day. Alternatively, you may want to send a summary to each User at the end of each week to provide progress updates relative to their set targets. This Scheduled Email process identifies each Recipient User, runs each included Report as them and then creates an email to that User attaching their copies of the Report.
If Scheduled Emails are being sent to User Groups, this process is dynamic and recognises changes to User Groups so that it can adapt to who the Email needs to be sent to. This is extremely helpful when you may have a new starter and are added to various User Groups. You will not need to update each Scheduled Email individually to ensure that User receives the Email.
The alternative approach would require setting up separate Scheduled Emails for each Individual Recipient, and point it at separate Reports which contain Criteria constraining the results to each Individual User. Using the method of sending one Email to all Recipients as if the Reports were run as them, simplifies the setup and will save you time and admin while ensuring that each individual User receives the correct data at the right time.
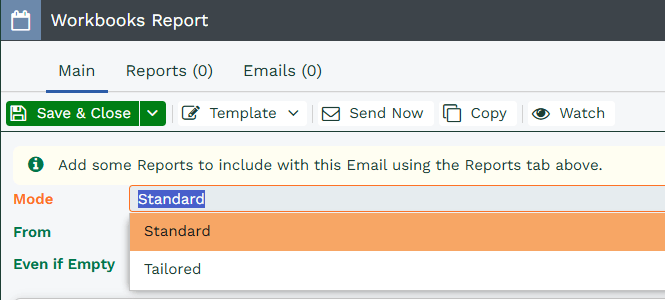
Once the appropriate database setting is enabled, you will notice that a new field will appear on your Scheduled Email Form called ‘Mode’. Here you are be able to select between sending a ‘Standard’ or ‘Tailored’ Scheduled Email.
Standard: Will send a single Email to all recipients.
Tailored: Will send an Email to each recipient as if the Reports were run by them.
Most fields within the configuration of the Scheduled Email will remain the same as sending one Email to all Users however, there will be some differences in the way that the following fields perform.
To – Here You will only be able to select Users or Groups within your database. You will not be able to select any People records to send the Email to. If you are updating any existing Scheduled Emails to the new ‘Send’ option, you will need to remove any People from the ‘To’ field, or you will encounter an error message on screen.
Note
When configuring your Report, it's important to make sure your Report includes a Criteria Operator of ‘Current User’s Name’. For example, ‘Assigned To Name’ ‘is Current User’s Name’. If your Report doesn’t include an Operator like this, the data in the Report will not constrain to the Recipient of the Email.
CC & BCC – When a User or Group is selected as a CC or BCC, they will receive a copy of the Email for every recipient it has been sent to. This means that if you send a Scheduled Email to 20 Users, the CC or BCC will receive 20 different versions of the Email.
Tip
If configuring a Scheduled Email with multiple Reports and a large list of recipients, it’s important to consider the performance of the included Reports. If one or more Reports are slow to load and this is being sent to a large list of recipients and running as each recipient each time. This could significantly impact the overall efficiency of the database and delay other queued Scheduled Emails and processes. To ensure consistent performance and reliability, it’s recommended to evaluate the performance of each Report and limit the number of Reports or Recipients in the Email if necessary.