


Workbooks Merging
Introduction
Workbooks automatically detects duplicate People and Organisation records. Workbooks has simple matching rule for finding duplicates:
- an exact match for main email address on People records.
- a ‘starts with’ match on Organisation names, after removing the common business suffixes from the end of the name (e.g. Ltd or Corp). For example, ‘Aerosystems PR Ltd’ would be considered a duplicate of ‘Aerosystems Products’.
If you have duplicate records in your database, you can merge them together. Only People or Organisation records can be merged together, and only up to 5 records can be merged at a time.
To do this, you must have the Merge module enabled, and the User must have the Merge Duplicate Records capability. The User must also have full permissions on the records that are going to be merged, especially delete permissions.
NOTE: Merging CANNOT be undone and the duplicate records will be deleted once the merge has completed. Therefore, we advise that only System Admins are given this capability, especially if you have any integrations that would fail if the records required by the integration are no longer in the system.
Merging Duplicate Records
Users with the Merge Duplicate Records capability will see a Merge button at the top of People and Organisation records. As shown below, when Workbooks finds a duplicate, the button will change to orange and it will indicate the number of duplicates that have been found.
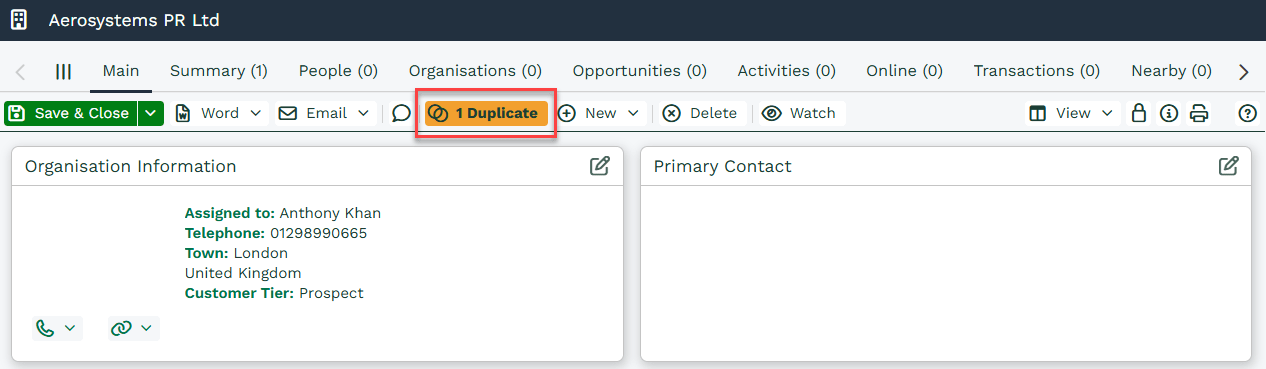
Click the orange button to view the duplicates that Workbooks has identified.
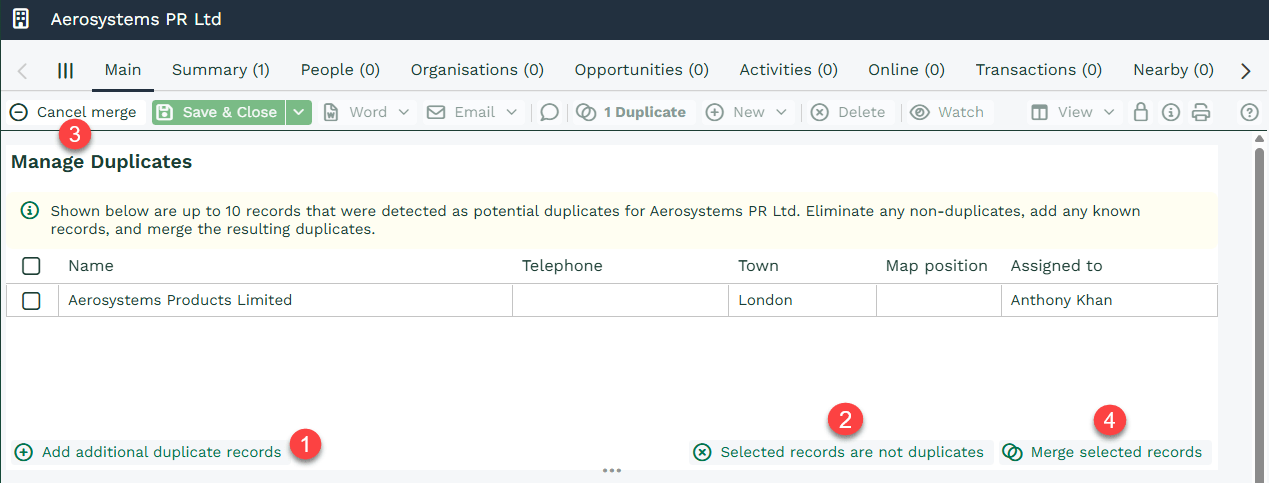
- Click Add additional duplicate records to open a search window where you can find other records that you know to be duplicates, even if the name is somewhat different.
- Tick the checkbox(es) next to any records that show in the list that you know are not duplicates, then click Selected records are not duplicates. This will stop the orange button from appearing in future for this record.
- Click Cancel Merge if you don’t want to proceed in any way.
- Tick the checkbox(es) next to any records that show in the list that you know ARE duplicates, then click Merge selected records.
Once you begin the merge, you will see a screen similar to the one below, which will display each record you’ve selected to merge in a separate block.
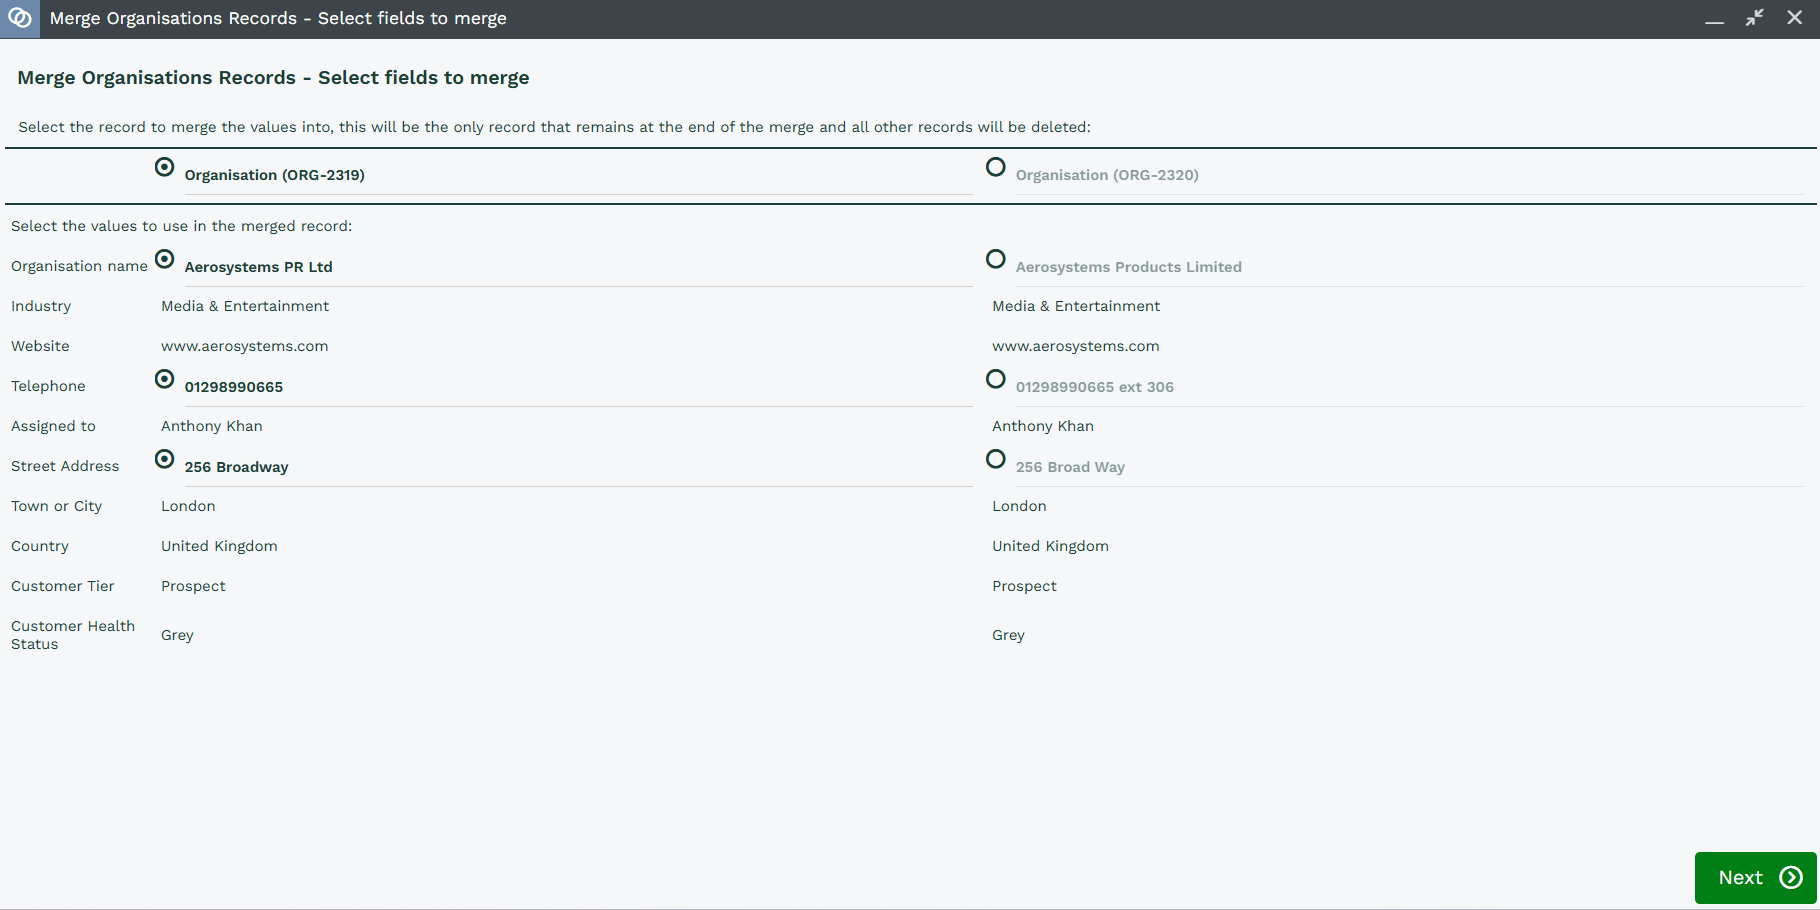
By default, Workbooks treats the record you started with as the ‘master’ record and assumes you want the values in that record to be kept. You can see that each field has a radio button next to it. If you want to keep a specific field value from one of the duplicate records, click the radio button next to that field.
NOTE: If you have an integration with an external system, or regularly use Object References in your imports, then be careful that you are not deleting records with Object References that are used in these processes.
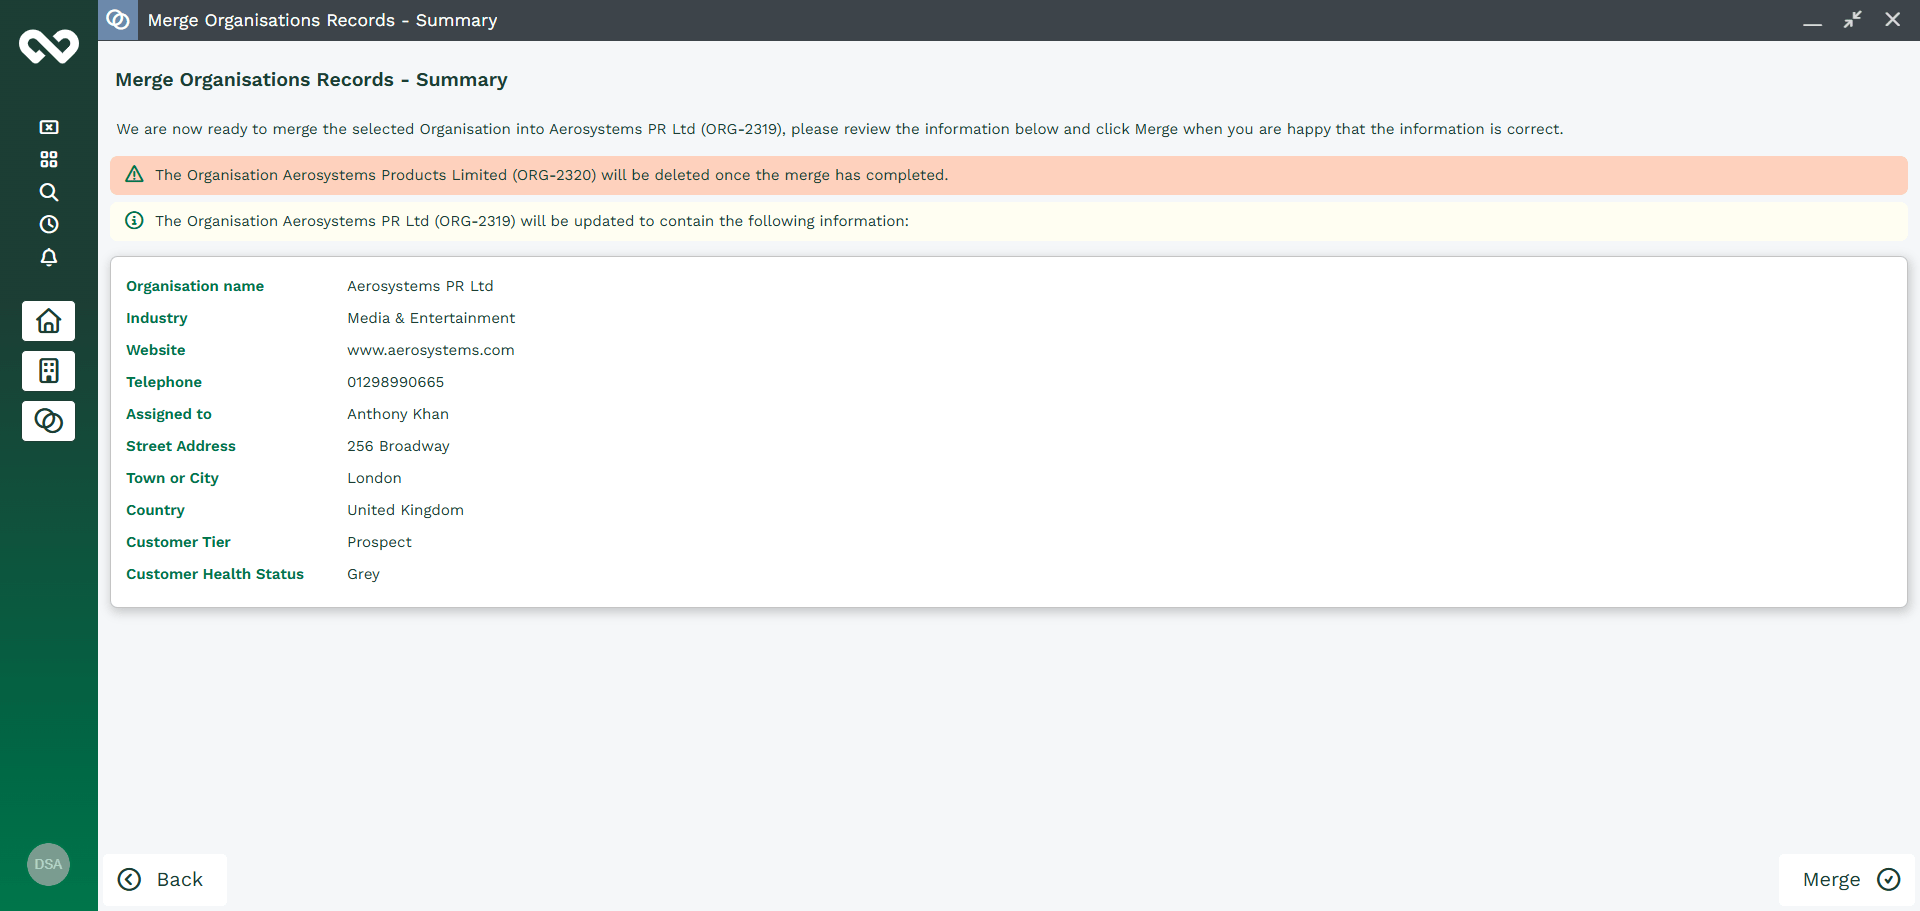
Clicking Next takes you to a screen showing you the values that be kept in your resulting merged record. If you do not want to go ahead, click the cross in the top right hand corner of the screen. If you’re happy that the information is correct, click Merge. You’ll be asked if you’re sure so click Yes or No as appropriate.
A background task will now be started to merge the records together, which includes moving Notes, Activities and Relationships across to the merged record, and updating any records with fields linked to the original records so that they relate to the merged record. These background tasks and their statuses can be found in the Data Quality Landing Page by going to Start > Bulk Changes > Data Quality. You will receive a notification once the merge is complete.
The Contact Details tab of the record will now show a greyed out row for the previous Main Location Contact Details for each of the records you just merged together.

Locating other Duplicate Records
To help you identify duplicate records that haven’t been highlighted with the orange merge button you can use the template reports that we provide for you.
- Template – Possible Duplicate Leads
- Template – Possible duplicate organisations – suffix and prefix
- Template – Possible Duplicate People
These templates give you some variation, providing counts of things like People with the same name or Organisations with the same name and postcode. It’s worth running them from time to time and merge anything appropriate to help keep your data as clean as possible.
NOTE:
- It is not possible to merge any Organisation records with your Own Organisation.
- If merging 2 people with different employers, i.e. the past employer and the current employer, we advise that you go through the Change of Employer wizard first, to ensure that the ‘previous employer’ relationship is created.
- Some information may be lost. For example, if more than one of the Person records had been members of a single Campaign. Only one of the Campaign memberships can be kept, so the membership status and information in custom fields on the other memberships will be lost.