


Scheduled Bulk Actions
Bulk Actions can be scheduled to run at various frequencies, this allows you to update or create new Records automatically rather than running the same Bulk Action manually.
Any Bulk Action can be scheduled from a Report or Landing Page to run hourly, daily or monthly; the Bulk Action will then apply the same action to the chosen view every time it is run.
Setting up a Scheduled Bulk Action
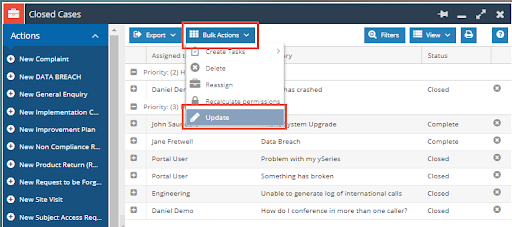
From a Landing Page or Report select the Bulk Action button and then choose from the list of available Bulk Actions.
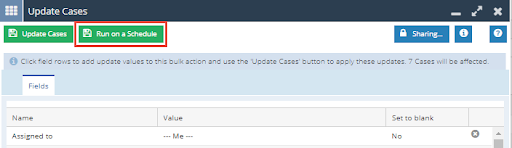
Configure the Bulk Action as you require, you will then have the option to run the Bulk Action, or Run on a Schedule, you will need to select Run on Schedule.
Selecting Run on a Schedule will open a new dialogue box where you will need to configure your new Scheduled Bulk Action. You will need to name you Bulk Action as well as set the frequency that this will run in your database. Further to this a User needs to be chosen to be notified when the Bulk Action runs, there is a setting so that this User will only be notified when the Bulk Action Fails.

Note – notifications will be sent as per the User’s notification settings within their Preferences.
Managing your Scheduled Bulk Action.
Once the Scheduled Bulk Action is set up, new Tabs and Buttons will become available to help you manage the Bulk Action.
History – This shows you all of the previous Bulk Actions that have been run allowing you to review failed Bulk Actions easily.

Target Records – This tab gives you a sample of the Records that you will be updated, Filters can be applied and saved to the Bulk Action to make it more specific. For example a Scheduled Bulk Action that runs daily may only need to run on Records that were updated today.
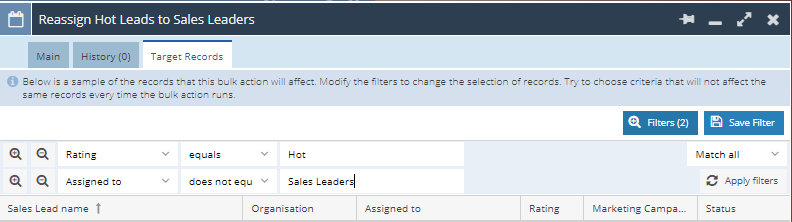
Note – running the same bulk action on the same records may cause the Bulk Action to fail and become disabled, so filters like this should be added wherever possible.
Run Now – Selecting this button will run the Bulk Action now rather than waiting for the next time that is is scheduled.

Edit Bulk Action – Editing the Bulk Action allows you to change the values that the Bulk Action will be performing. Selecting this button will open a new dialogue box within the Bulk Action so that you can change the Fields that are updated and the values that are used.
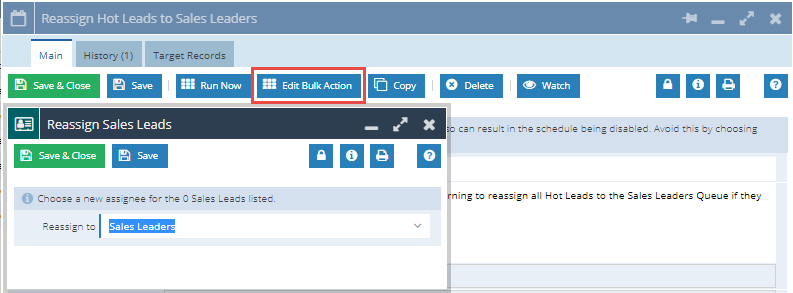
Note – you are unable to use this to change the type of Bulk Action that is run. If you originally chose to update Records you will not be able to use this button to then Reassign the Records.
Copy – Copying the Bulk Action creates a new identical Scheduled Bulk Action. This can be used if you have a similar Bulk Action that needs to be performed on a different interval, rather than creating a Scheduled Bulk Action from Scratch.

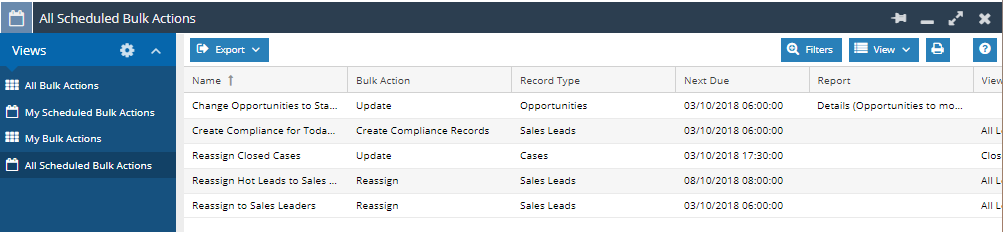
Once you have Saved and Closed your Bulk Actions you can go back and review these from the Bulk Action Landing Page (Start > Bulk Actions), where you can review “My Scheduled Bulk Actions” and “All Scheduled Bulk Actions”
We have created step by step examples of how to setup and configure Scheduled Bulk Actions, these can be found on the Forum. The examples are: Reassign Sales Leads with a Hot Web Insights Rating and Change an Opportunity Stage when there has been no activity for seven days.