


Records
Records in Workbooks are displayed as forms, which are a collection of fields of information. Most fields are straightforward and can be completed by simply typing into them. Throughout Workbooks, you’ll notice certain field types that behave consistently across all records, such as:
| Compulsory/mandatory fields | These fields are marked with a solid line on the left. They’re required, meaning you must complete them before you can save the record. |
| Picklists | Identified by a down arrow—Some Picklists let you choose only one option, while others are multi-select. |
| Lookups | Identified by the magnifying glass symbol—these fields allow you to link two records together and create a relationship between them, such as the Employer field on a person record. |
| Checkboxes | Simply click in them to add a tick to the box. |
| Create Activity checkbox | If you check this box then click Save or Save & Close, a scheduled Activity record will be automatically created, linked to the underlying record. By default, this Activity is assigned to the same user as the underlying record. |
| Postcode/address lookup | Wherever Workbooks provides address or postcode/zipcode fields, users (who have integrated Workbooks with Postcode Anywhere) can auto-complete address fields. |
| Reveals | Identified by a plus symbol, these are sections on the form that contain more information that, typically, you don’t need to see or access all the time—click on the plus to see the fields within the Reveal. |
| Watch / Stop watching | Add records to the ‘My View’ section of a Landing Page by clicking Watch. |
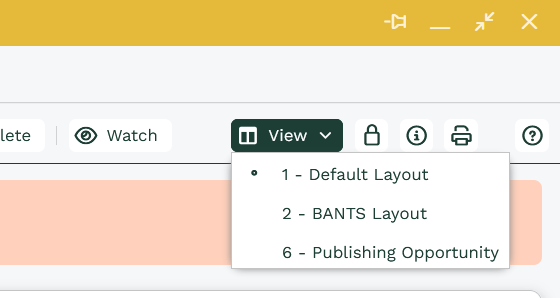
| View | If more than one Form Layout has been shared with you, you can switch between them using the options within View. If you only have access to one layout, you won’t see the View button. |
| Sharing Permissions | The padlock symbol allows you to see which Users / User groups have access to the record. If you have the right levels of permission, you can modify who has access. |
| Additional Properties | The information symbol contains details about when the record was created/updated, by whom, etc., along with the unique Object Reference for the record. |
| Print preview | Allowing you to print a copy of the record. |
| Help | Clicking on the question mark symbol anywhere in Workbooks takes you to contextual help within our Knowledge Base. |
| Tabs | Find links to different records. |
If you need to capture information that isn’t covered by an existing field, your System Administrator can help by creating a new custom field on the appropriate record types through Configuration, or they can build a fully customized form layout tailored to that record type.
Line Item Grid
Transaction documents in Workbooks (ie, Opportunities, Quotations, Orders, Invoices, Credit Notes, Supplier Orders and Contracts) include a Line Item grid where you can record products and services. As with Landing Page grids, you can control which columns are displayed and save your customised layout so it’s applied to the Line Item grid of all future transaction documents of that type (but you cannot filter Line Item grids or save your layout as a named view).
Transaction documents in Workbooks (i.e. Opportunities, Quotations, Orders, Invoices, Credit Notes, Supplier Orders, and Contracts) include a Line Item grid where you can record products and services. Just like Landing Page grids, you can customize which columns are displayed and save your preferred layout by clicking view at the top right corner of the line items > Save.
Once saved, that layout will automatically apply to all future transaction documents of the same type. Keep in mind that Line Item grids cannot be filtered, and saved layouts cannot be stored as named views.
Updating Records
When a record is opened in Workbooks, it’s assigned a Lock Version, which is a hidden numeric value used to track changes. When the record is first created, the Lock Version is set to 0. Each time the record is updated and saved—either by a user or through the API—the Lock Version increases by 1.
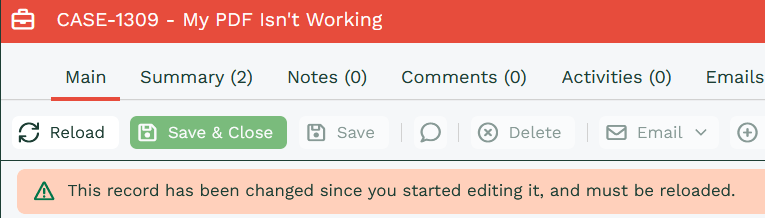
Because multiple users can open the same record at the same time, Workbooks uses the Lock Version to prevent conflicting updates. Only one User’s changes can be saved. The first person to click Save successfully updates the record. If another user tries to save afterwards, they’ll see a message letting them know their version is out of date and can’t be saved.

Click Reload to automatically re-open the record and display the latest data which will include the changes the other User has made.
If you click No, the fields will become read-only on the record and you will be presented with a reload button. Workbooks will also display a message at the top of the record highlighting what has happened.
Deleting Records
Records that are deleted individually are “soft deleted,” meaning they can be recovered for up to 30 days from the date of deletion. After that, they are permanently removed. More information is available here.
Changing View
If you see a View button at the top-right of a record, it means more than one Form Layout is available. For example, there may be a standard view used by all Users that contains read‑only fields, and another view for managers where those fields are editable. If other Views have been shared with you, you’ll be able to switch between Views by simply clicking the View button and select the Form Layout you want to use.
Note
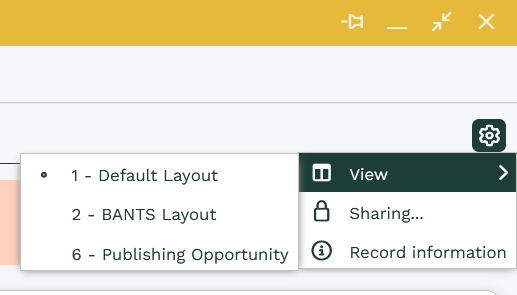
If a User chooses to display Form Buttons in groups within their Preferences, the View options won’t appear as a standalone button. Instead, they’ll be tucked inside the cog (settings) icon in the top‑right corner, as shown below.
Opening tabs
You can click on any tab to open it. However, if there are too many tabs to fit on your screen, a hamburger icon will appear in the top-left corner. Clicking this icon displays a full list of available tabs in a dropdown, so you can easily switch between them.
This behavior applies to both records and reports. The hamburger icon only appears when your screen size isn’t large enough to show all tabs at once.
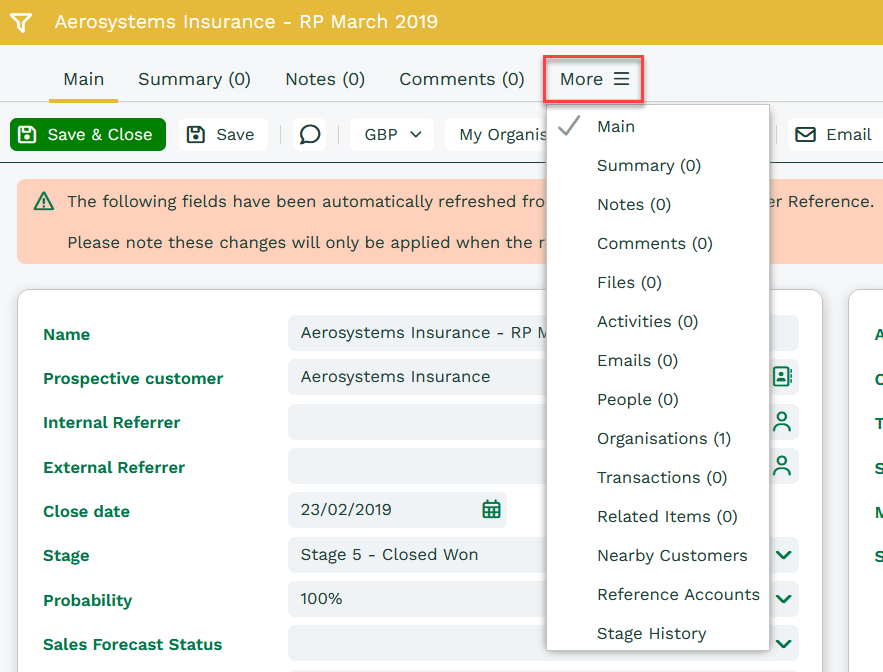
Users can also choose to display the first four tabs (as set within the Form Layout > Tabs section within Customization) by selecting the relevant option ‘Show first four’ within their Preferences. The rest of the tabs will be collapsed behind a ‘More’ tab at the top of the record as shown below:
Generating PDF documents from records
From any record, you can generate a PDF document using a template. This lets you quickly pull together all relevant information into a clean, ready‑to‑share document that can be printed or sent to a client or organization.
The ‘Generate PDF’ option appears on all record types. However, keep in mind that a template must be assigned to the correct category before it will appear as an available option for that specific record type.